Make your service more accessible to your customers by giving them the ability to create a Servicecamp ticket from within the QuickSupport module, even if the supporter is offline.
This ensures that inquiries will not get lost in your e-mail inbox by being submitted as a ticket for a better overview.
This article applies to all TeamViewer customers with a Business, Premium, Corporate, or Tensor subscription license using the TeamViewer Servicecamp AddOn in a Windows environment.
Enable the integration
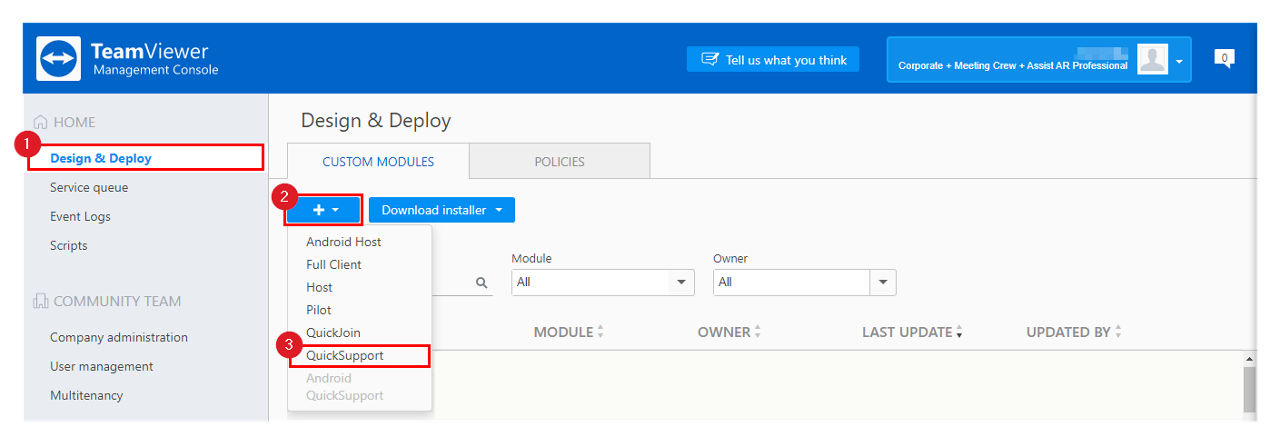
This feature can be enabled from the TeamViewer Management Console (=MCO). After login to the MCO navigate to Design & Deploy → click on the + → add QuickSupport.
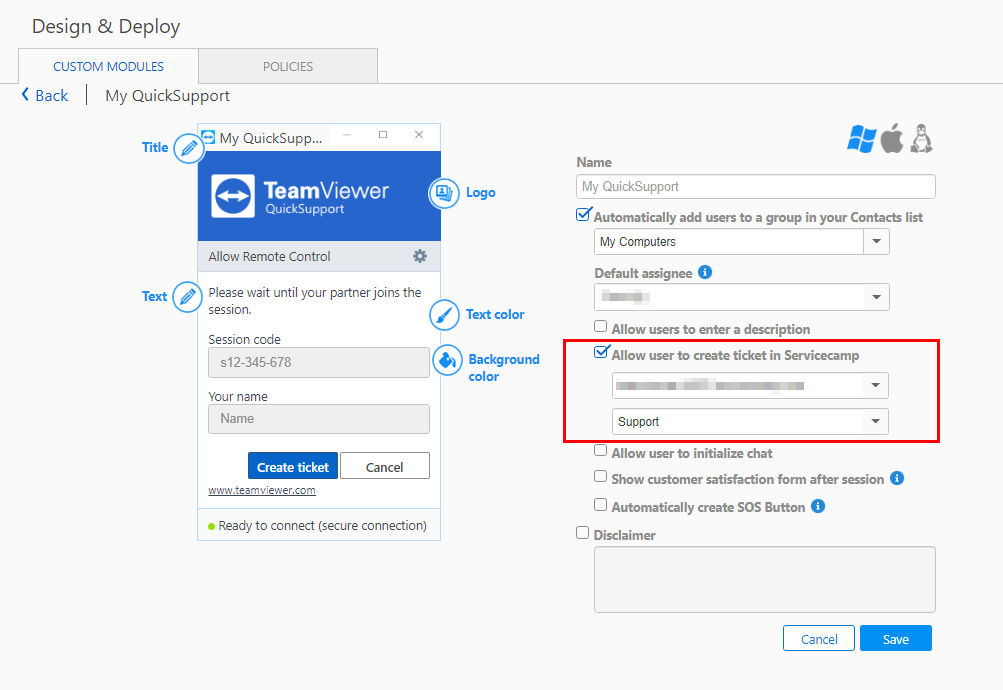
The Custom Modules tab will appear for you to see the QuickSupport preview mode. Mark the checkbox Allow user to create ticket in Servicecamp
📌Note: There are some limitations on to whom this feature will be available. Users who bought Servicecamp and already have an active Servicecamp instance will be able to use this feature right away. Users who have a trial Servicecamp instance will be able to use the feature as well. Users who bought Servicecamp, but do not have an active Servicecamp instance yet or have an expired Servicecamp instance will be shown an inactive gray out checkbox. To use this feature those users must first activate their Servicecamp instance. This checkbox will not be available for free users.
A drop-down menu will appear for you to select the Inbox into which tickets will be created.
📌Note: For customers using multiple Servicecamp instances another drop-down menu will be displayed that allows to firstly choose an instance followed by choosing the inbox.
After clicking Save, Servicecamp and QuickSupport will be successfully integrated, and users already can download the customized QuickSupport module from your homepage. (To learn how to create a TeamViewer button on your webpage please click here.) You can also manually send the corresponding download link to your end-users and/or customers.
Use the integration
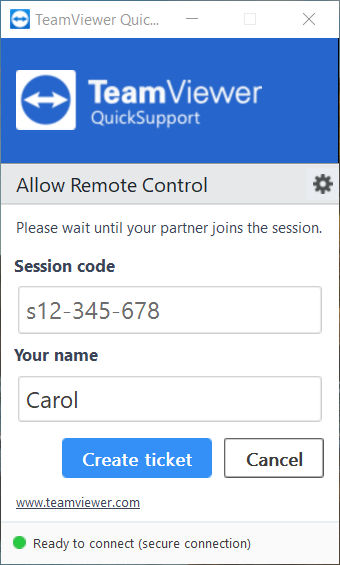
When the QuickSupport module is started, the Create Ticket button will be available on the module.
By clicking on the Create Ticket button, a separate window will be opened where the user needs to provide their email address, name and describe the issue on the field Description.
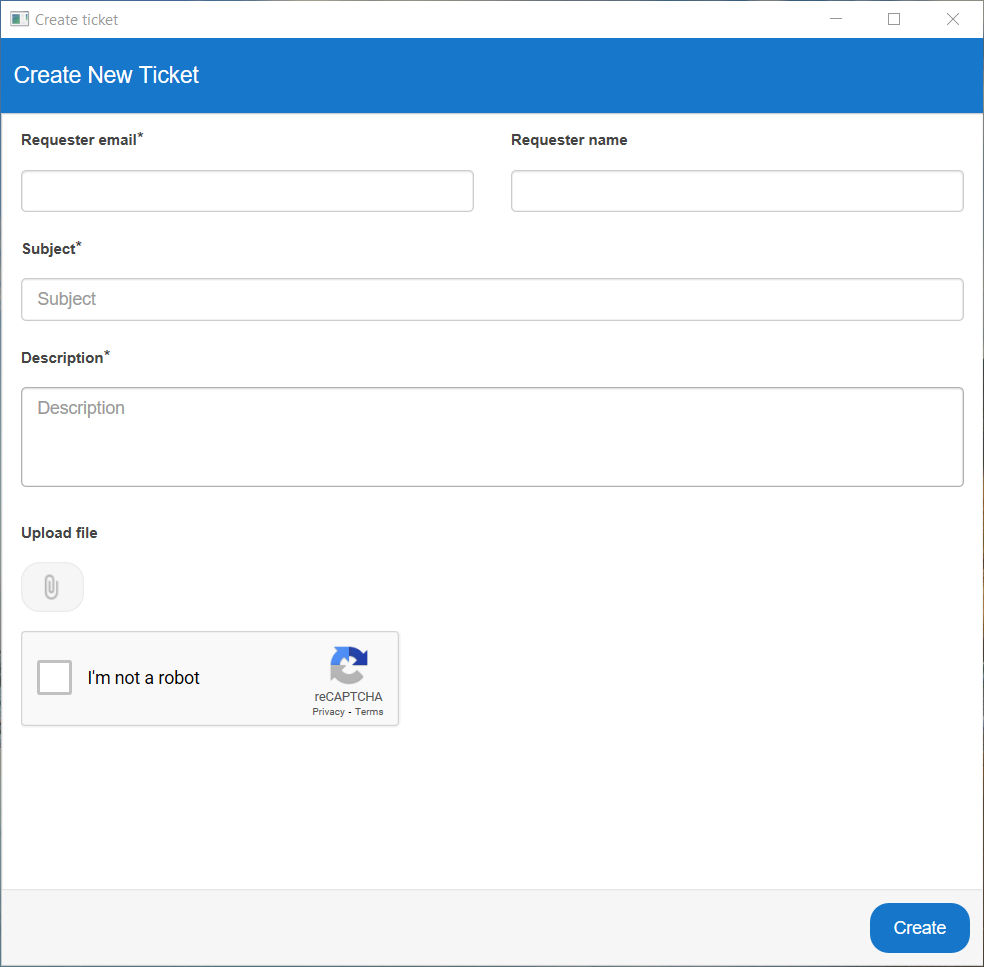
💡Hint: By using the Servicecamp functionality the supporter can define and configure custom fields (input and drop-down fields) and make them available on the ticket creation window.
After submitting the ticket, the opened window will be closed automatically if the ticket is created successfully, and the end-user will also receive a notification/autoreply from Servicecamp with the created ticket ID number.
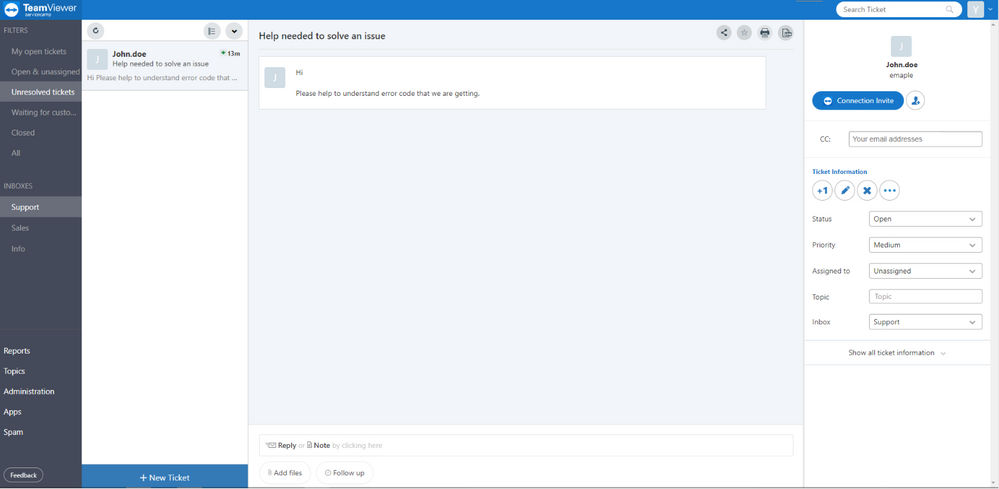
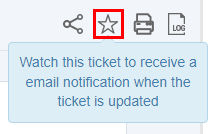
💡Hint: By clicking on the star icon at the top right, the supporter can receive a notification about the case to start working on the ticket faster and consequently keeping a much better track and communication with the end-user to troubleshoot any issues or questions.
📌Note: By submitting the ticket, the Session code number of the QuickSupport module will be sent to Servicecamp. However - due to limitations that remote sessions can only be started by the person to whom the service case is assigned. The supporter agent will not be able to start remote sessions directly from Servicecamp if that service case is not assigned to the correct agent.