
Knowledge Base
Okta Integration - SCIM Configuration
Last Modified 8 мая 2026 г.
With SCIM (System for Cross-domain Identity Management), it is possible to synchronize users from Okta to TeamViewer. It allows administrators to create, update and delete users within Okta and keep their TeamViewer accounts automatically updated within seconds.
This article applies to TeamViewer customers with a Tensor license.
Prerequisite
To be able to use this feature, you must meet the following requirements:
- a valid Tensor license for TeamViewer
- TeamViewer Single Sign-On (SSO) via Okta has been configured successfully
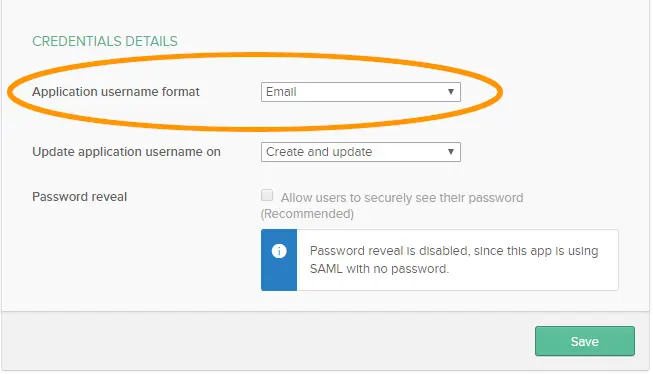
Please refer to the setup instructions given on the TeamViewer Knowledge Base: https://community.teamviewer.com/English/kb/articles/30784-single-sign-on-sso and ensure to have the Application username format on the tab. Sign-On set to the value Email (see below)
- follow manual below to setup SCIM
Manual
Create TeamViewer Script Token
- Login to TeamViewer: https://login.teamviewer.com.
- Select Edit Profile and navigate to the Script Tokens section.
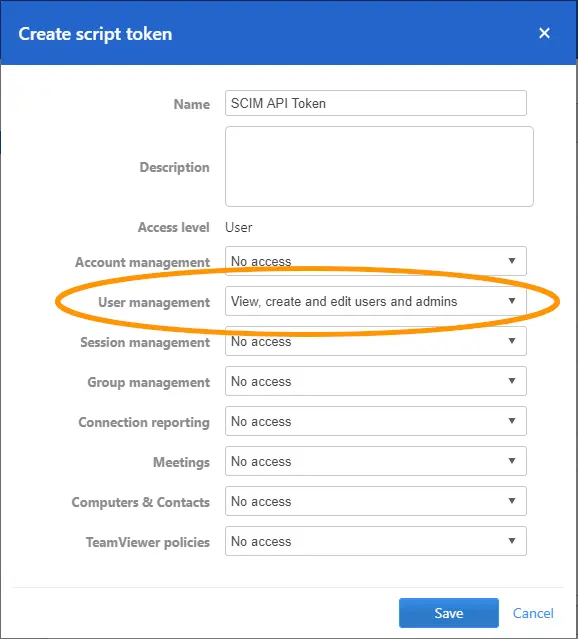
- Add a new script token with the rights View, create and edit users (optionally also admins).
- More details about the TeamViewer SCIM API can be found here: Introduction
Technical description of the “System for Cross-domain Identity Management” API as implemented by TeamViewer
Configuration Steps
Configure Provisioning for TeamViewer as follows:
Enable SCIM integration in Okta
1. Open your Okta portal and open the TeamViewer Okta app.
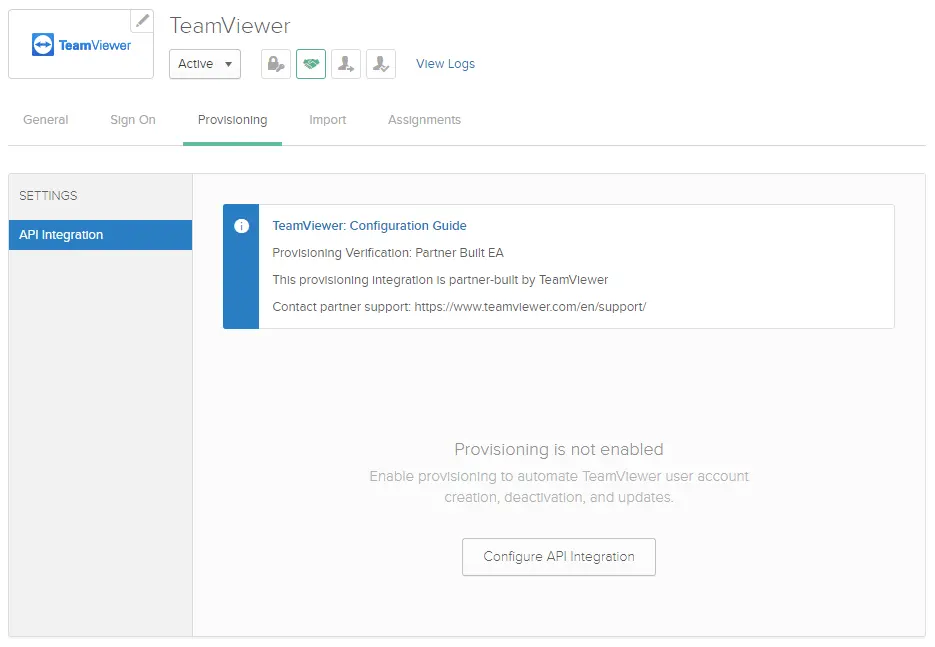
2. Switch to the Provisioning tab and click on the Configure API Integration button.
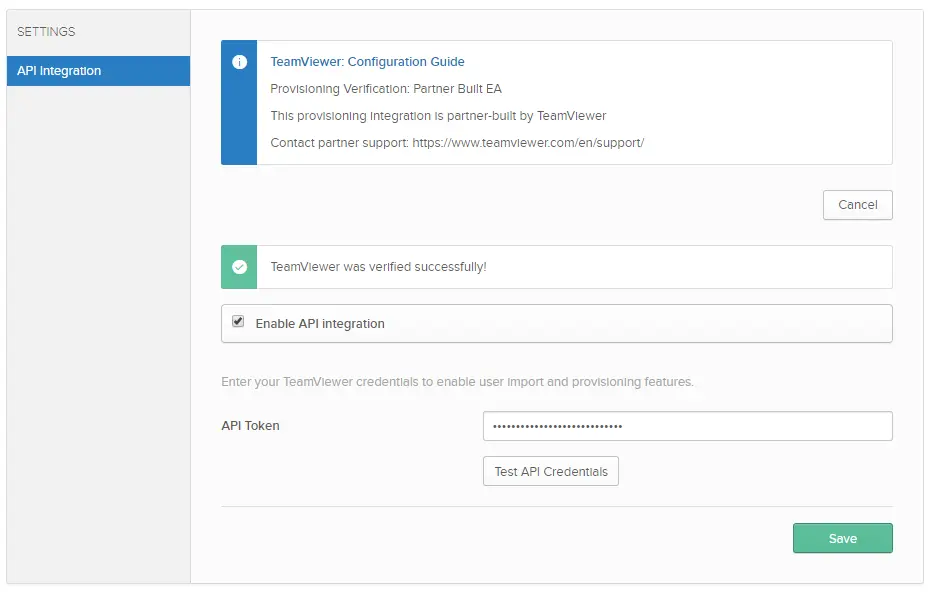
3. Tick the checkbox and enter the that has been created before.
4. Click Test API Credentials to verify the token.
5. Click Save to save the changes.
Configure SCIM integration in Okta
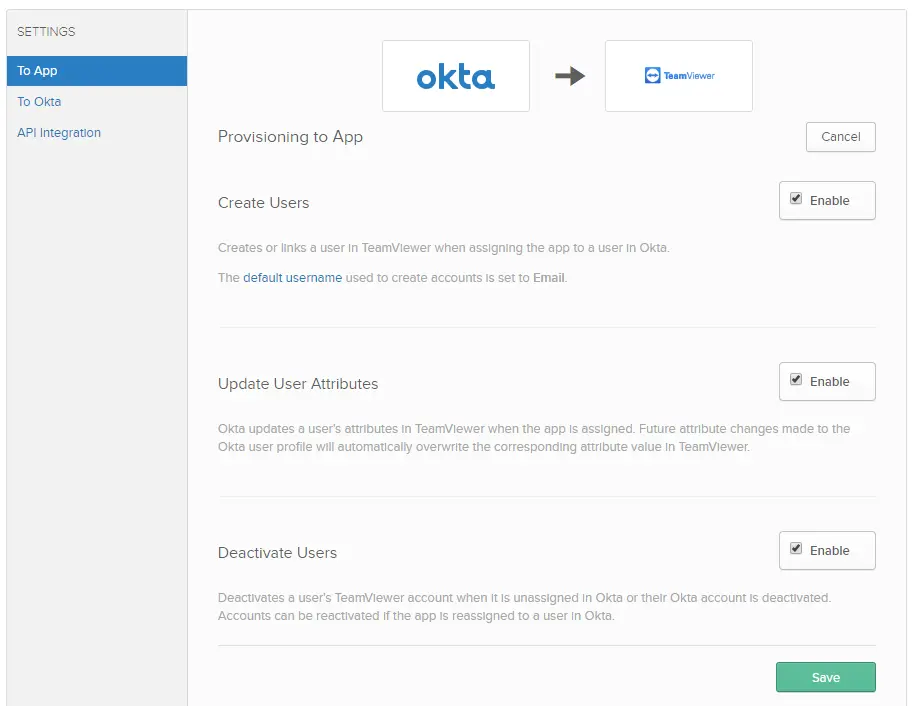
1. From the SETTINGS menu on the left, select To App and click Edit.
2. Update User Attributes.
- Deactivate Users
- Create Users
- Check Enable for the following supported features:
3. Click Save.
Start assignment
You can now assign users and groups to the TeamViewer Okta application.
During the assignment Okta will ask for a TeamViewer SSO Customer Identifier.
- Here, please enter the same value as configured in the Single Sign-On section.

You are done with the configuration and can now start provisioning users.
Known Issues and limitations
Provisioning in TeamViewer is based on the members of your TeamViewer Company. However, user email addresses need to be unique accross all TeamViewer.
users (even ones that are not part of your TeamViewer Company). So the creation of new users through Okta Provisioning can fail if there is already a user registered in TeamViewer with the same email address, but is not part of your TeamViewer Company.
In addition to the above point, removing a user from a TeamViewer Company via TeamViewer (Classic) Management Console will not delete the user account. The Provisioning integration can therefore fail to re-create the user, as the account with the corresponding email address still exists.
Updating the user name / email of the user is not supported by the
- TeamViewer provisioning integration.