Knowledge Base
Create an access endpoint in TeamViewer
Last Modified 7 мая 2026 г.
Once your access gateway is successfully set up, you can begin by adding access endpoint devices behind it. An access endpoint is a device that resides within a segmented network and is accessed securely through an access gateway. Each access endpoint behaves like a standard managed device, with its own manager assignments and support for Conditional Access.
Create an access endpoint
To add an access endpoint to an existing access gateway, please follow the instructions below:
1. Sign in to the TeamViewer client.
2. Go to the Admin settings, and within the Device Management section, click Agentless Access.
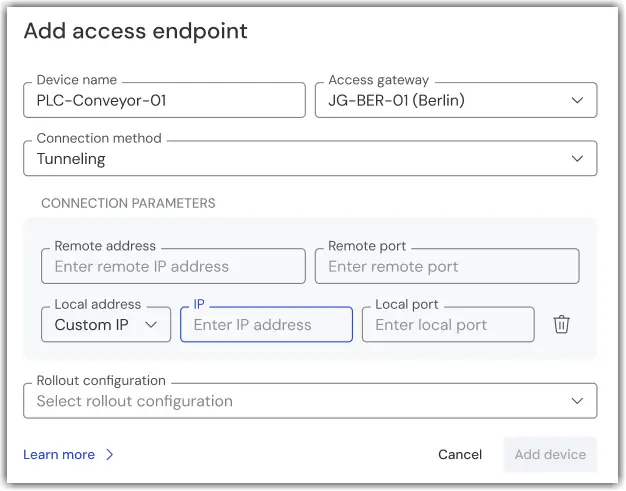
3. Click the access gateway for which the access endpoint should be added, then click Add access endpoint.
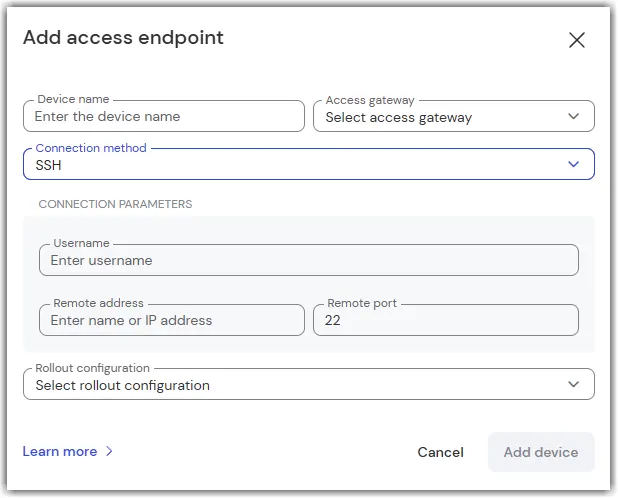
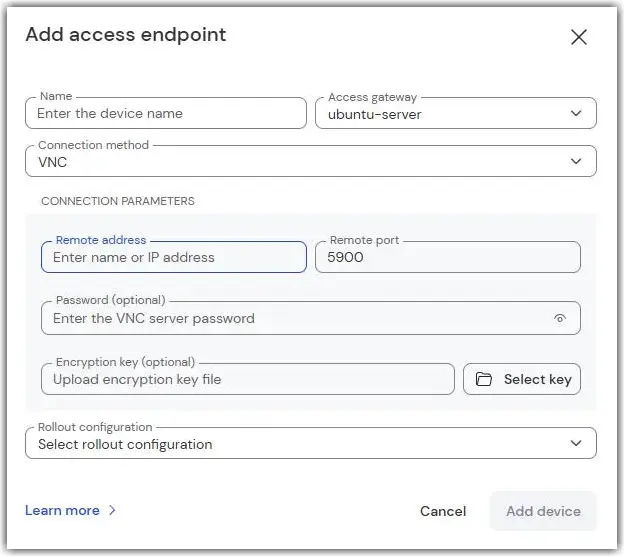
4. Fill in the required details:
- Device name: This name will appear in your device list as a managed device. Choose something clear and descriptive.
- Connection method: Select either Tunneling, VNC, or SSH depending on your network setup.
5. Rollout configuration: Select the rollout configuration that matches your environment.
Note: Ensure that you are assigned as the device manager in the selected rollout configuration and that the following manager permissions are granted:
- Device administration
- Manager administration
- Policy administration
- Description administration
- Custom fields administration
- Access control management - Easy access (unattended)
6. Click Add Device to complete the setup.
The access endpoint has now been successfully created within your company. The new device will appear under the selected access gateway in TeamViewer and can be managed in the same way as other devices in your infrastructure.
Set up an encrypted VNC endpoint
VNC Encryption setup
This section describes the setup of the UltraVNC encryption and the connected setup within the Agentless Access UI to create an encrypted VNC connection. For Windows XP, version 1.2.24 was tested and verified.
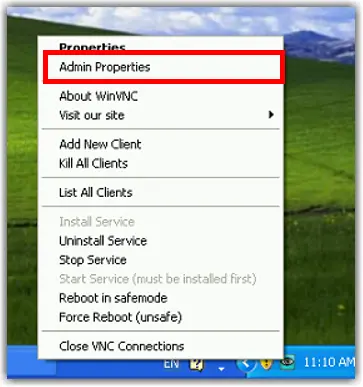
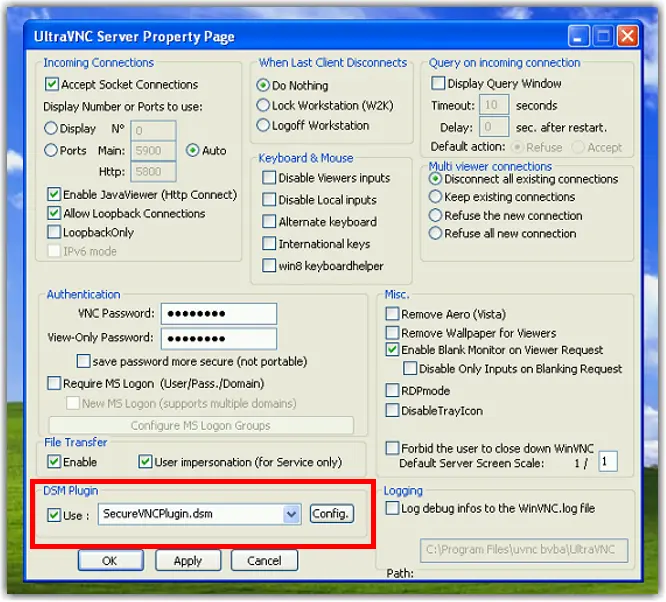
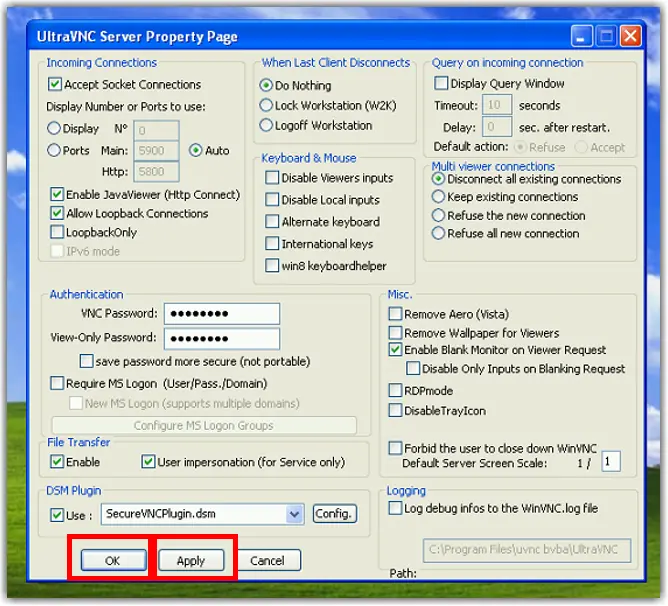
1. Right-click the UltraVNC tray icon and select Admin Properties.

2. In the DSM Plugin section:
- Select Use
- Choose SecureVNCPlugin.dsm
- Select Config

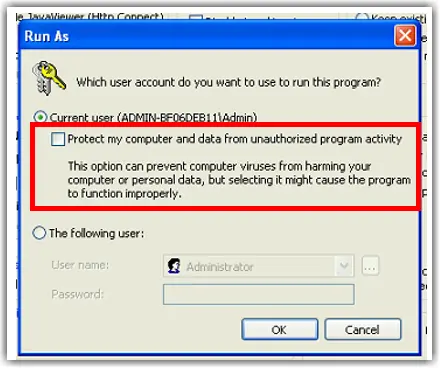
3. On Windows XP only:
- Clear the checkbox Protect my computer and data from unauthorized program activity
- Select OK

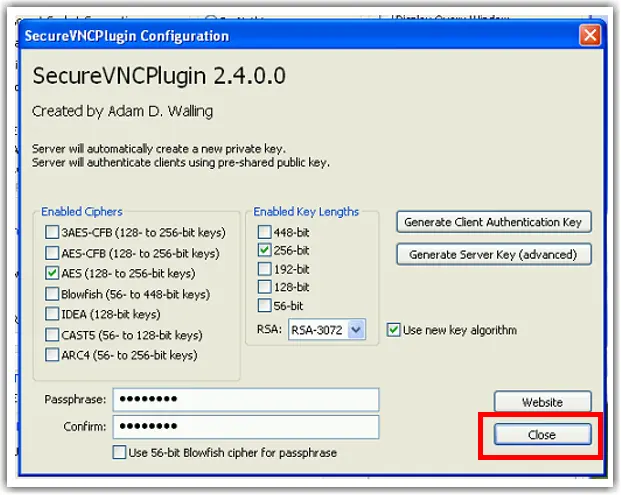
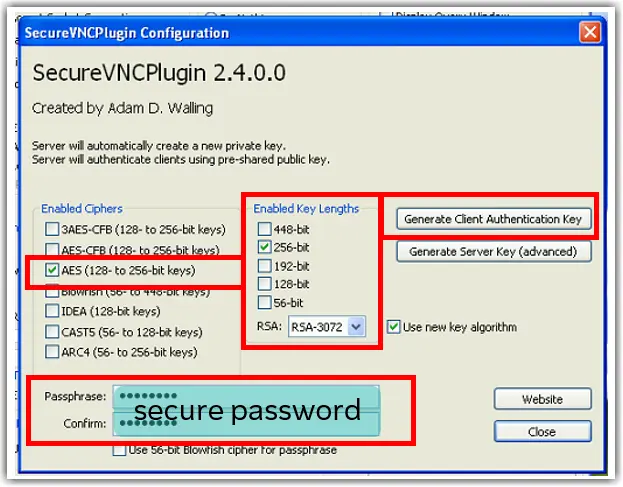
4. In the SecureVNCPlugin window:
- Select AES (128 to 256 bit keys)
- Select 256-bit under
- Enabled Key Lengths
- Set RSA to RSA 3072
- Enter a secure passphrase
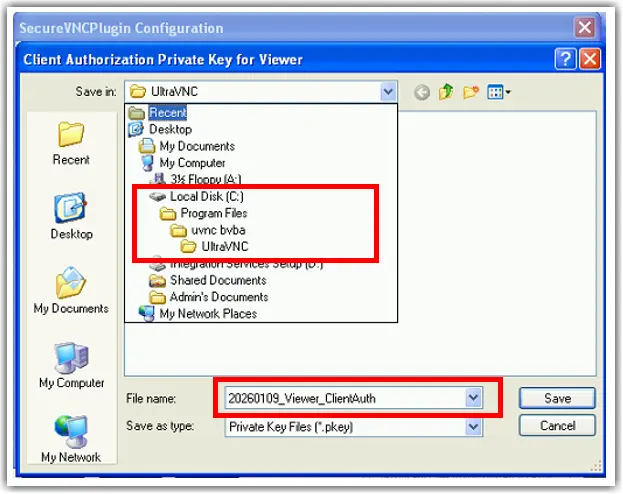
- Select Generate Client Authentication Key


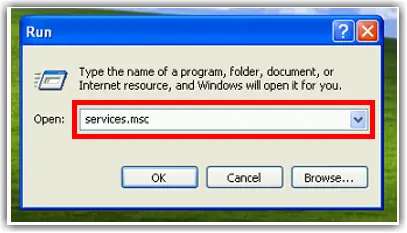
8. Press Windows + R, type services.msc, and select OK.

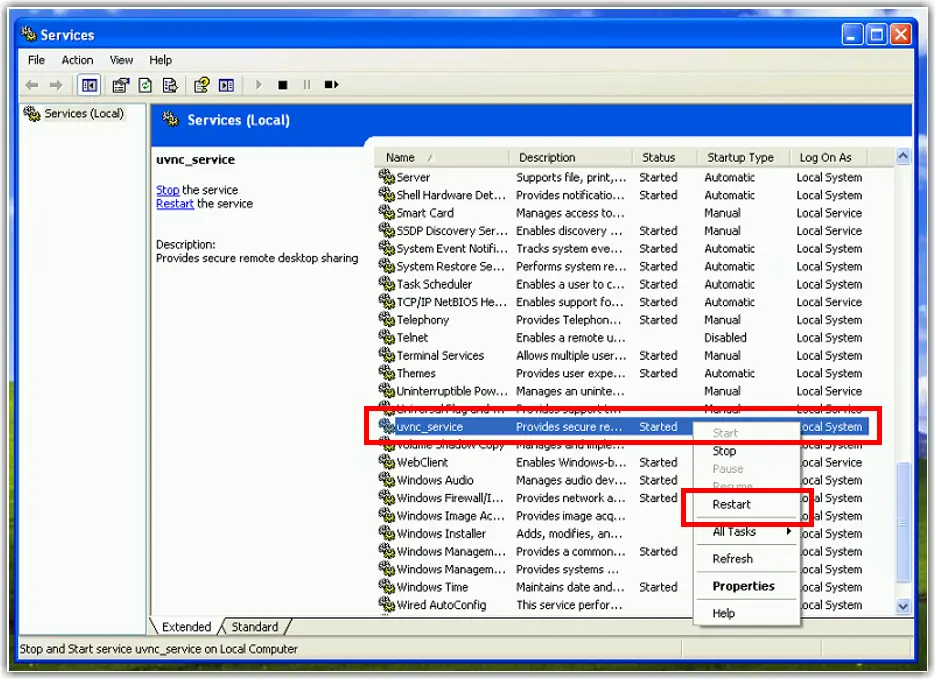
9. In the Services list:
- Locate uvnc_service
- Right click
- Select Restart

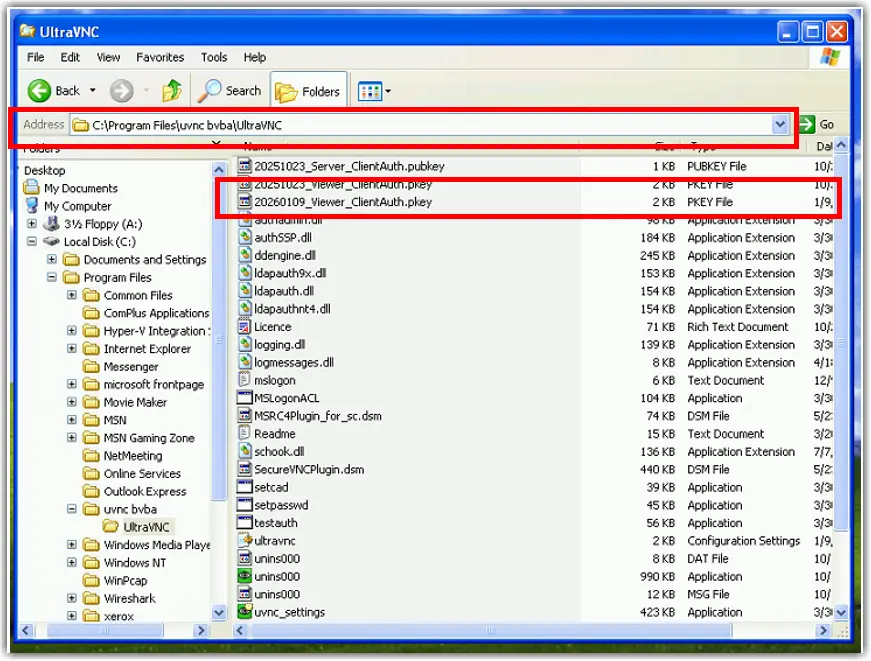
10. Copy the file <date>_Viewer_ClientAuth.pkey (step 5) from the UltraVNC folder to the company admin machine.

11. On the admin machine, create the VNC endpoint and upload the Viewer key file during the setup.