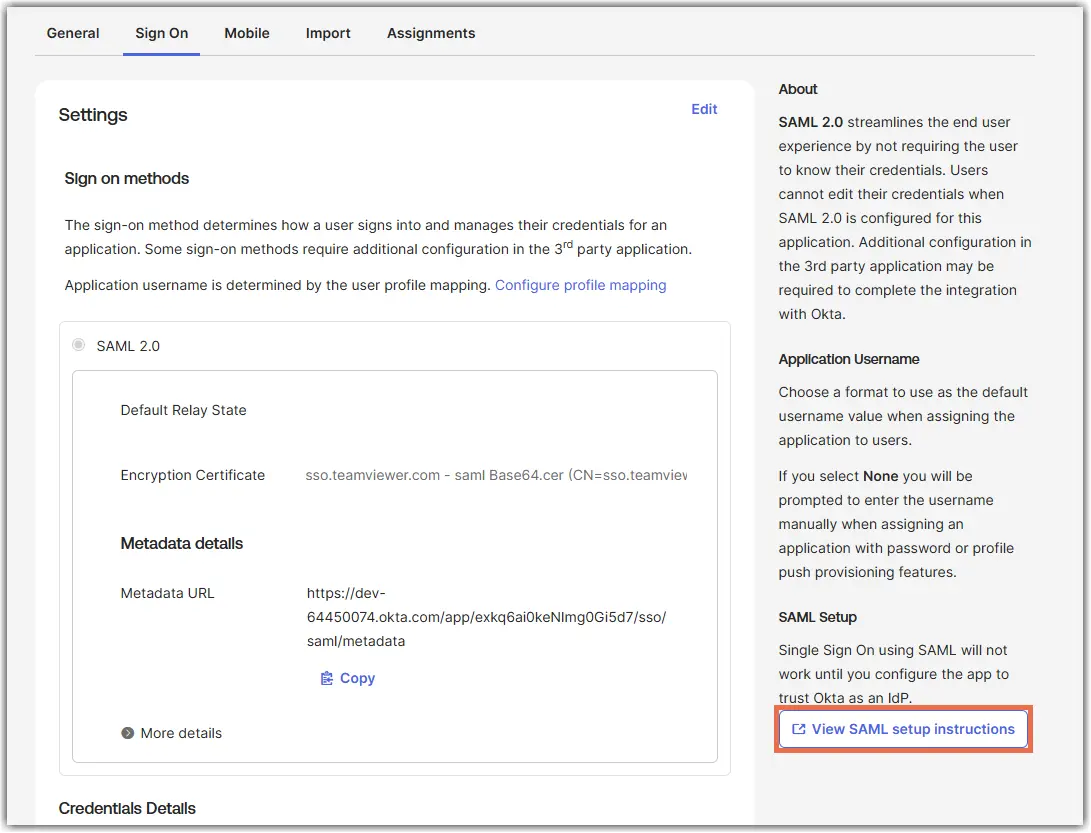
- In the Okta Admin Console, open Applications and select Applications.
- Select Create App Integration.
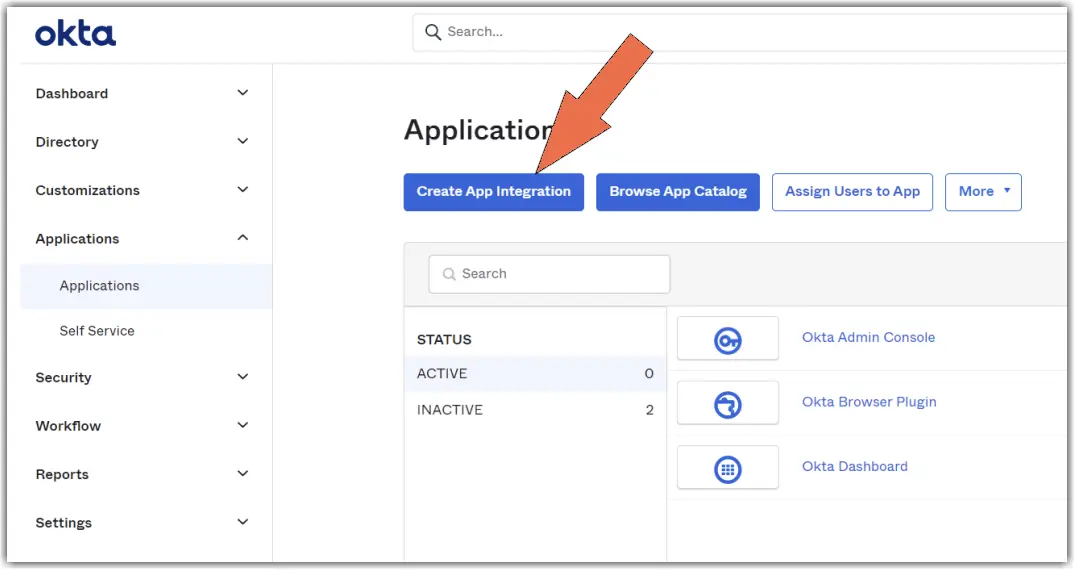
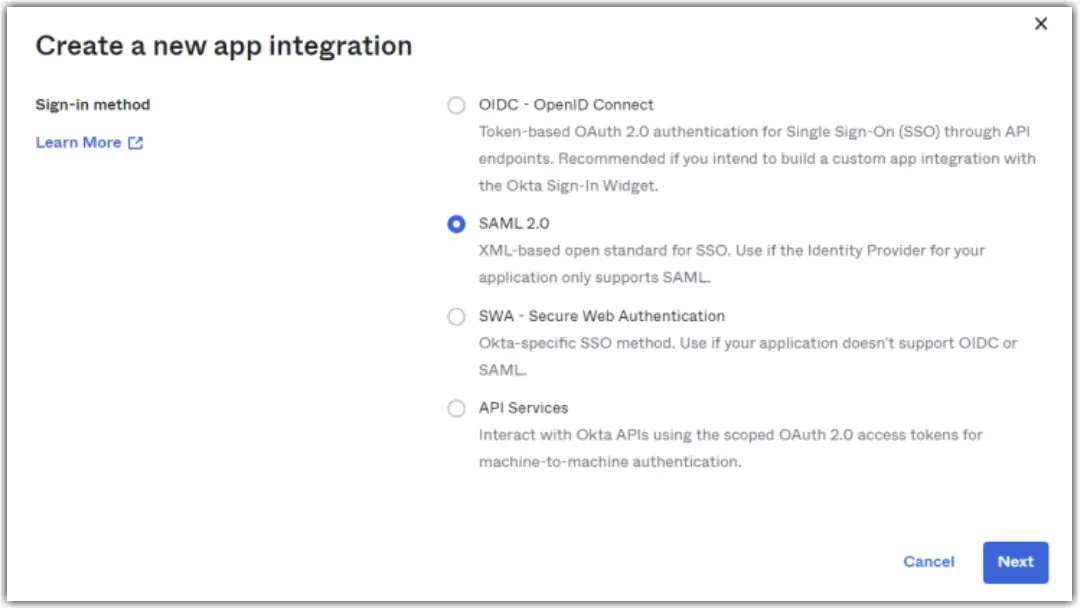
- Select SAML 2.0.
- Select Next.
- Enter a name for the application.
- Select Next.
- On the SAML Settings page, enter the values in the following table.
| Fields | Information to be entered |
|---|---|
Single Sign On URL | https://sso.teamviewer.com/saml/acs
(Note: Leave the box Use this for Recipient URL and Destination URL ticked.) |
Audience URI (SP Entity ID) | https://sso.teamviewer.com/saml/metadata |
Name ID Format: | EmailAddress |
Application username |
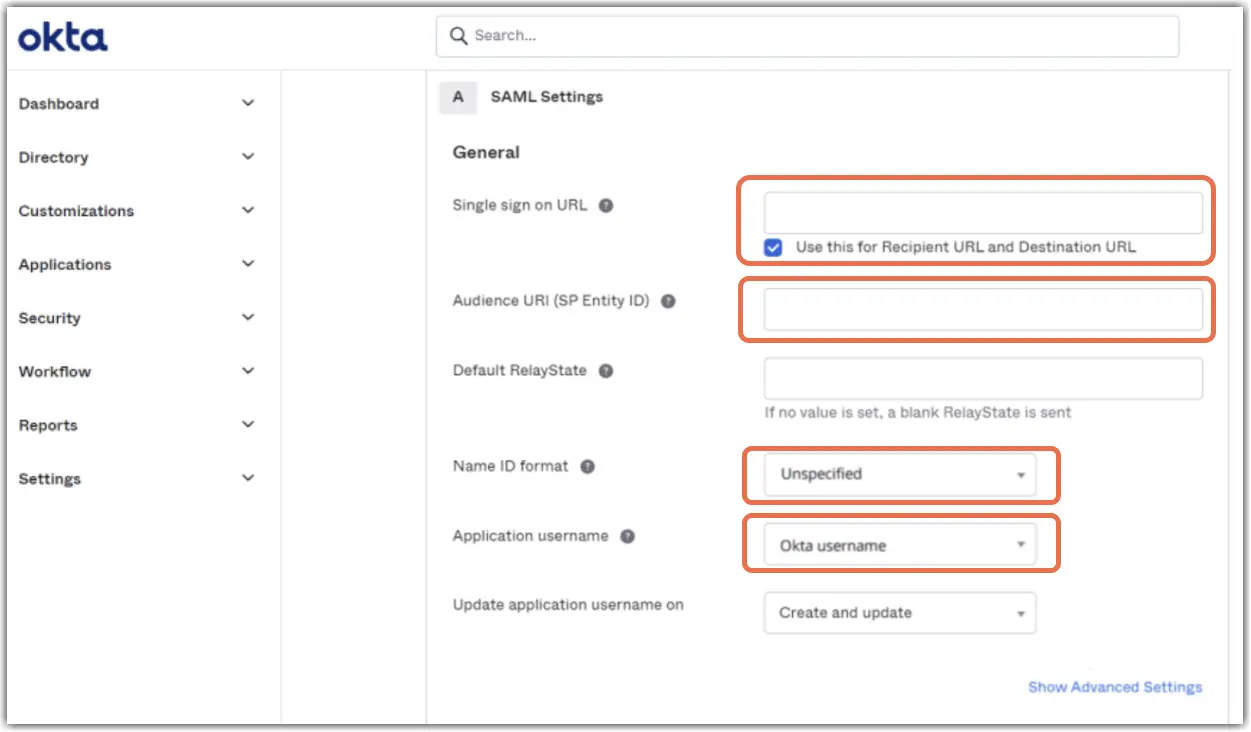
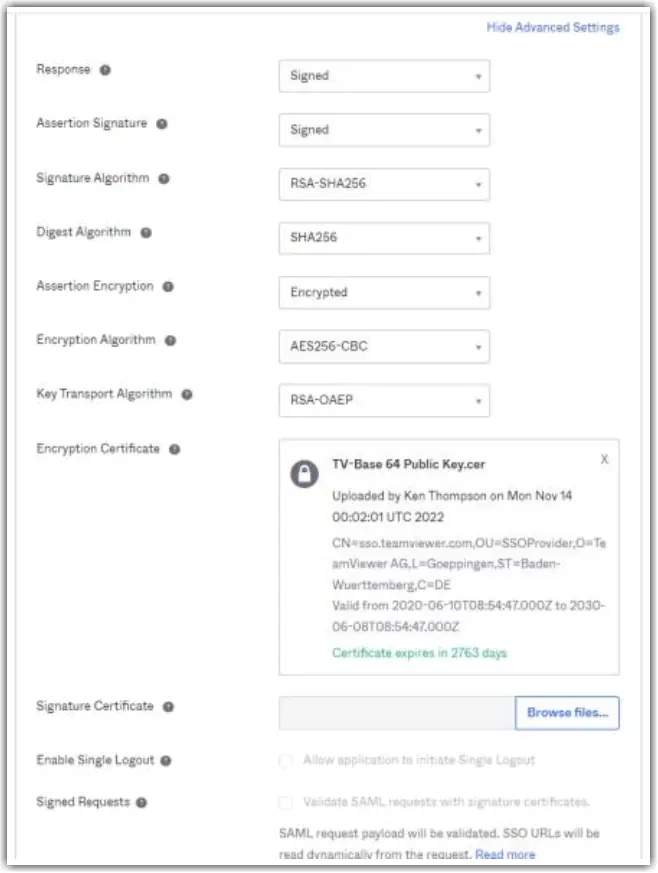
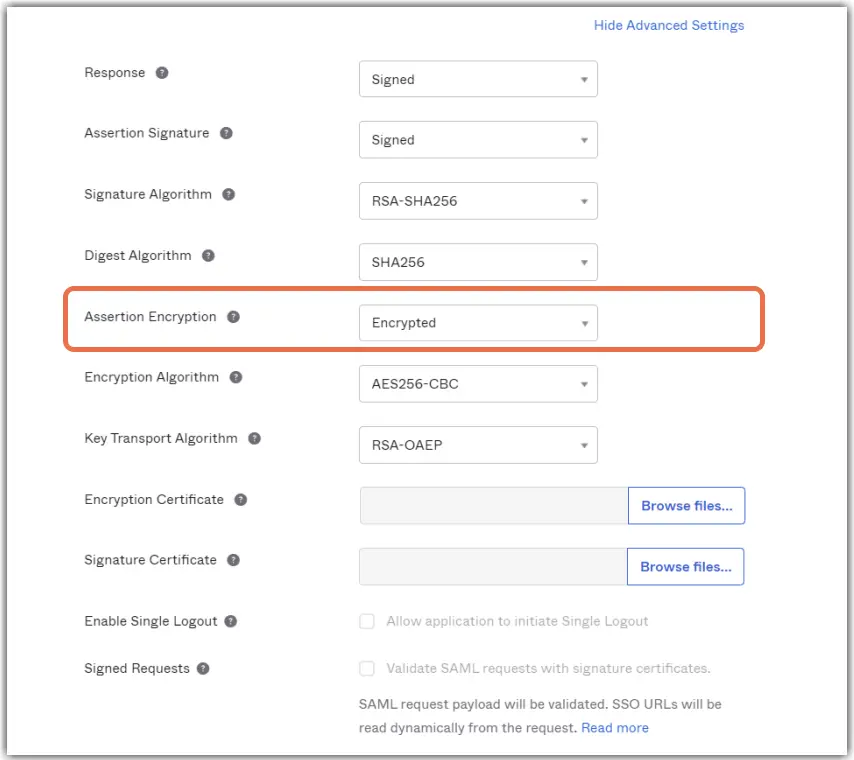
- Select Show Advanced Settings.
- Set Assertion Encryption to Encrypted.
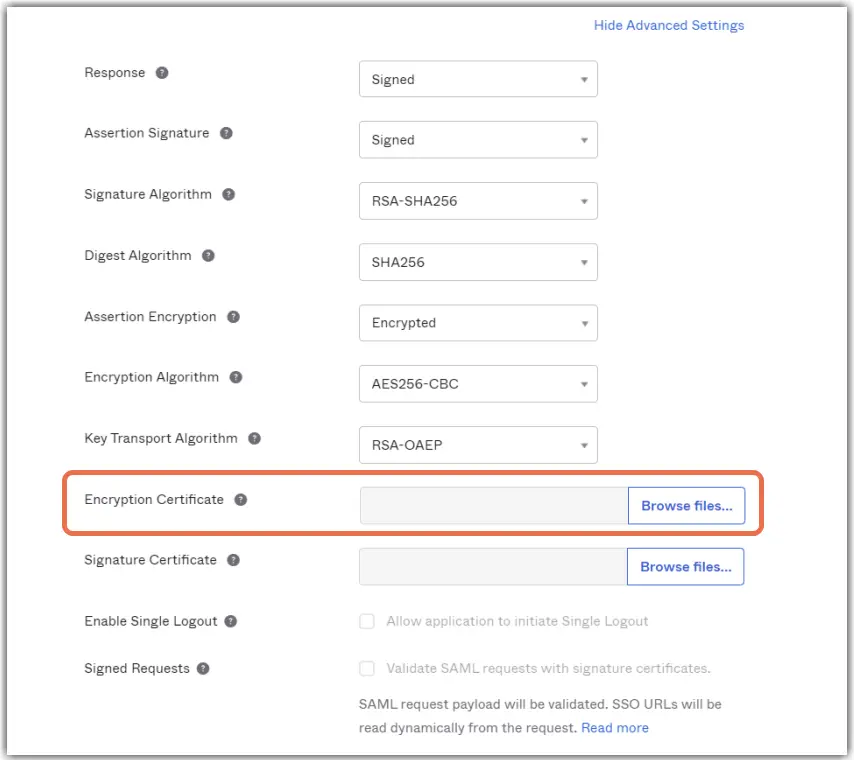
- Upload the TeamViewer public key to Encryption Certificate in Base64 format.
- Under Attribute Statements, add the following email attribute.
Name: http://schemas.xmlsoap.org/ws/2005/05/identity/claims/emailaddress
Name format: URI Reference
Value: user.email
- Select Next.
- Select I'm an Okta customer adding an internal app.
- Select This is an internal app.
- Select Finish.
How to get the TeamViewer public key
Run the following PowerShell command to download the TeamViewer SAML metadata, extract the public key, and save it as a certificate file:
"-----BEGIN PUBLIC KEY-----`n"+ `
((Select-Xml `
-Content ((Invoke-WebRequest `
https://sso.teamviewer.com/saml/metadata.xml).Content) `
-xpath "//*[local-name()='X509Certificate']").Node[0].'#text') + `
"`n-----END PUBLIC KEY-----" `
| Out-File -FilePath "sso.teamviewer.com -saml.cer" -Encoding ascii
The resulting file is named sso.teamviewer.com-saml.cer
To export the certificate in Base64-encoded X.509 format:
- Open sso.teamviewer.com-saml.cer.
- Open the Details tab.
- Select Copy to File.
- Select Next.
- Select Base-64 encoded X.509.
- Select Next.
- Enter a file name.
- Select Next, and then select Finish.
The resulting Base64 certificate should look like this: