
Knowledge Base
Single Sign-On for Microsoft Entra ID
Last Modified 26 июн. 2026 г.
TeamViewer Single Sign-On (SSO) aims to reduce user management efforts for large companies by connecting TeamViewer with identity providers and user directories.
Notes:
- The TeamViewer Single Sign-On is based on the domain which you set up. This means all TeamViewer accounts in your company or outside your company will be forwarded to the Identity Provider.
- The email address of the Microsoft Entra ID (formerly Azure AD) user must match the email address of the corresponding TeamViewer account.
- The TXT Entry has to be visible in public. You can check this by using a DNS TXT Lookup Tool.
This article applies to TeamViewer customers with an Enterprise/Tensor license.
Requirements
To use TeamViewer Single Sign-On, you need:
- a TeamViewer version 13.2.1080 or newer.
- a SAML 2.0 compatible identity provider (IdP)*.
- a TeamViewer account to access the Management Console and add domains.
- access to the DNS management of your domain to verify the domain ownership.
- a TeamViewer Tensor license.
Step 1: Create your custom identifier
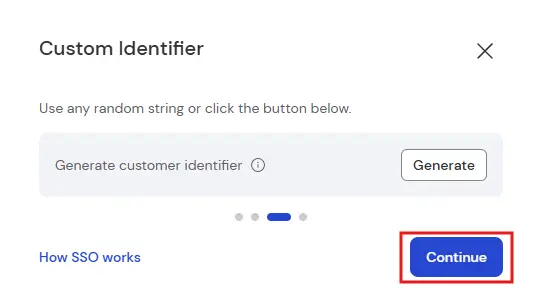
This custom identifier is not stored by TeamViewer; it is used for the initial SSO configuration. It must not be changed at any point in time since this will break Single Sign-On, and a new setup will be necessary.
Any random string can be used as a customer identifier. It is recommended not to use special characters in the custom identifier.
Notes:
- You can use, for example, an online password generator or your internal password generator if your company has one.
- This string is later required for the configuration of the IdP.
Step 2: Identity Provider Setup Microsoft Entra ID
To connect TeamViewer with Microsoft Entra ID as the identity provider, it is required to create an application for your Microsoft Entra ID. The steps to create and configure an enterprise application are described below:
1. Open a Browser and login to "portal.azure.com" with an Account that has Global Admin Permissions.
2. You will see a Home Screen. Select there the Microsoft Service "Microsoft Entra ID"

3. After you have selected the Microsoft Service Microsoft Entra ID, you will see an overview. Please select on the left side under the section Manage the option Enterprise applications.
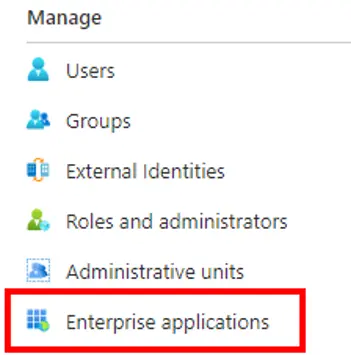
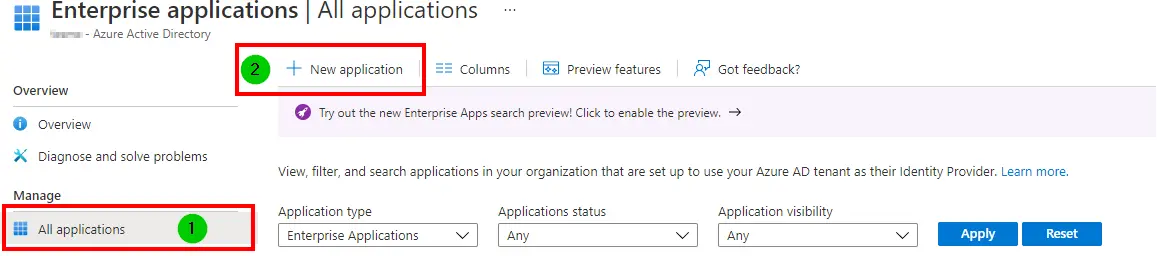
4. Now, the overview with all your Enterprise Applications that you have in your Microsoft Entra ID will open.
5. Click All applications (1) followed by.
6. Click New Application (2).
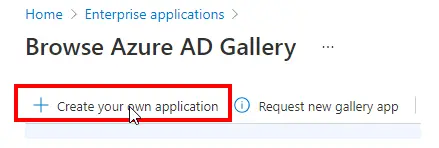
7) In the next window, please click Create your own application
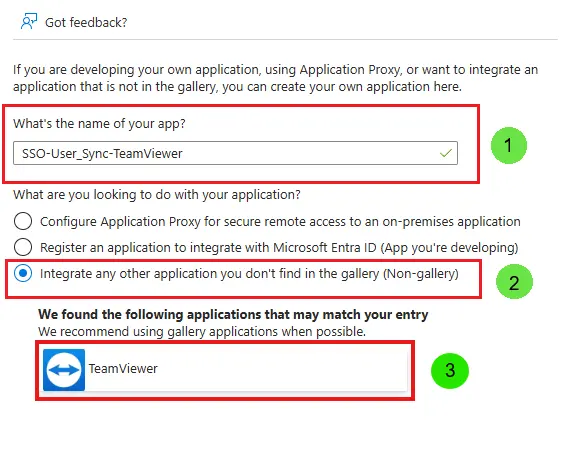
8. Now you can create your own application:
(1) Enter a name for your application.
(2) Select Integrate any other application you don't find in the gallery (Non-gallery).
(3) Select the suggested TeamViewer App from Microsoft.
(4) Click Create.
9. After you have created the application, you will see the overview of this application.
10. Click under the Manage Section, the Option Single Sign-On , and select the SAML Method.
11. Now you can Edit the SAML Configuration.
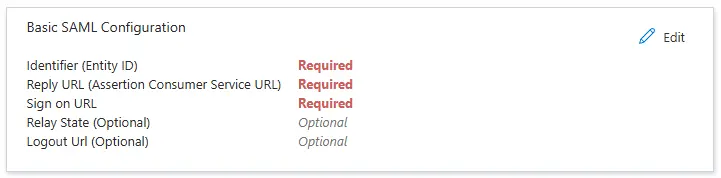
a. Entity ID (already prefilled) ➜ https://sso.teamviewer.com/saml/metadata
b. Add the Reply URL ➜ https://sso.teamviewer.com/saml/acs
c. Enter the Sign on URL ➜ https://sso.teamviewer.com/saml/acs
d. Click Save.
12. After you save the first step, you get the question, whether you want to test the single sign-on. Click No, I'll test later.

13. In the next section, you must edit the Attributes & Claims.
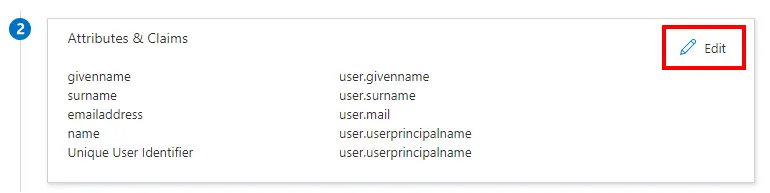
14. Click the customeridentifier field.
a. In the Source attribute enter the custom identifier, which you have created at the beginning.
b. Click Save.
15. You will see the updated value in the Overview.
16. In the next step, you download the Metadata XML File or you copy the Metadata URL.
- You need one of them for the following steps in the TeamViewer Management Console.
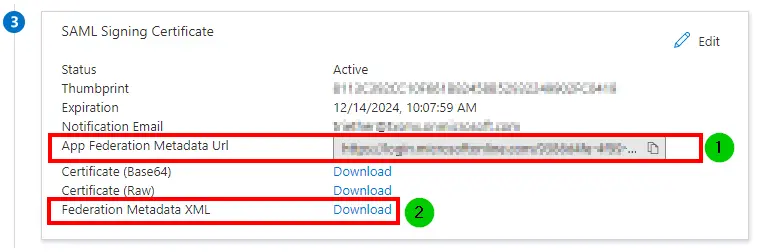
17. Before you finish the TeamViewer Management Console Setup, please add Groups Users to the Application.
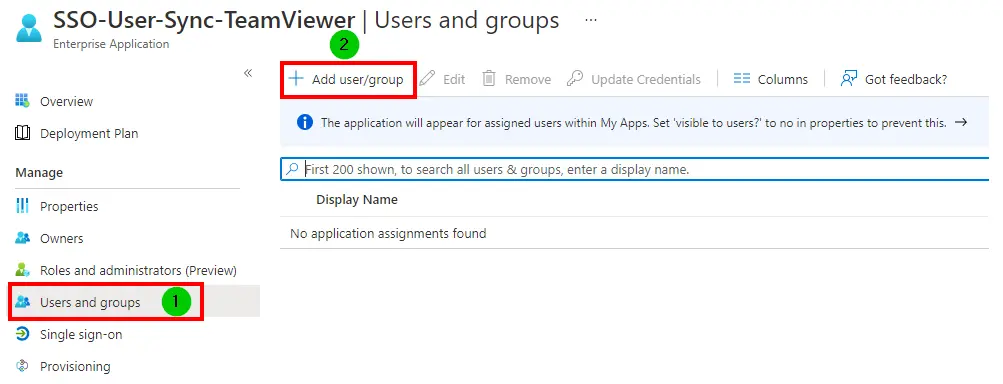
Note: This is required so users can successfully sign in to their TeamViewer accounts, and the Groups/Users will be used for the AD SCIM Sync later.
(1) Click in the Application on Users and groups.
(2) Click Add user/group.
Step 3: Configure your TeamViewer Remote
1. Open a web browser or TeamViewer Remote full client and sign in with your licensed TeamViewer account.
Note: The TeamViewer account user permissions must be Company Administrator.
(1) Click Admin settings.
(2) Click Single Sign-On.
(3) Click Add domain.
2. In the next window, you can enter the domain that you want to use for Single Sign-On.
Note: Repeat this step if you want to use multiple domains for TeamViewer Single Sign-On. Use the same XML File or XML URL for the different Domains. The only requirement here, the domains are linked to the same Microsoft Entra ID Tenant.
(1) Enter your Domain.
(2) Select the Configuration Type (e.g., Metadata URL).
(3) Upload the Metadata URL.
(4) Activate additional Options.
(5) Click Continue.
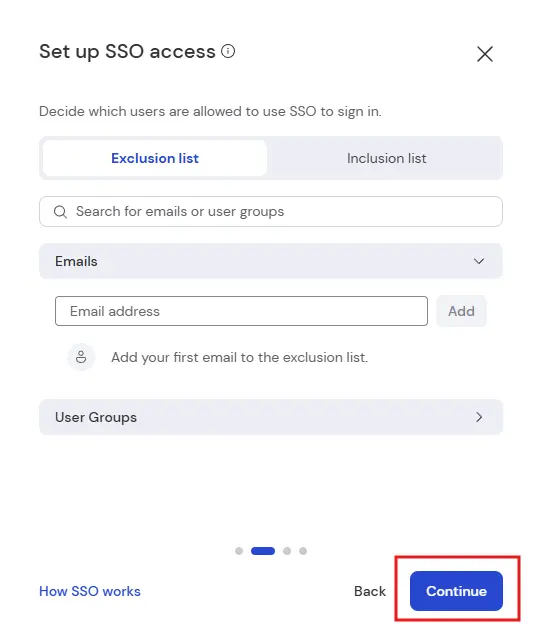
3. In the next section, you can add accounts to the Single Sign-On Exclusion or Inclusion list. If you don't have something to add, click Continue.
Important Note: It is highly recommended to add all domain owners to the exclusion list so that they can still log in if SSO needs a new configuration.
Note for Email Exclusions: You can specify email addresses that will be excluded from Identity Provider Connection. These accounts can sign in to TeamViewer as usual without identity provider authentication.
Note for Email Inclusions: You can specify email addresses that will be included in Identity Provider Connection. Only these accounts can sign in to TeamViewer with SSO. Other accounts will sign in as usual without identity provider authentication.
4. This step (Single Sign-On Custom Identifier) can be skipped with the Click on Continue as you have already created the Custom Identifier at the beginning.
Step 4: Verify the domain
Note 1: You will see on this Screen the Information for your DNS Server Management. You need the information from the field Name / Host and the information from the field Value / Data.
Note 2: Copy from the field Value / Data, you need this information later.
1. On the domain verification window, do the following
(1) You can click Start Verification.
(2) You can click Skip and add domain.
Note: You can come back to the verification page any time and see the values when the domain isn't verified
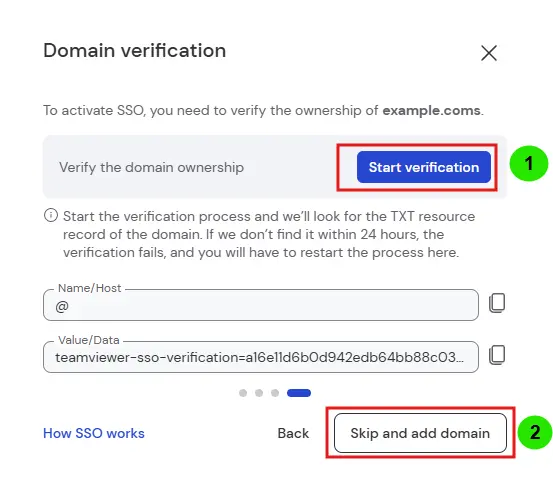
2. Click Start Verification after you have completed the steps on your DNS Server Management.
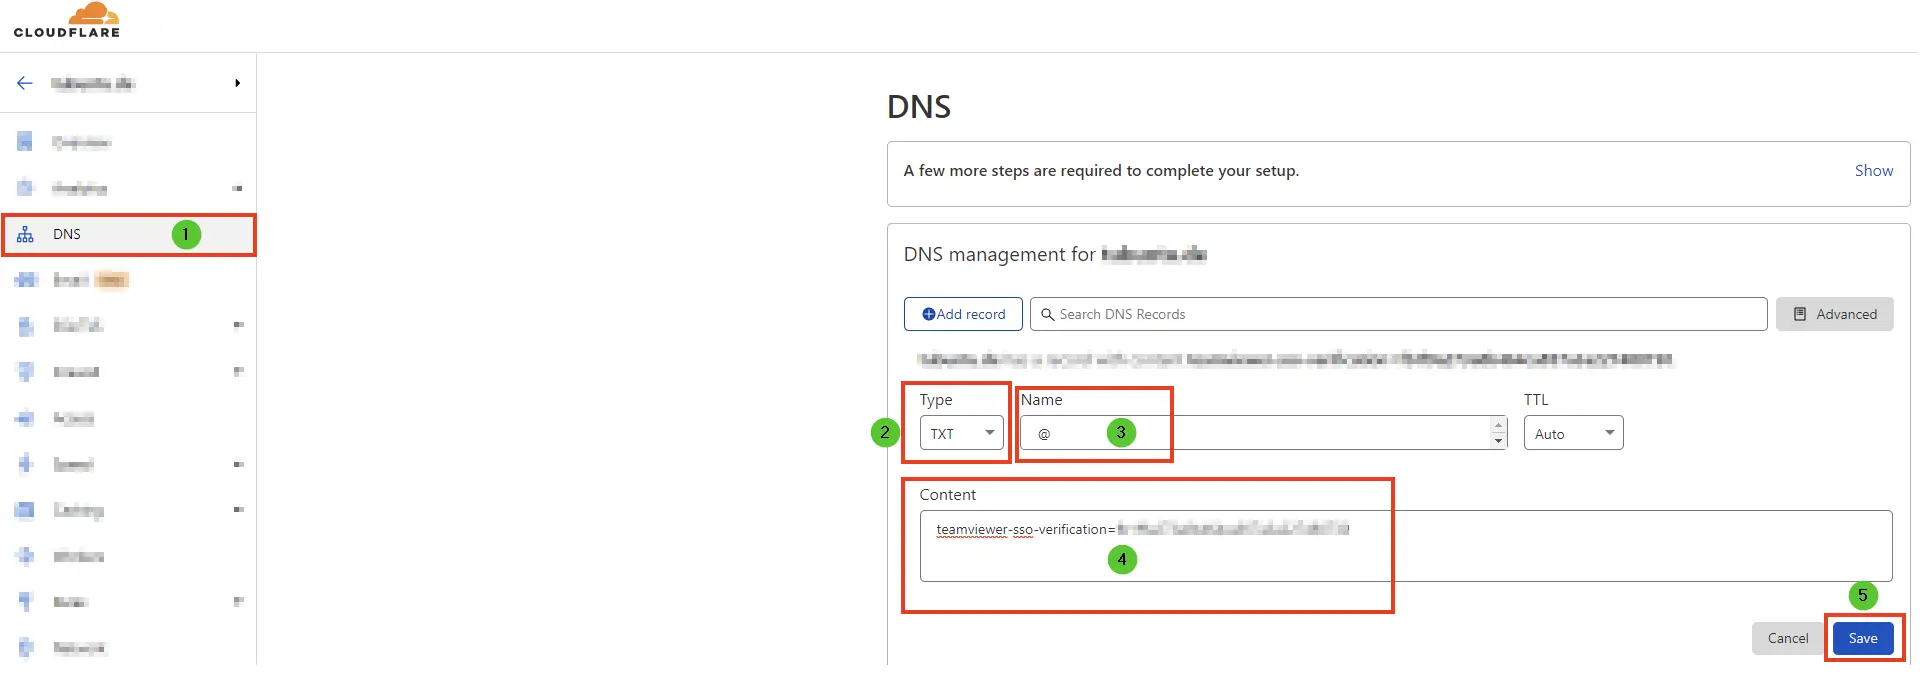
Note: The following shows the DNS Server Management for a Domain, which is managed by Cloudflare. Your DNS Server Management might look different!
After you have signed in to the Cloudflare Dashboard, select the domain.
(1) Click DNS and click Add record.
(2) Select as Type ➜ TXT.
(3) Enter for the Name ➜ @.
(4) Enter for Content ➜ The TeamViewer SSO Verification Value from the Step above.
(5) Click Save.
TeamViewer Client Configuration
TeamViewer is compatible with Single Sign-On starting from version 13.2.1080.
Previous versions do not support Single Sign-On and can not redirect users to your identity provider during the login. The client configuration is optional but allows changing the used browser for the SSO login of the IdP.
The TeamViewer client will use an embedded browser for the identity provider authentication by default. If you prefer to use the default browser of the operating system, you can change this behavior:
Windows:
HKEY_CURRENT_USER\Software\TeamViewer\SsoUseEmbeddedBrowser = 0 (DWORD)
macOS:
defaults write com.teamviewer.teamviewer.preferences SsoUseEmbeddedBrowser -int 0
Note: You need to restart the TeamViewer client after creating or changing the registry.