
Knowledge Base
Audio and video forwarding
Last Modified: Jul 27, 2026
TeamViewer Tensor's audio and video forwarding feature lets you use your local microphone and camera during a remote session. By forwarding your selected audio and video devices to the remote computer, you can join meetings and use communication applications as if you were sitting at the remote device.
This article applies to TeamViewer ONE users and TeamViewer Tensor users on the following licenses: Tensor, Tensor Light Agent, Tensor Support & Tensor Support Concurrent, and TeamViewer ONE.
Requirements
Before utilizing audio and video forwarding, make sure the following conditions are met:
- The device is associated with your TeamViewer Tensor license.
- The remote device is running the full version of TeamViewer or TeamViewer Host.
- Connection to the remote device is made via Easy Access.
- A microphone and/or camera is available and functioning on your local device.
How audio and video forwarding works
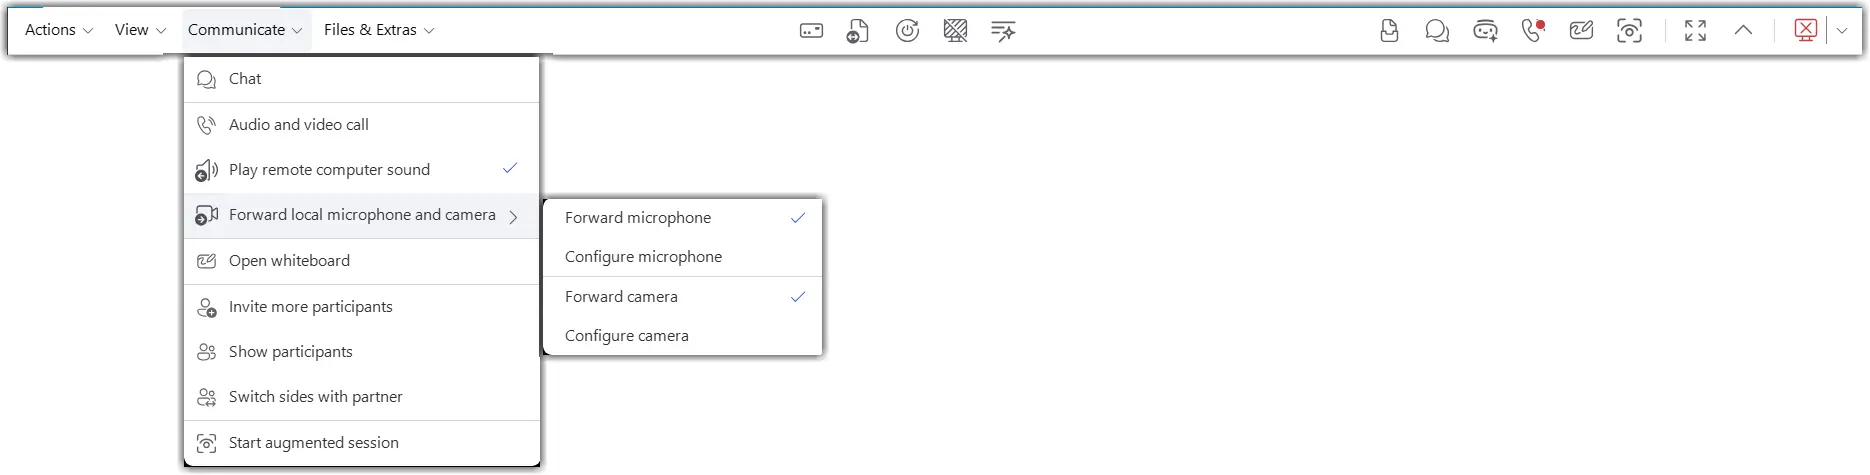
When activated, TeamViewer Tensor checks the remote device to verify whether the appropriate virtual drivers are installed. If they are not found, TeamViewer Tensor automatically installs the required virtual devices. This allows your selected audio and video devices to be used by the remote machine in meetings or other communication applications. By default, the pre-selected audio and video devices in TeamViewer Tensors settings (LOCATION) are shared. If different audio or video devices should be used instead, you can change the configuration in the Configure audio/Configure video menus provided.
How to enable audio and video forwarding
- Start a remote connection to a supported device via Easy Access.
- In the session toolbar, enable audio forwarding, video forwarding, or both.
- If TeamViewer does not detect the required virtual drivers on the remote device, allow the installation to complete.
- To change the microphone forwarded by TeamViewer, select the Configure Microphone option, and choose the desired input device.
- To change the camera forwarded by TeamViewer, select the Configure Camera option and choose the desired video device.
- Open the desired meeting or communication application on the remote device.
- Select the TeamViewer virtual microphone and/or TeamViewer virtual camera in the application's audio and video settings.
- Verify that the remote application receives audio and video from your local devices.
How to change the forwarded audio/camera devices
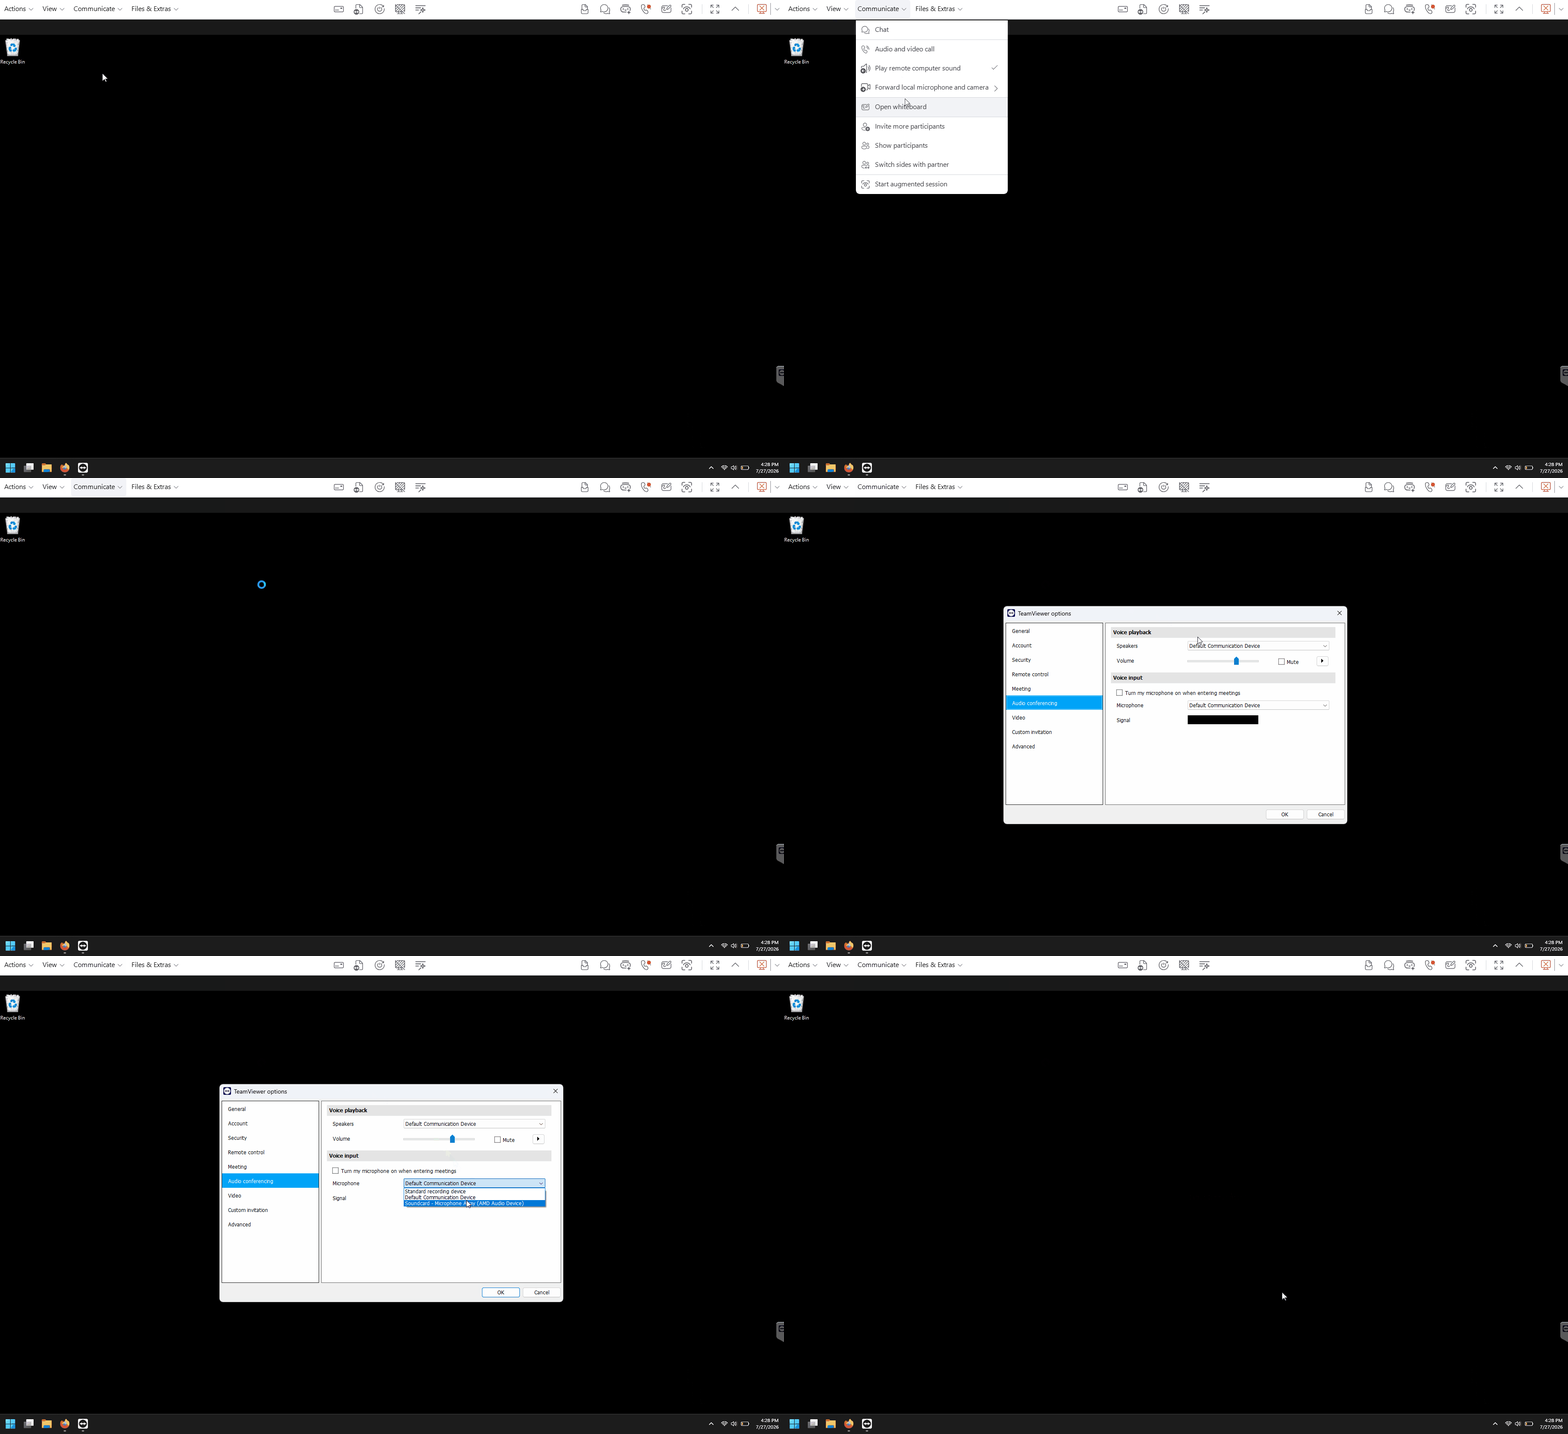
- While in the remote session, open the audio or video forwarding settings from the session toolbar.
- Select a different local microphone or camera.
- Confirm the selection.
- Test the device in the remote application.
How to manually install or uninstall the forwarding drivers
In TeamViewer Remote:
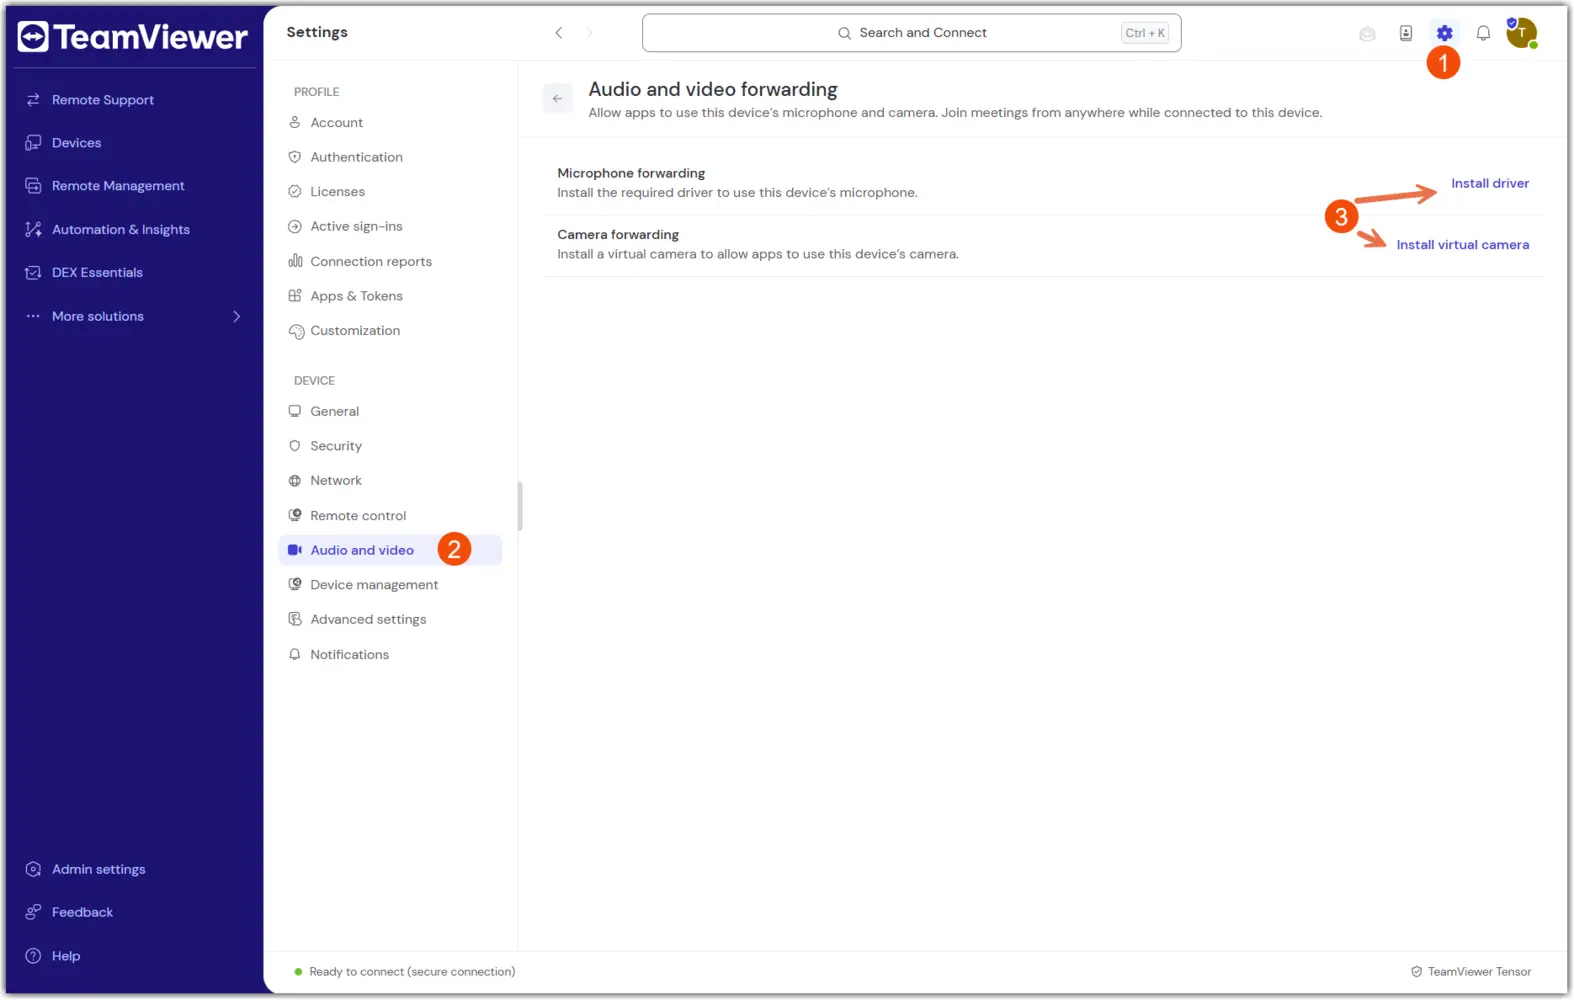
- Open TeamViewer settings on the remote device.
- Navigate to the audio and video forwarding driver section.
- Install or uninstall the virtual audio and camera drivers as needed.
- Confirm the change.
- Restart the remote session if required.
In TeamViewer (Classic):
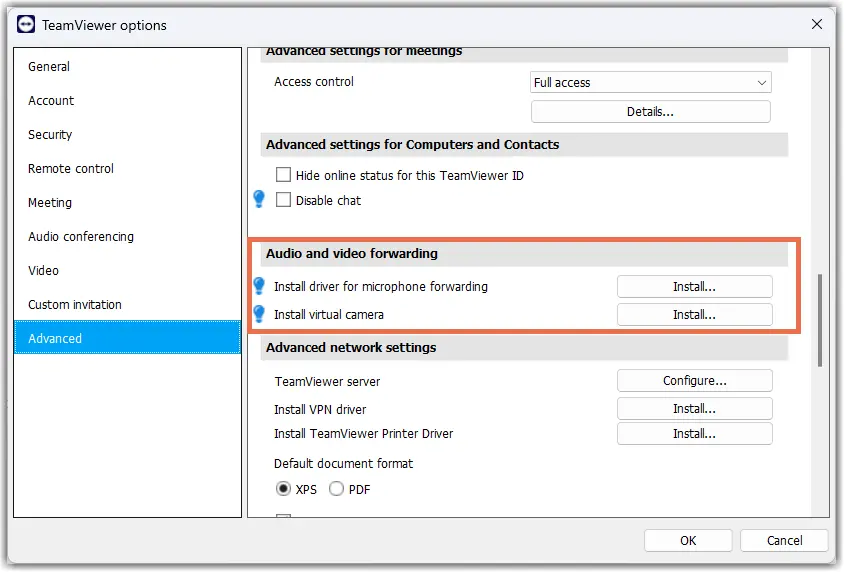
- Open TeamViewer Advanced settings: Extras → Options → Advanced → Show advanced.
- Navigate to the Audio and video forwarding section.
- Install or uninstall the virtual audio and camera drivers as needed.
- Confirm the change.
- Restart the remote session if required.
How to install the forwarding audio driver via MSI
The forwarding drivers can also be installed via MSI, using the following commands:
msiexec /i TeamViewer_Full.msi INSTALLVIRTUALAUDIO=1
msiexec /i TeamViewer_Host.msi INSTALLVIRTUALAUDIO=1