TeamViewer extension for Zoho CRM enables sales agents and pre-sales engineers to connect to devices of leads and potential customers in order to assist them in setting up a trial, walk them through a product experience or demo functionalities.
This can be achieved through an intuitive interface for creating remote access invitations and sharing them with a single click.
With the powerful TeamViewer cross-platform solution, the agents can reach to customers on whatever devices they may be.
Moreover, the integration includes connection reports to allow for performance tracking and visibility on how the functionality is used.
This ultimately results in increased customer satisfaction and improved lead conversion.
Please keep in mind that Integrations are not included in basic license packages. They have to be purchased separately as AddOns. For more information, please visit our website: http://www.teamviewer.com/integrations
Installing the TeamViewer extension
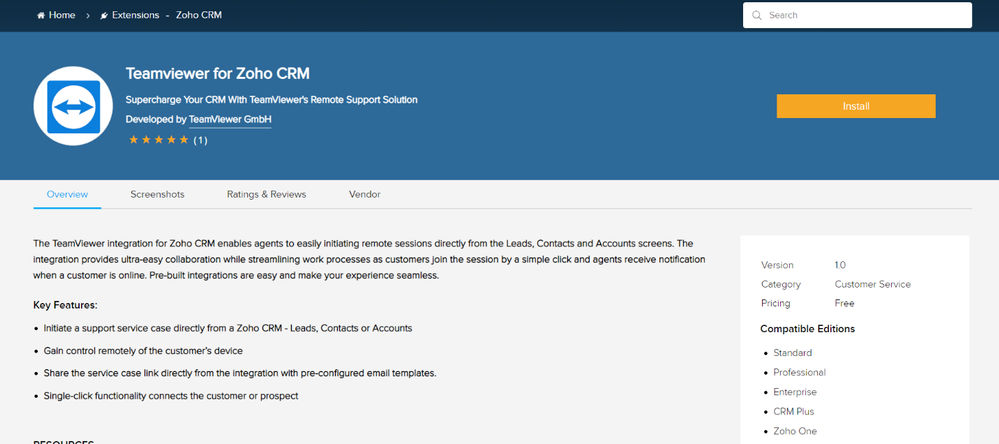
You can download the TeamViewer extension for Zoho CRM at https://marketplace.zoho.com/crm/teamviewer-for-zoho-crm
Once you open the TeamViewer listing, click Install and then Continue. You should then see the screen below.
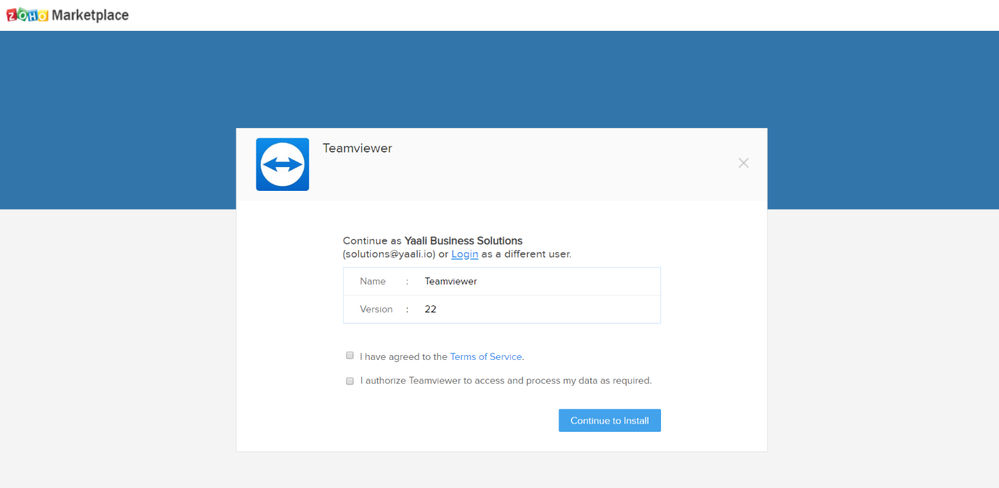
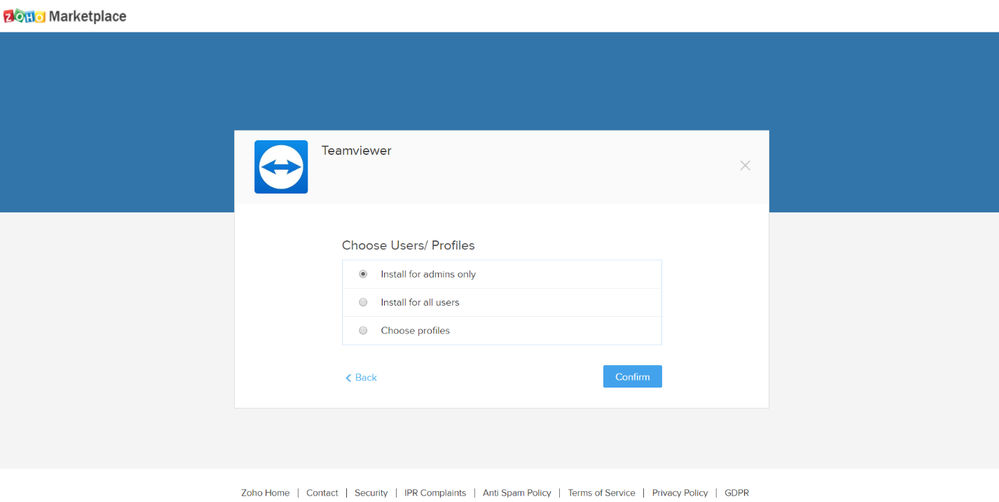
You should now be able to see the TeamViewer Terms of Service. Click to accept them and proceed to the next step by clicking on Continue to Install. At the next screen (shown below), you will be asked to choose user profiles for the extension. Select Install for all users, and Confirm Installation.
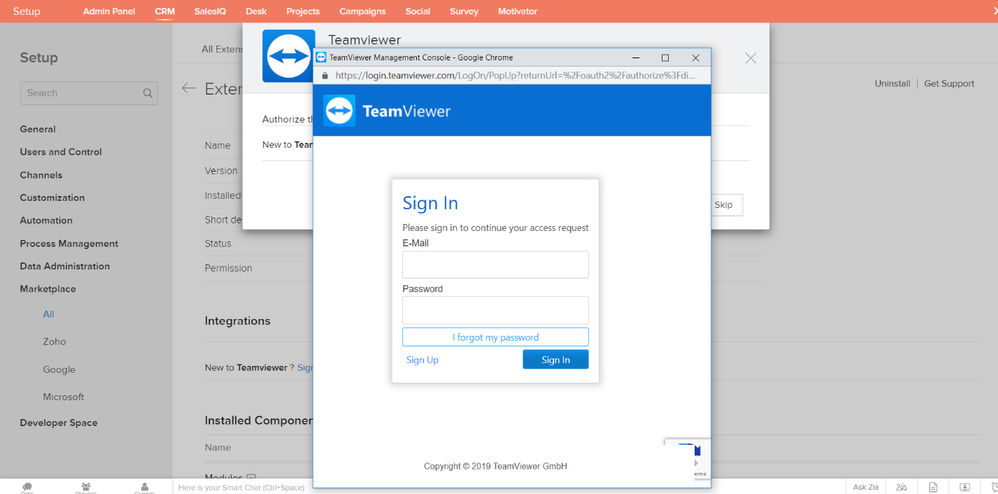
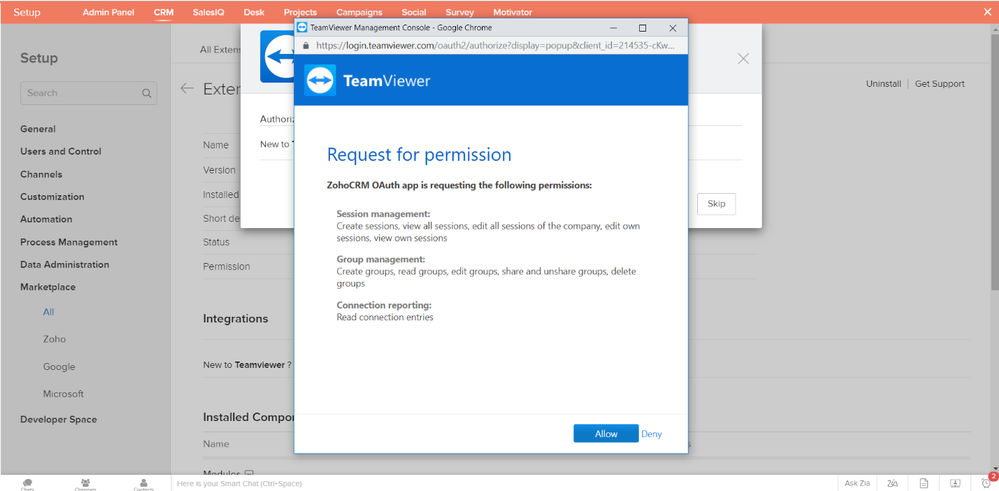
After Installation, you will be prompted to authorize your TeamViewer account that has a valid license. Click Authorize in the modal and a popup window will open up to connect to your TeamViewer account. If no popup is shown, make sure that pop-up windows are not blocked by your browser settings.

In the popup window asking for your TeamViewer account credentials, log in with your TeamViewer account credentials.
After you have successfully logged in to your TeamViewer account, you will be asked to provide permission for Zoho CRM Extension. Click Allow, you will see a connection success message.
This action only needs to be performed once, by the Admin user of the organization. Now, you are all set to use the extension.
Managing TeamViewer Templates
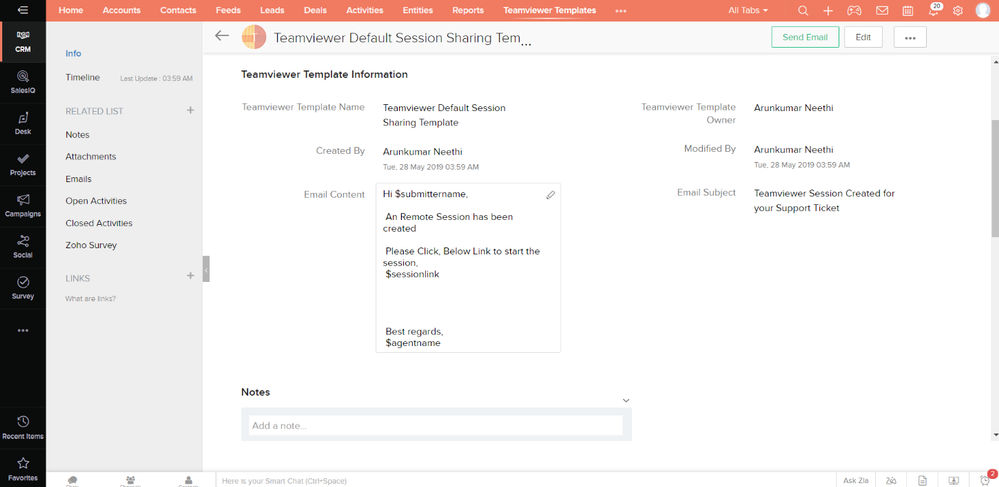
The installation of the TeamViewer extension comes with a default email template. Administrators can edit and adapt the email template according to their company requirements.
Users are allowed to have multiple templates for session sharing, which can be managed using the TeamViewer Templates Module. In the Module, a Default Session Sharing Template would be auto-generated during the extension installation.
Users can add as many templates as needed and those can be used while sharing the session details within the clients.
In the template, you can include variables like $submittername, $sessionlink and $agentname to auto-populate the corresponding values from the ticket.
Managing TeamViewer sessions
Once you have successfully installed the TeamViewer extension and connected with a licensed TeamViewer account you're ready to use the extension.
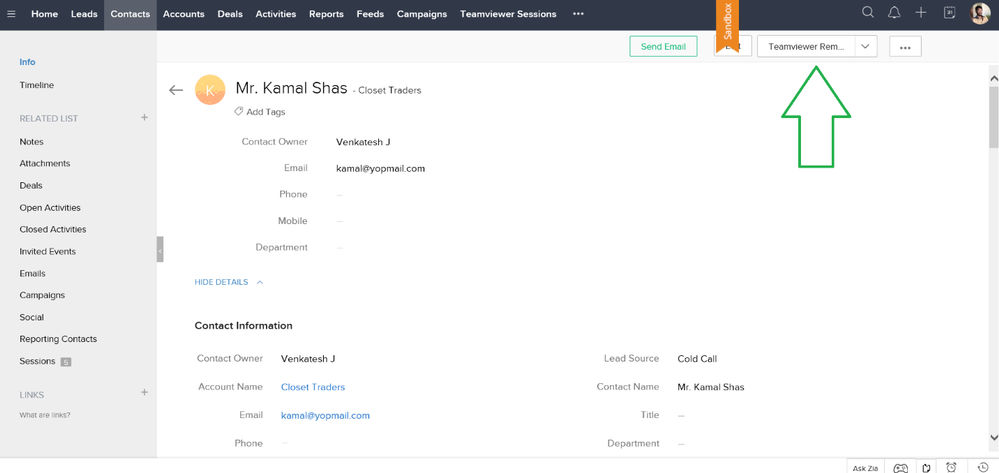
From Leads, Contacts and Accounts consoles, the user is able to create a session for the contact details included in the relevant records.
Go to the View Page of the CRM Leads/Contacts/Accounts Record, you will be able to see a Button called TeamViewer Remote at the top-right bar.
On Clicking TeamViewer Remote, a Modal box with four buttons will open as shown in the illustration below.
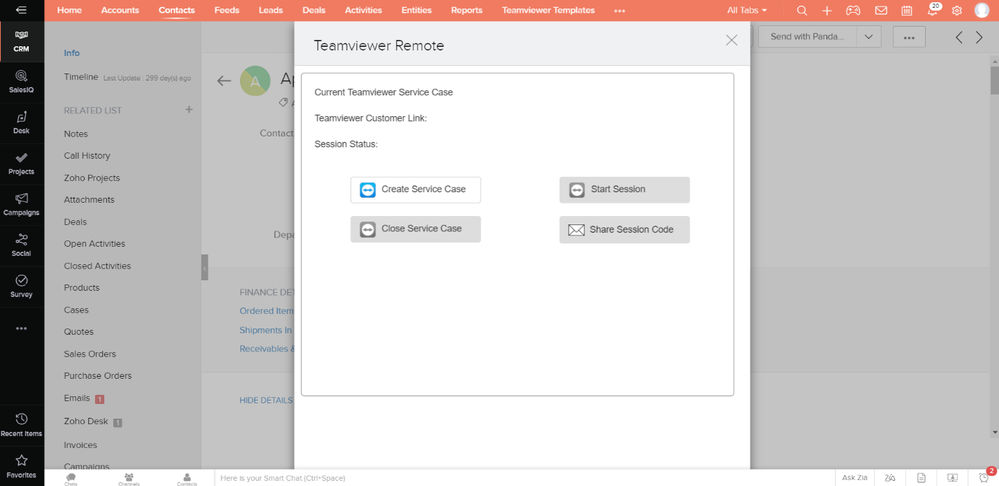
Click on Create Service Case Button, which will create a service case (session) with your TeamViewer account for the contact details available in the currently opened CRM record. Once a session has been created, the agent will be able to see the created Service Case Number and Session Link, that has to be shared with the customer.
On Clicking Start Session, It will automatically open the TeamViewer software in the agent’s system and make it ready for the connection with the customer.
Please note that it is a pre-requisite that the full version of the TeamViewer application is installed on the local PC. Please download the latest version of TeamViewer from http://download.teamviewer.com/full
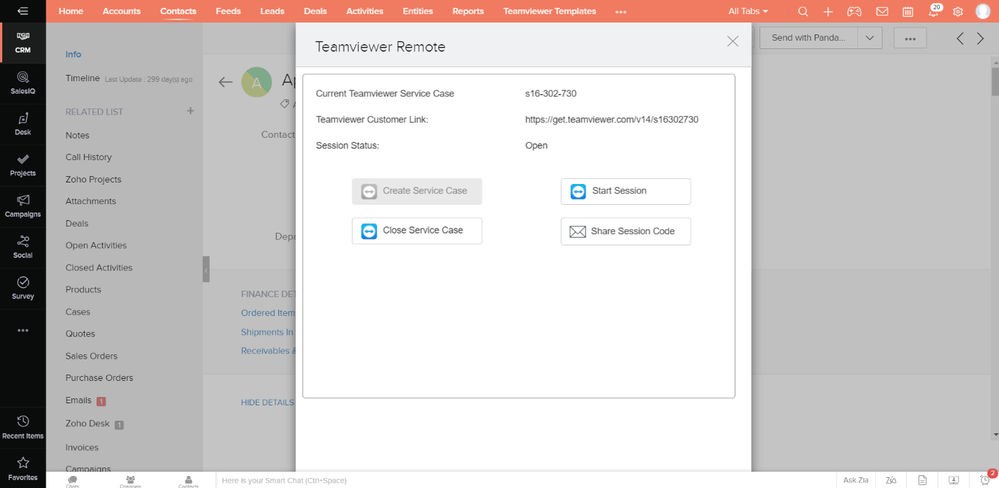
By clicking Share session the pre-defined email template with the populated addressee, submitter name and TeamViewer customer_link will be added to the Ticket history and sent to the submitter.
On the end-user side, once they click the link unless TeamViewer is already installed a runtime executable TeamViewer QuickSupport client will be downloaded and executed.
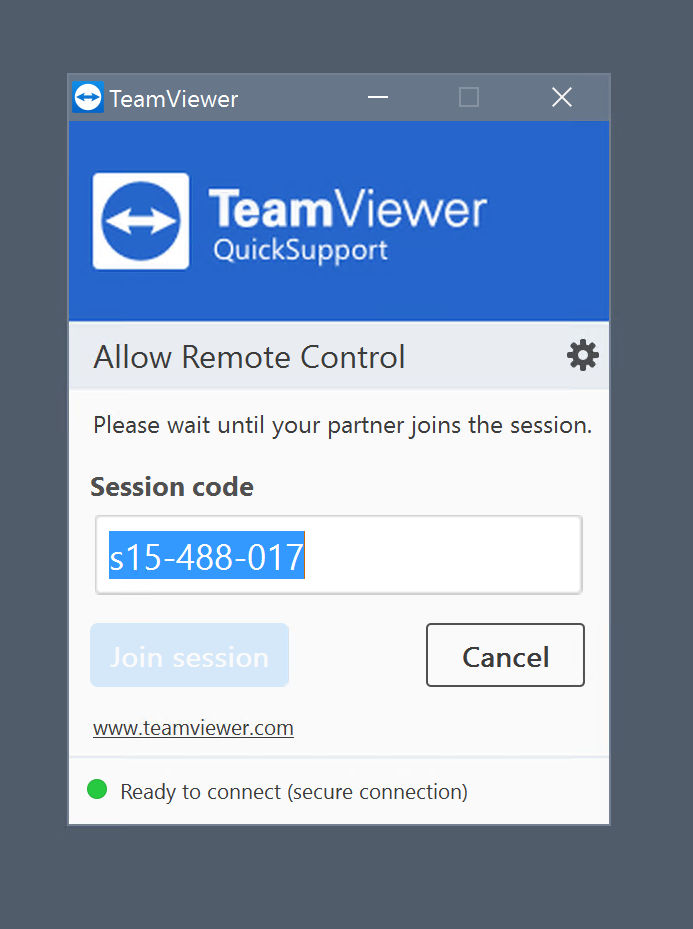
Now the supporter and the customer would be able to connect with the created session.
Session & Connection Reports
Record-specific sessions and connections
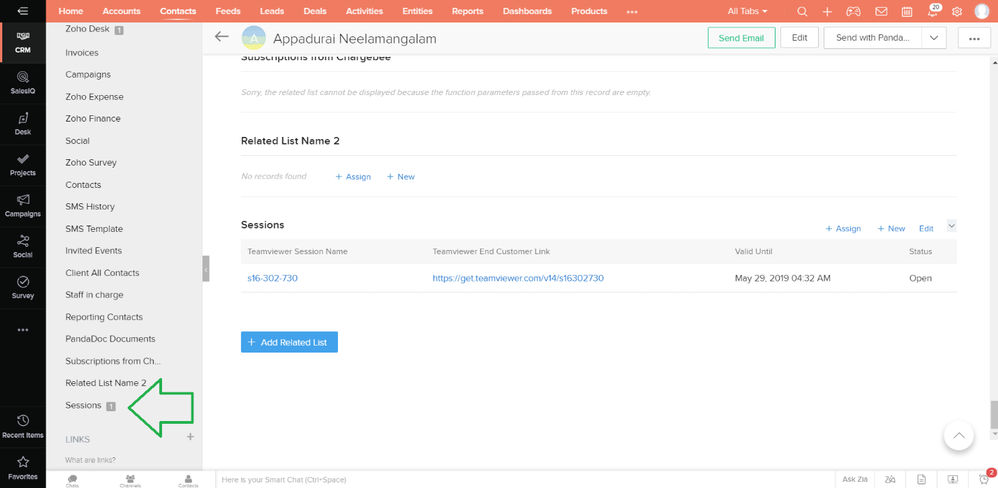
Users would be able to find the sessions created for the records in CRM, at the View Page Itself.
At the Left Side Bar of CRM Record, there will be a list of related lists for the CRM Record that will be available. Click the Related List names Sessions, you will be able to see the Session associated with the Record as shown below:
Organization-specific sessions and connections
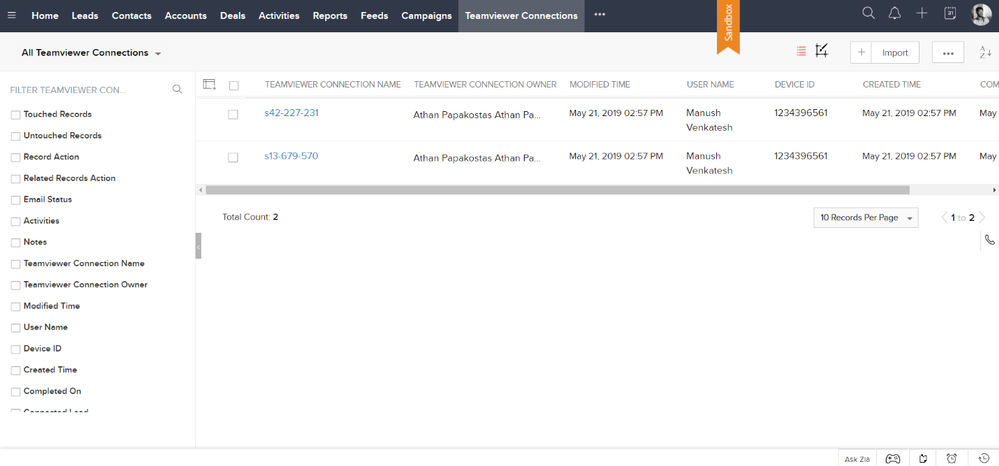
After Installation, Users would be able to see a Custom Module in CRM called TeamViewer Connections. In the Module, the user would be able to see all the connections made with the customers.
In the Connection Records, the User would be able to see the CRM session for which the connection has been made, Device ID that the customer Used, Start and End Time of the Connection.
The connection will be automatically synchronized into CRM once every day and Agents can also manually Synchronize them from the Connection’s List Page when needed.
Disconnecting your TeamViewer account from Zoho
To disassociate your TeamViewer account from your Zoho account, go to Setup ➜ Marketplace ➜ All. There select Installed Extensions and select TeamViewer for Zoho CRM. In the Integrations Section, Click Revoke access from the TeamViewer Data.
By selecting Revoke your TeamViewer account will be disconnected from your Zoho account.