AI-powered remote access software
TeamViewer Remote
Supporting distributed teams done efficiently. TeamViewer’s software provides secure, instant access to employee devices across your business, letting your IT team solve problems and provide support from anywhere.
TeamViewer is designed for a variety of use cases, including IT support, remote work, customer service, and embedded device management. Whether you're troubleshooting technical issues or managing business operations remotely, our software provides a seamless and secure connection.
Deliver a fast, effective fix for IT service issues without having to leave your desk.
TeamViewer enables secure access across all major operating systems, including Windows, Mac, Linux, iOS, and Android. With full cross-platform connections, you can work from any device, ensuring productivity remains uninterrupted.
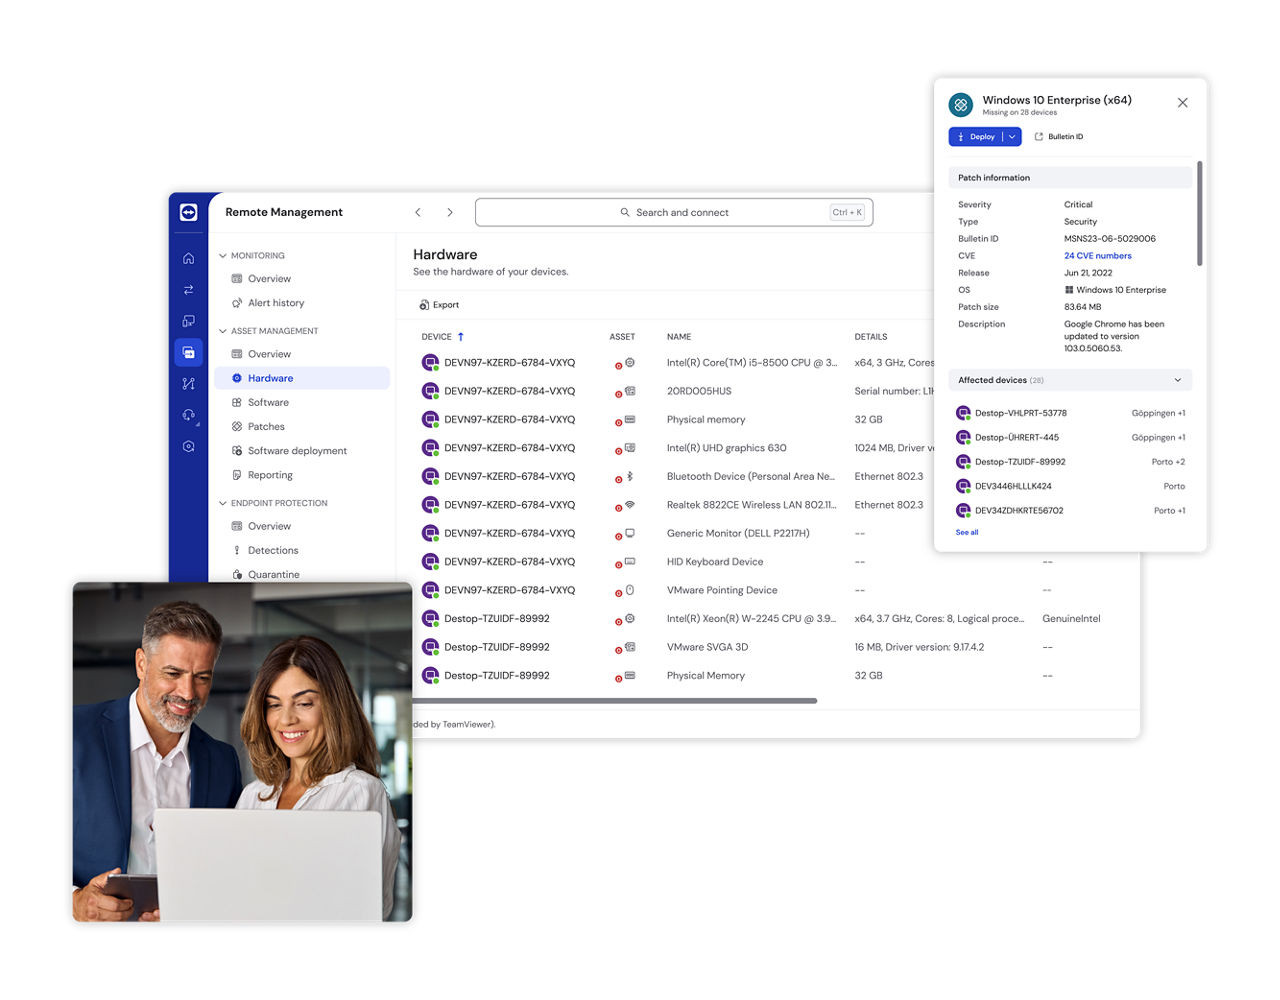
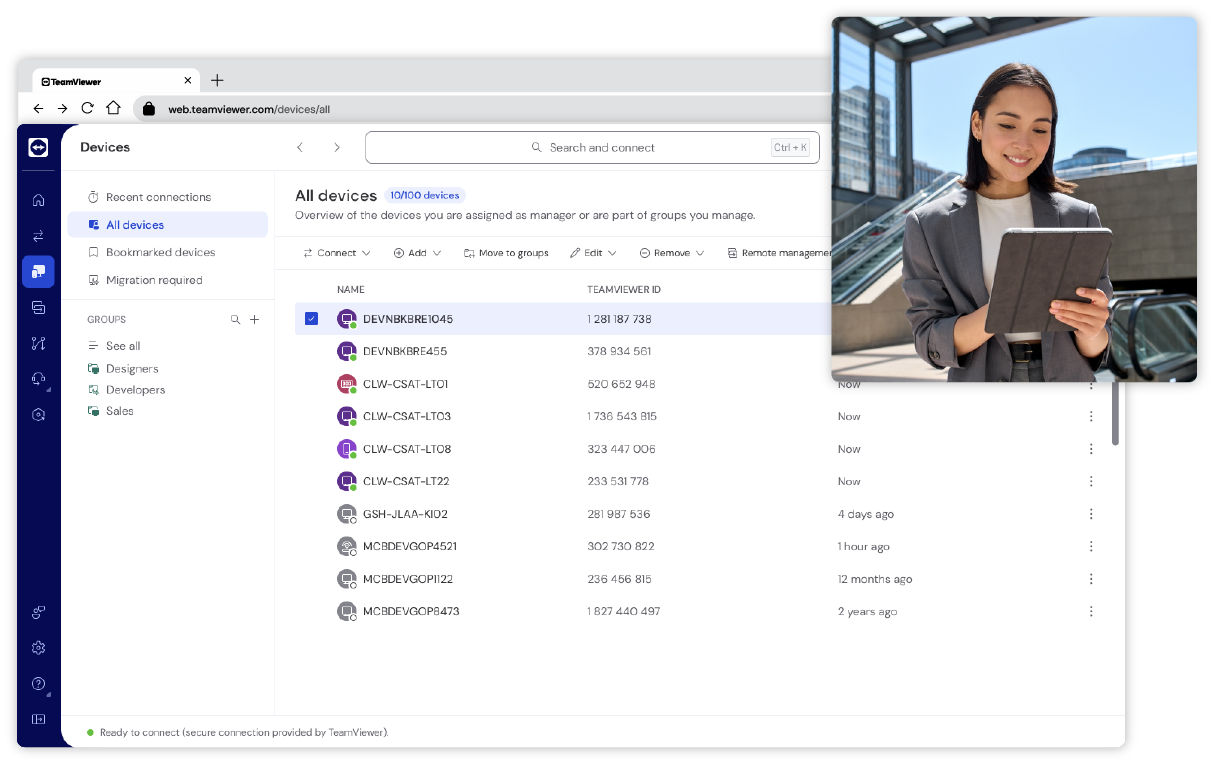
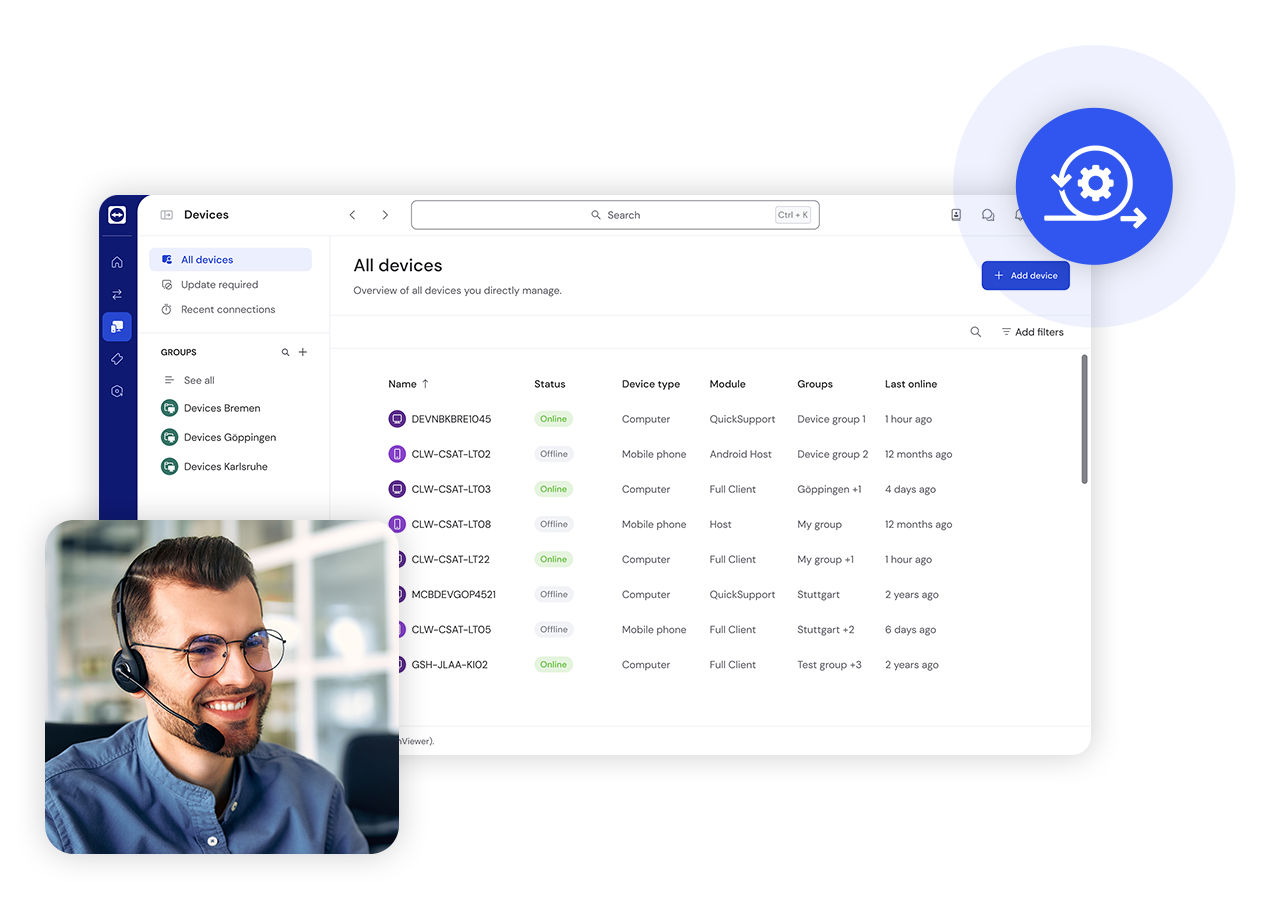
TeamViewer Remote offers a simple, efficient way to monitor, maintain, update, and optimize delocalized computers, devices, and applications. Deploy TeamViewer’s software for remote access across hundreds or thousands of devices simultaneously.
With centralized installation, IT teams can save time and effort while ensuring consistent access across their organization.

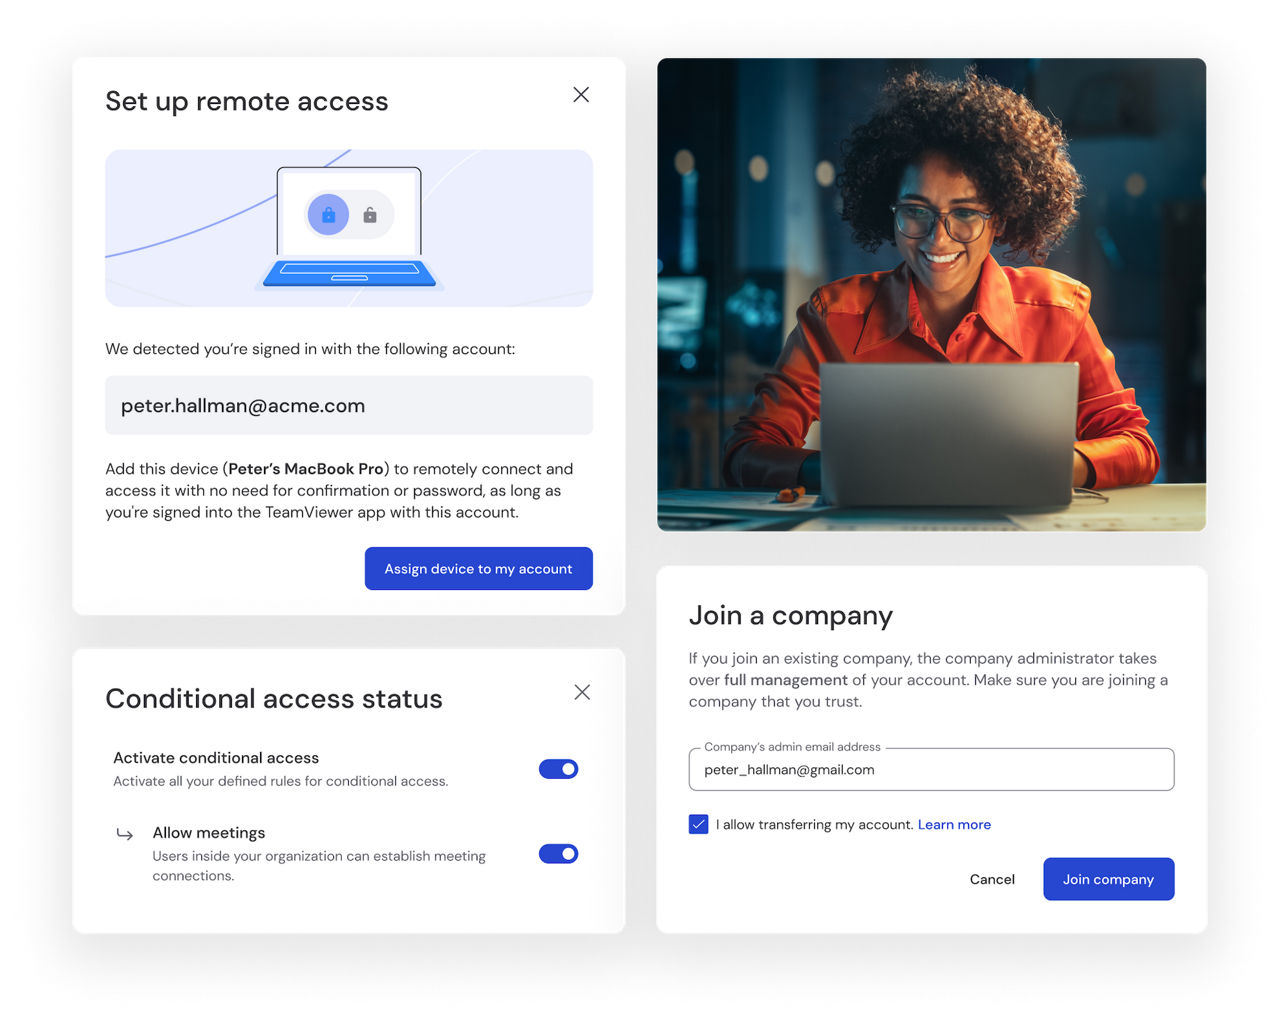
Manage access rights across your company with conditional access settings (requires a Tensor license). Define permissions and ensure only authorized users can establish remote connections, enhancing security for businesses of all sizes.

Remotely wake up and restart devices in sleep mode to keep operations running smoothly.
With Wake-on-LAN, you can ensure devices are accessible whenever needed, even if they're powered off.
Enhance your workflow by integrating TeamViewer with key business tools, including CRM, IT service management, and productivity platforms.
Streamline remote support while maintaining compatibility with your existing software ecosystem.
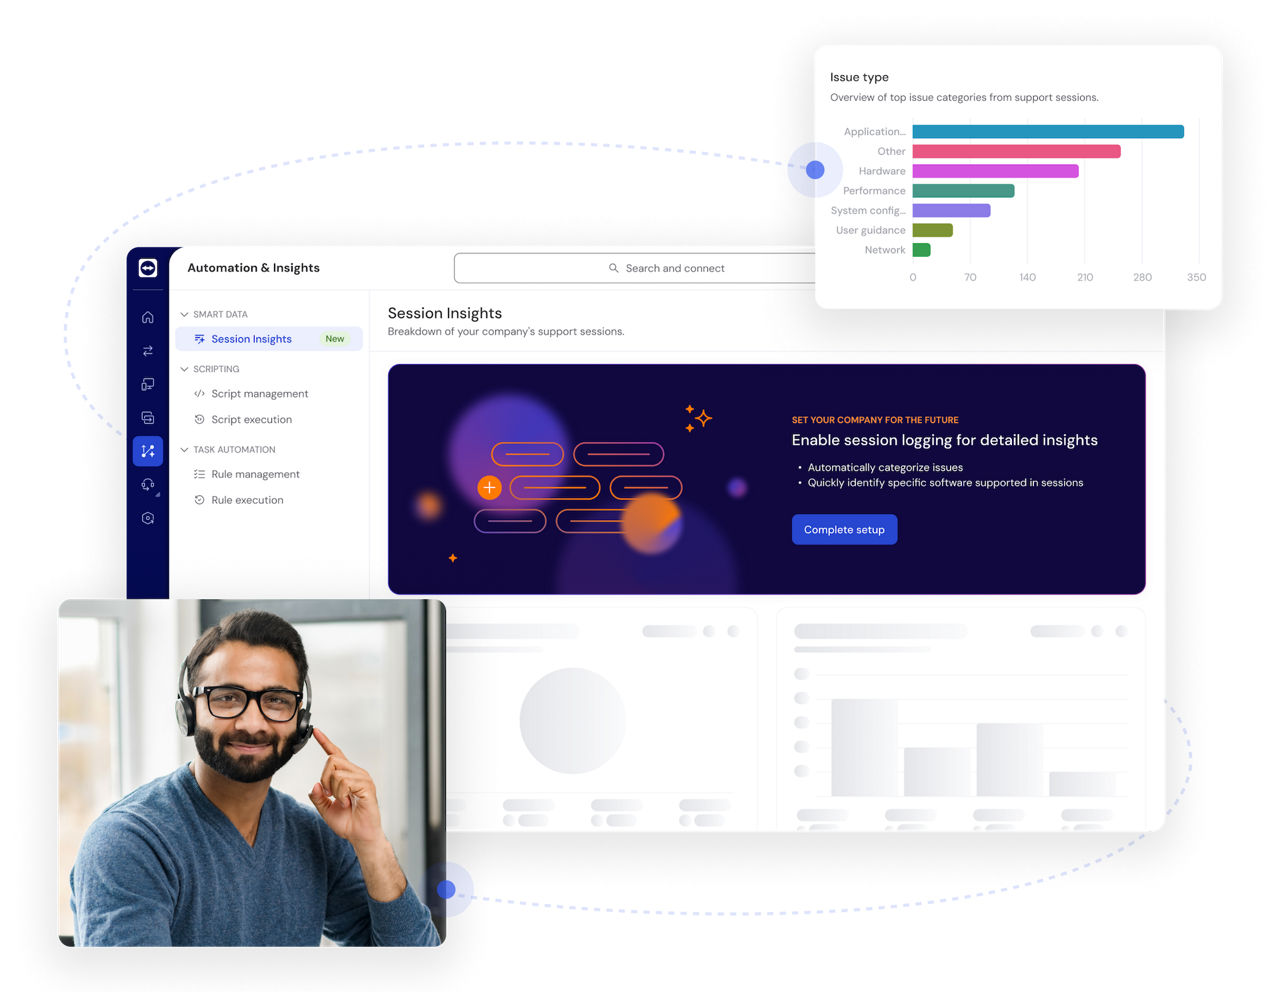
Leverage smart assistance and actionable insights with TeamViewer AI, combining Tia and Session Insights.
Reduce manual effort, resolve issues faster, optimize IT workflows, and keep your workforce productive with AI-driven recommendations and analytics.
TeamViewer is built for secure remote access. Your data is safeguarded with market-leading security features, including end-to-end encryption, multi-factor authentication, and advanced access controls.
Access a wide range of devices, from desktops and servers to mobile phones and industrial machines, ensuring seamless connectivity across your entire digital infrastructure.
Whether you're an individual user or managing a global enterprise, TeamViewer scales to meet your needs. Deploy remote desktop software for small teams or thousands of employees with ease.
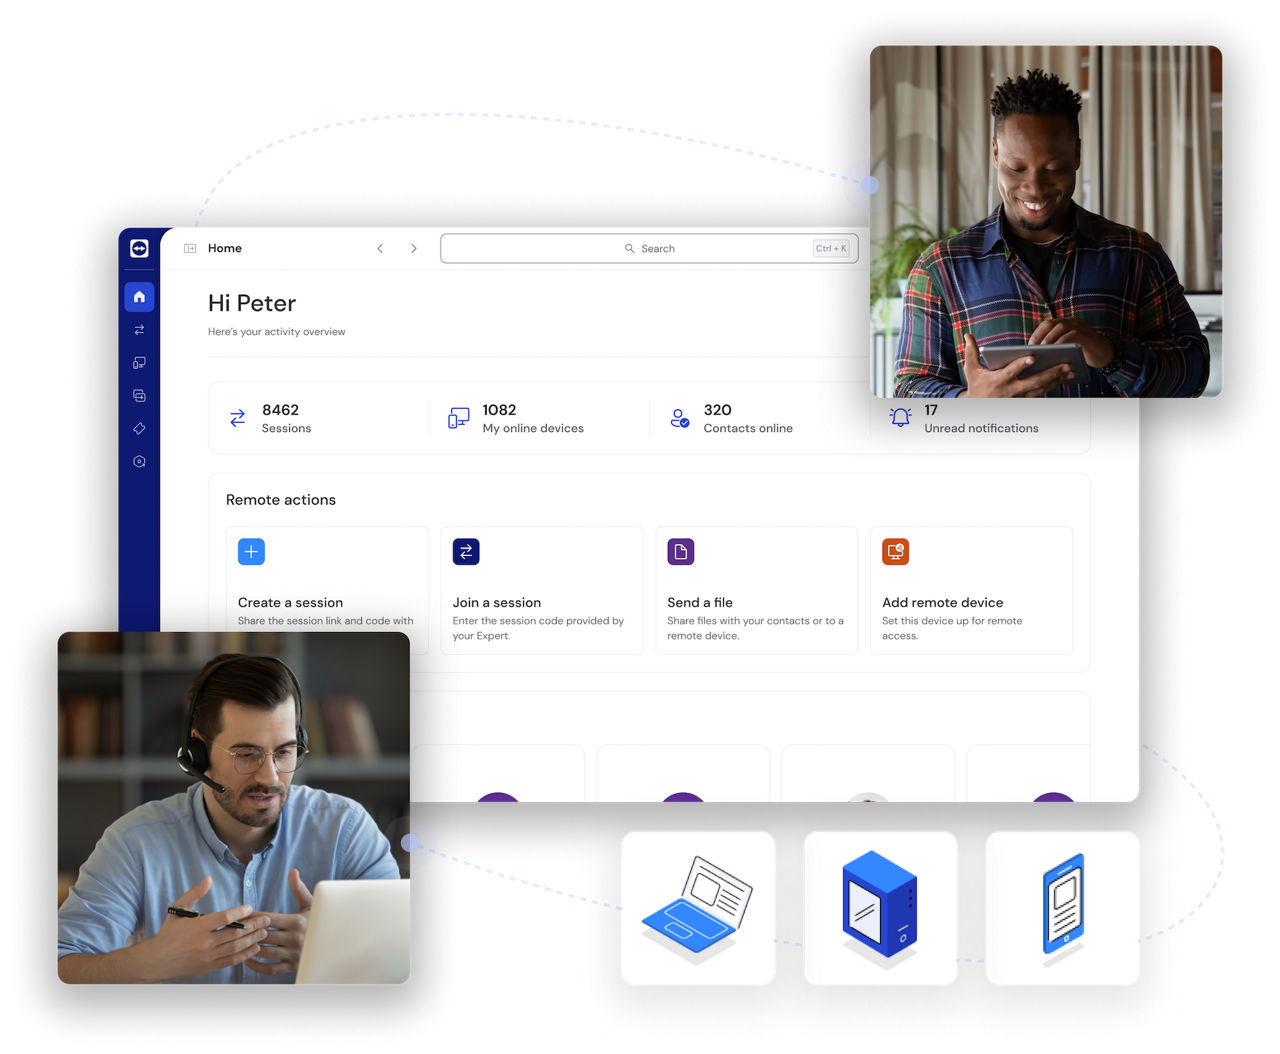
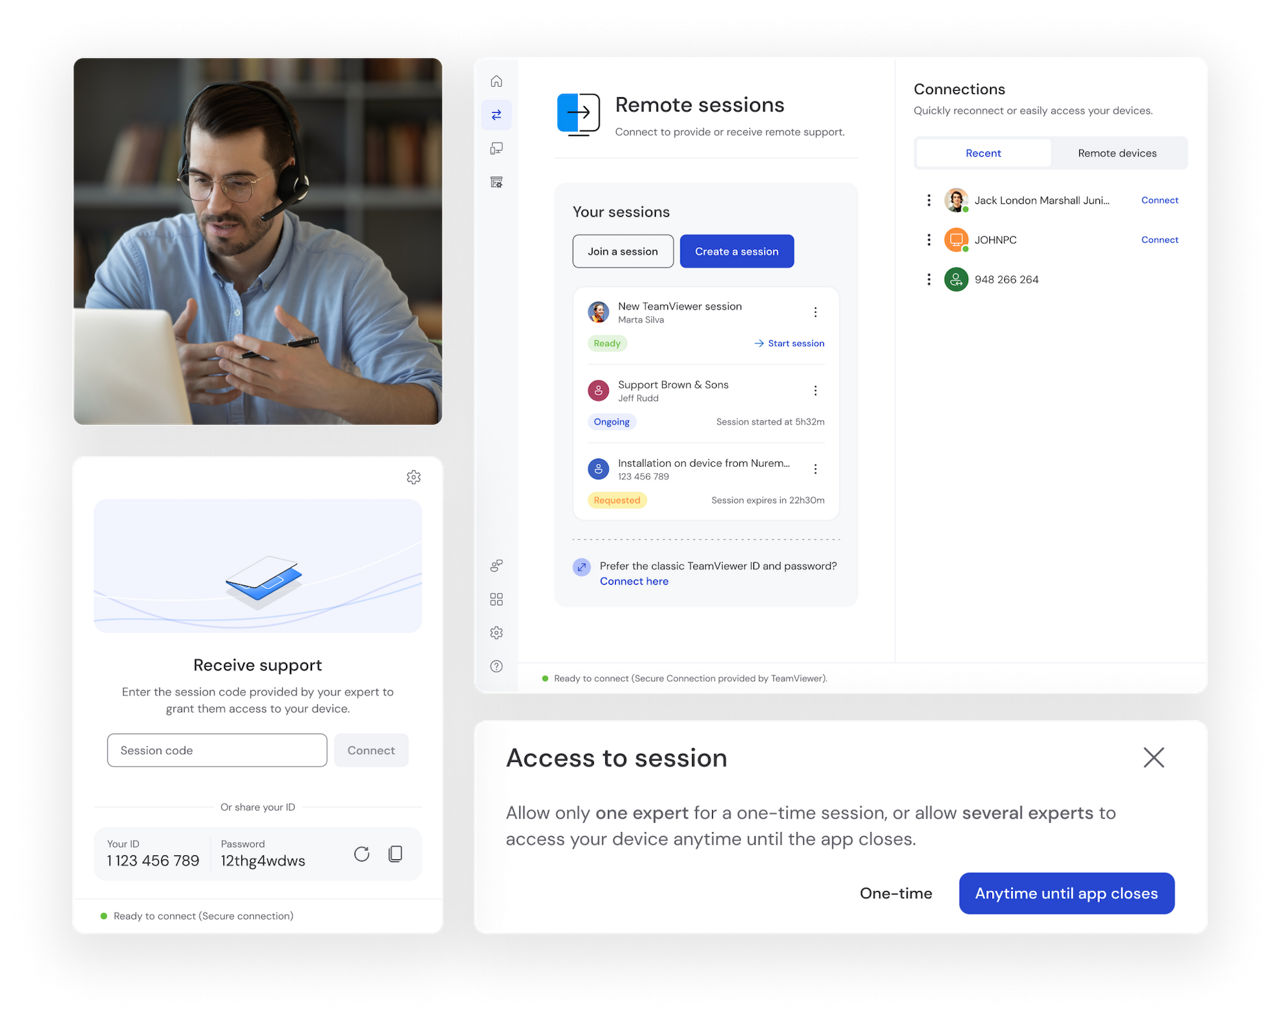
User-friendly and intuitive, TeamViewer requires minimal setup and training. Connect instantly with just a few clicks, without the need for complex configurations.
Integrate TeamViewer with leading business applications to improve efficiency and streamline workflows, making remote support a seamless part of your daily operations.
Enhance your remote access with powerful features from TeamViewer AI. Resolve issues faster and boost IT efficiency through real-time remote control, AI-assisted troubleshooting, and automated session summaries.
Support any operating system and device. And with the full-featured TeamViewer Remote web app, you can access all your devices from any browser.
TeamViewer fulfills a wide range of remote support needs while improving productivity and maintaining connectivity for users across all industries and organizational sizes.
TeamViewer supports your small business with secure and reliable remote access solutions that transform how you operate day-to-day. Our solution provides the technological backbone that allows your team to manage customer tickets, perform essential remote IT support, and enable productive work. This software for remote access scales with your business needs, ensuring you only pay for what you actually use.
Small business owners particularly appreciate the flexibility TeamViewer offers when juggling multiple responsibilities. Whether you're traveling to meet clients, working from home, or stepping away from the office for personal matters, you maintain complete visibility and control over your business operations. The intuitive interface requires minimal training, allowing even non-technical staff to quickly master the essential functions, further reducing implementation costs and accelerating your return on investment.

Access your personal devices from anywhere in the world with TeamViewer. Whether you need to retrieve important documents from your home computer while traveling or assist your children with computer problems while you're at work, TeamViewer transforms complicated technical tasks into simple, efficient processes that save you valuable time and eliminate frustration.
The personal use version offers robust security features that protect your sensitive data while maintaining the ease of use that makes TeamViewer so popular among non-technical users. This accessibility makes TeamViewer’s remote desktop software the perfect solution for maintaining your digital life regardless of physical location, giving you peace of mind knowing your important files and family members' technical needs are always within reach.
Digital nomads rely on TeamViewer’s fastest remote access software to ensure they can access critical files, use specialized software, and collaborate with colleagues regardless of whether they're in a Bali café, a Barcelona co-working space, or a cabin in the mountains.
TeamViewer's lightweight application performs even on limited bandwidth connections, making it ideal for digital professionals who frequently find themselves using hotel WiFi or mobile devices' hotspots. The secure encryption protocols protect sensitive work data across these varied networks, addressing a key concern for remote professionals who handle client information. With cross-platform functionality that works across Windows, Mac, Linux, iOS, and Android devices, digital nomads can maintain their preferred workflow regardless of which devices they carry on their travels.
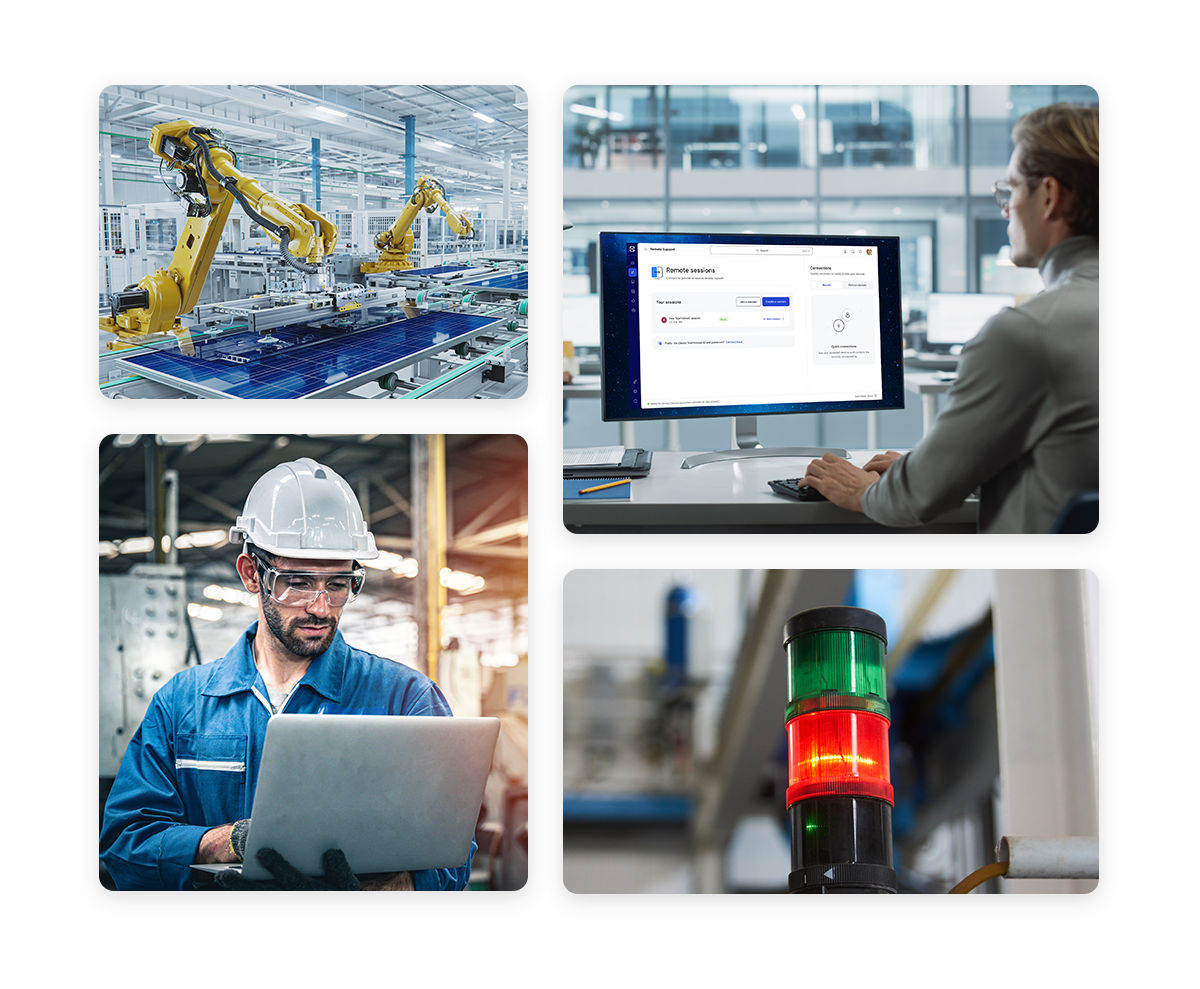
TeamViewer provides comprehensive remote monitoring and control capabilities for your industrial ecosystem. Production managers can oversee multiple production lines simultaneously from a central location, conducting real-time analysis without physical floor walks.
Maintenance teams gain secure remote access to troubleshoot equipment, run diagnostics, and deploy updates remotely—particularly valuable for hazardous or remote locations. The remote desktop software's detailed logging supports regulatory compliance while generating data for predictive maintenance that reduces operational disruptions.
TeamViewer scales effortlessly across your global enterprise operations, giving centralized IT teams the power to deliver consistent, high-quality remote support to thousands of employees worldwide.
The robust administration console provides complete connection visibility to maintain security protocols while delivering detailed support analytics. The unattended remote access capability allows IT staff to perform maintenance, updates, and troubleshooting without requiring end-user participation.
Whether you prefer on-premises deployment or cloud-based management, TeamViewer adapts to your enterprise architecture while ensuring the reliable remote support essential for business continuity across your global footprint.
Spotlight
TeamViewer is a leading remote access software solution, offering fast, secure, and reliable remote connectivity for businesses and individuals alike. It allows you to seamlessly access remote computers, devices, data, and applications from anywhere, empowering you to stay connected on the go or from your smartphone. Whether you need to remotely manage commercial equipment, optimize industry processes, or enhance IT support, TeamViewer Remote has you covered.
Remote access software allows users to connect to and control another device from a distance, enabling remote desktop work, IT support, and secure data access. It facilitates collaboration between teams in different geographic locations by remotely accessing machines that would otherwise be physically inaccessible.
Remote access software uses an internet connection to establish a secure link between two remote computers, allowing users to control the remote computers as if they were physically present.
Enterprise-grade remote desktop software, such as TeamViewer, ensures secure and seamless connectivity for remote employees, IT support teams, and customer service operations.
TeamViewer is one of the best remote access software solutions for Windows, offering cross-platform support, advanced security, and an intuitive user experience.


