Knowledge Base
Settings for a TeamViewer Meeting
Last Modified 7 мар. 2024 г.
This article applies to all TeamViewer Meeting users and customers.
In a TeamViewer meeting, you can change the roles of the participants to either
- organizer or
- presenter.
TeamViewer Meeting allows you to control the audio and video settings as well as your screen sharing during the meeting.
Changing roles
It is possible to change the role of a meeting participant, e.g. if a participant other than the organizer wants to share their screen.
Prerequisite: You are the organizer of the meeting and have a meeting already open.
1. On the TeamViewer Meeting panel, open the Participants area which can be found on the lower right bottom of the meeting panel.
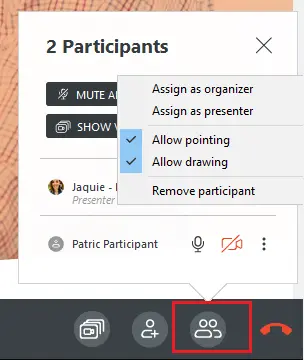
2. Click on the More Options icon next to the participant whose role you want to change.
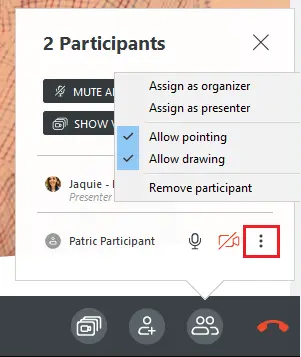
3. Select the Assign as organizer or Assign as presenter.
Changing audio settings
Prerequisite: an audio connection via Voice over IP must be active.
1. Once you create a meeting, navigate to the lower menu and from here you can mute or unmute your microphone by clicking on it.
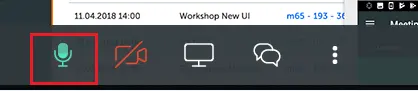
2. You can control the volume or the sound of your computer during your meeting by clicking on the More Options button on the lower menu and choosing the option Audio and video settings.
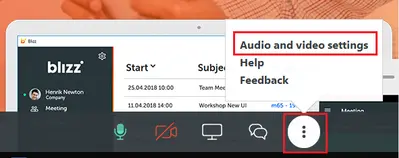
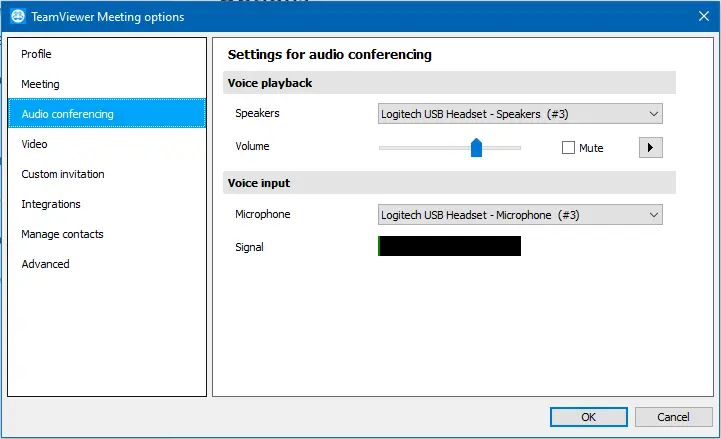
This shortcut takes you to the TeamViewer Meeting Options on the Audio conferencing tab where you can mute or unmute your microphone and/or your speakers and select any external hardware if available. From there you can navigate to the Video Tab if desired.
Controlling screen sharing
When you start a meeting, the screen sharing begins automatically according to the default setting. However, you can pause or stop the screen sharing according to your needs or you can change the settings so that your meeting starts as a call or as a video call.
1. On the TeamViewer Meeting panel, start your Meeting.
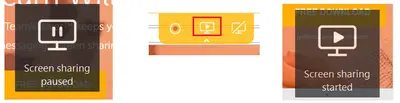
2. Navigate to the upper menu in your meeting and select the middle option to pause the screen sharing.

3. If you pause it, you will see a message pop up Screen sharing paused and the frame of your meeting will turn orange. To resume your screen sharing simply click on the same button and you will see the message pop up Screen sharing started. Your meeting frame will turn green.
4. If you would like to remove the frame and the screen sharing, navigate to the upper menu and choose the option End sharing on the right.

You will see the message Screen sharing ended and your meeting will turn into a call or a video call accordingly.
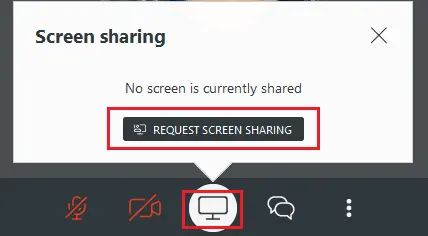
5. To resume screen sharing in a call, click on the Select Screen button in the lower menu, and click on Request Screen Sharing.
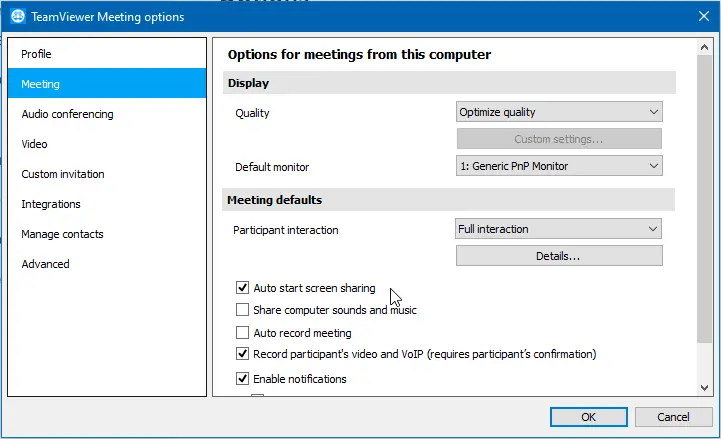
To deactivate the Auto start screen sharing feature, click on the TeamViewer Meeting Options and you will find the option on the Meeting. If you deactivate this option nothing is transmitted until you press the start button.
Deactivate Screen Sharing from the settings
To deactivate the Auto start screen sharing feature, click on the TeamViewer Meeting Options and you will find the option on the Meeting tab. If you deactivate this option nothing is transmitted until you press the start button as shown above. You will notice that there is an orange frame around your screen which indicates that the screen sharing is off.