Knowledge Base
Zendesk Support Integration - Installation and User Guide
Last Modified 8 мая 2026 г.
The TeamViewer integration for Zendesk allows you to manage and start all support cases from one place. With the TeamViewer integration for Zendesk, customers do not need to install anything. You can start a session with a simple click.
Please keep in mind that Integrations are not included in basic license packages. They have to be purchased separately as AddOns. For more information, please visit our website: http://www.teamviewer.com/integrations
About Zendesk
Zendesk is a web-based ticket system that offers an elegant solution for ticket management and help desk issues.
Prerequisite
To get started with TeamViewer in Zendesk Support, an administrator must create a custom ticket field prior to installation to store the TeamViewer session information:
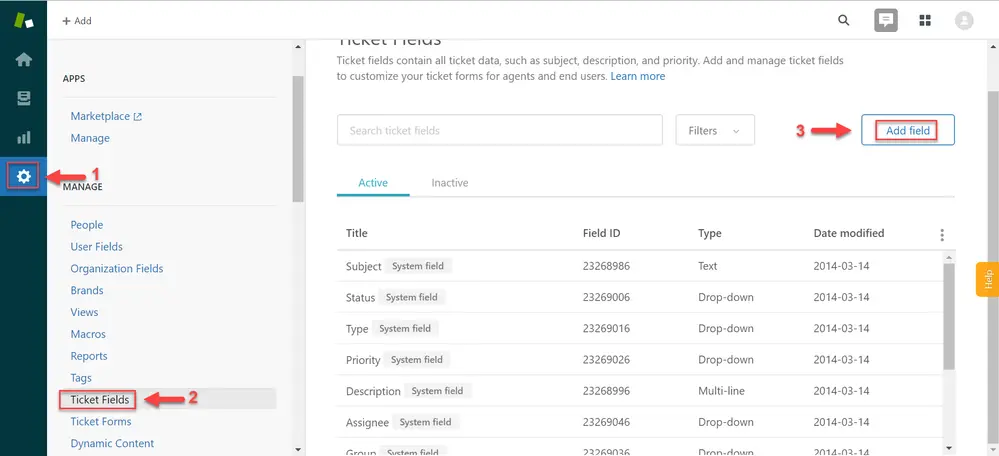
1. Go to Admin settings ➜ Ticket Fields ➜ Add Field ➜ choose Text.
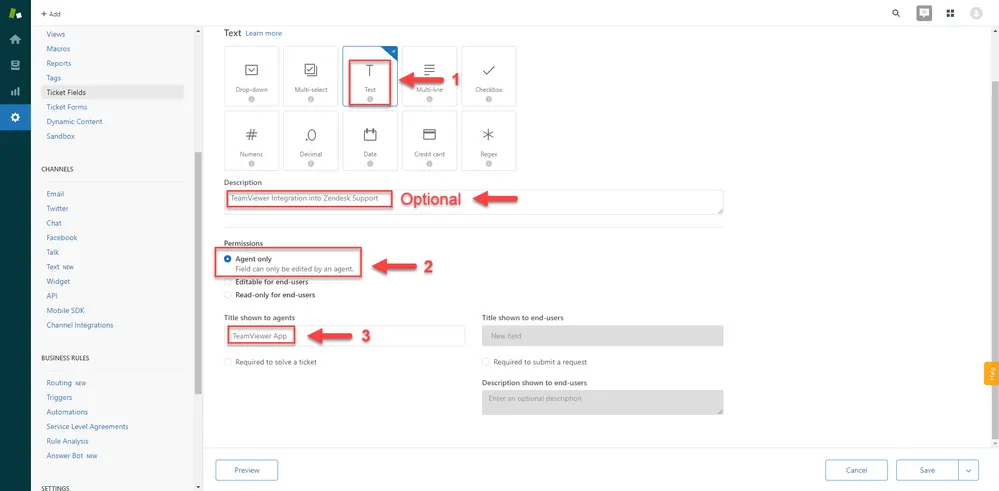
2. Choose a title e.g. ‘TeamViewer App’ to be shown to Agents with the required permissions.
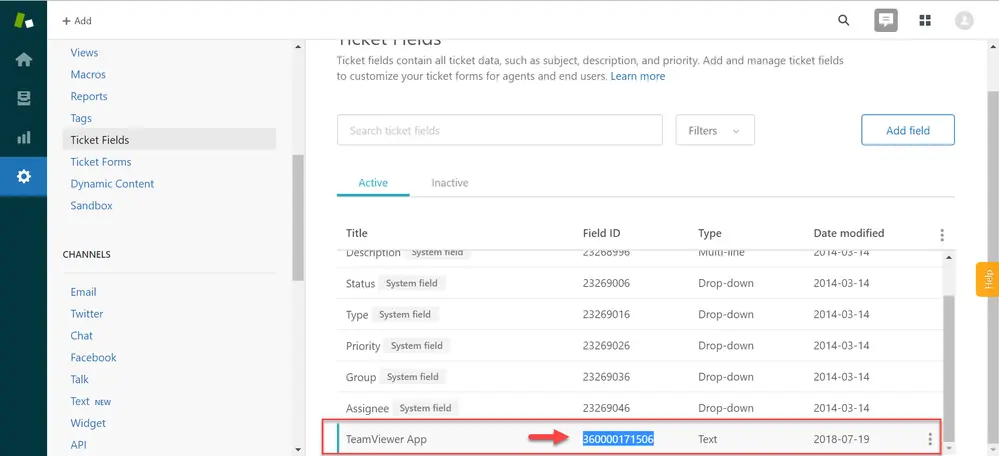
3. Once taken back to the list of ticket fields, find your new Field ID and copy it.
Installation
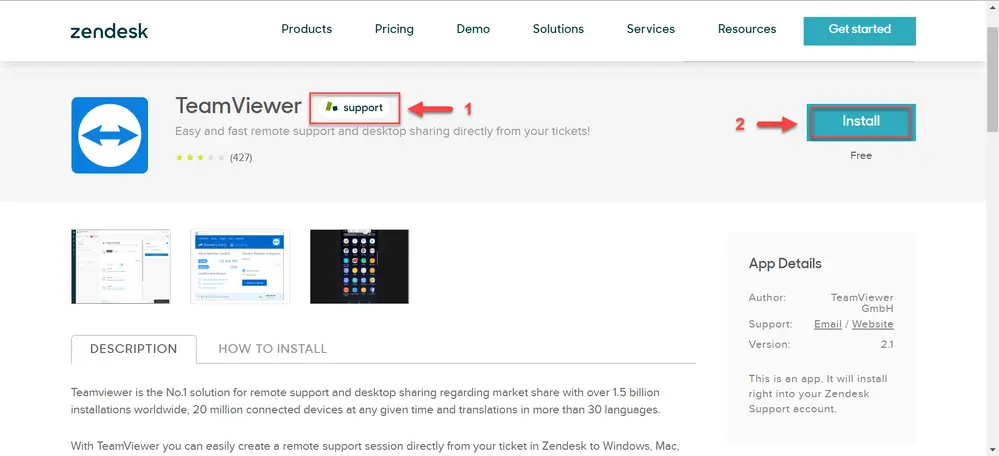
To install the TeamViewer App for Zendesk Support, head over to the Zendesk Marketplace and locate the 3rd party integration via the following link. Once the user confirms they are in the correct Zendesk Product listing in the Marketplace (also available for Zendesk Chat) they choose Install.
Configuring the TeamViewer app
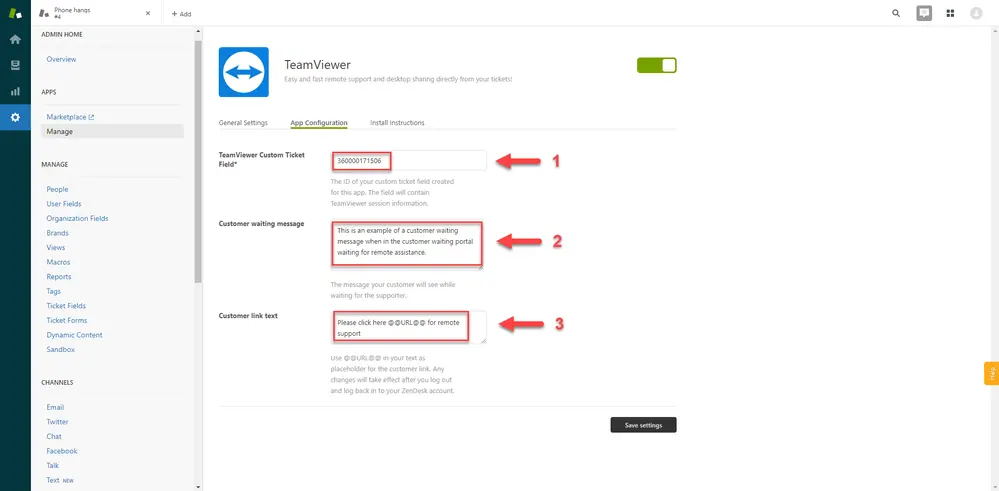
After installation, the administrator will need to configure the TeamViewer App to their specific settings. To change the TeamViewer App settings, users will need to navigate to Settings ➜ Manage Apps ➜ Locate TeamViewer ➜ Change Settings

Within the TeamViewer settings, administrators can optionally choose to restrict the App usage to different roles & groups created within their Zendesk Support instance under the General Settings.
To configure the TeamViewer integration, navigate to the 2nd tab ➜ App Configuration. Here administrators will paste their custom ticket field ID that was created in the previous step to display the App Title and Usage to agents. Administrators will need to configure a custom predefined link text that the customer will receive when inserting remote session details to a customer.
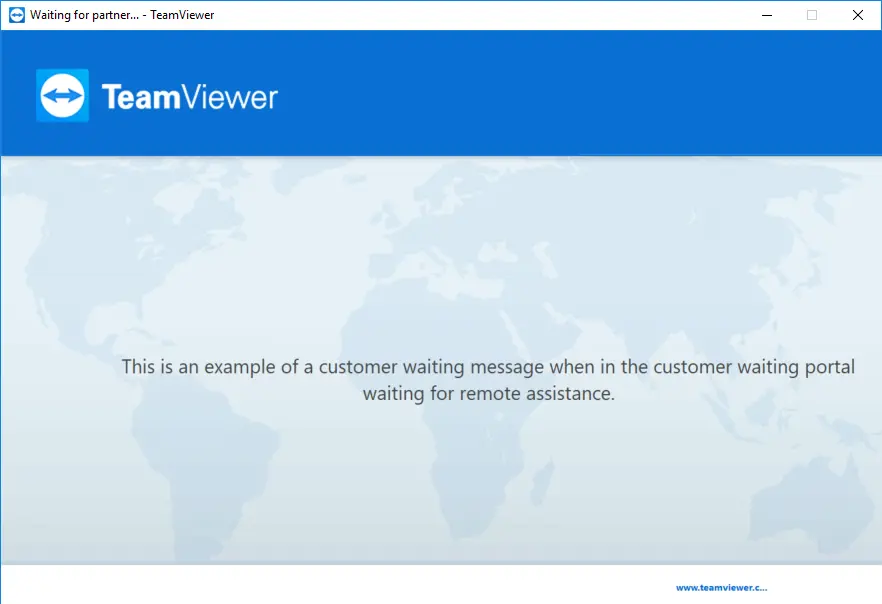
Additionally, administrators can create a custom waiting message their customers will see when waiting for a supporter via the customer waiting portal.
Using the TeamViewer app
Now that we have completed the prerequisites, installed & configured the App, agents can support their customers by creating service cases and sharing session links to customers via the Support ticketing system.
Authenticating TeamViewer Account
*Required one-time Oauth sign in to authenticate the TeamViewer company administrator account and license before sessions can be generated.
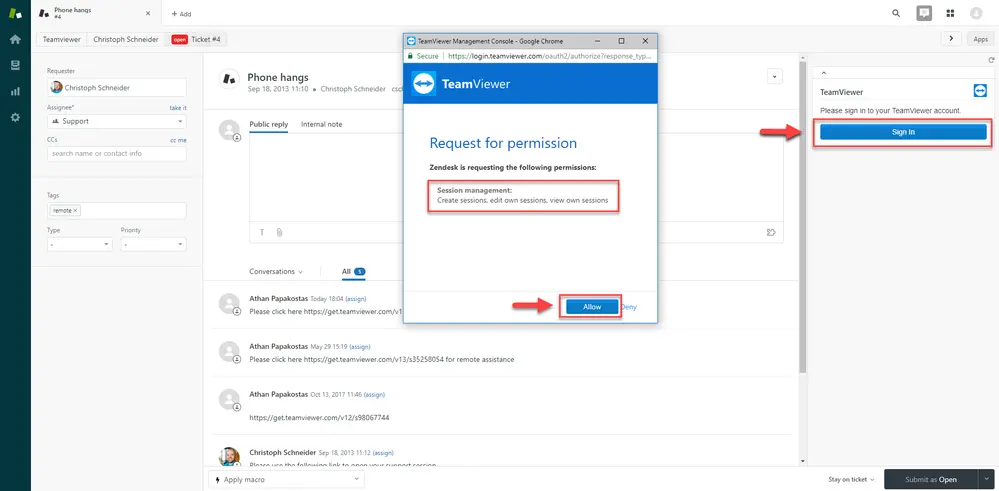
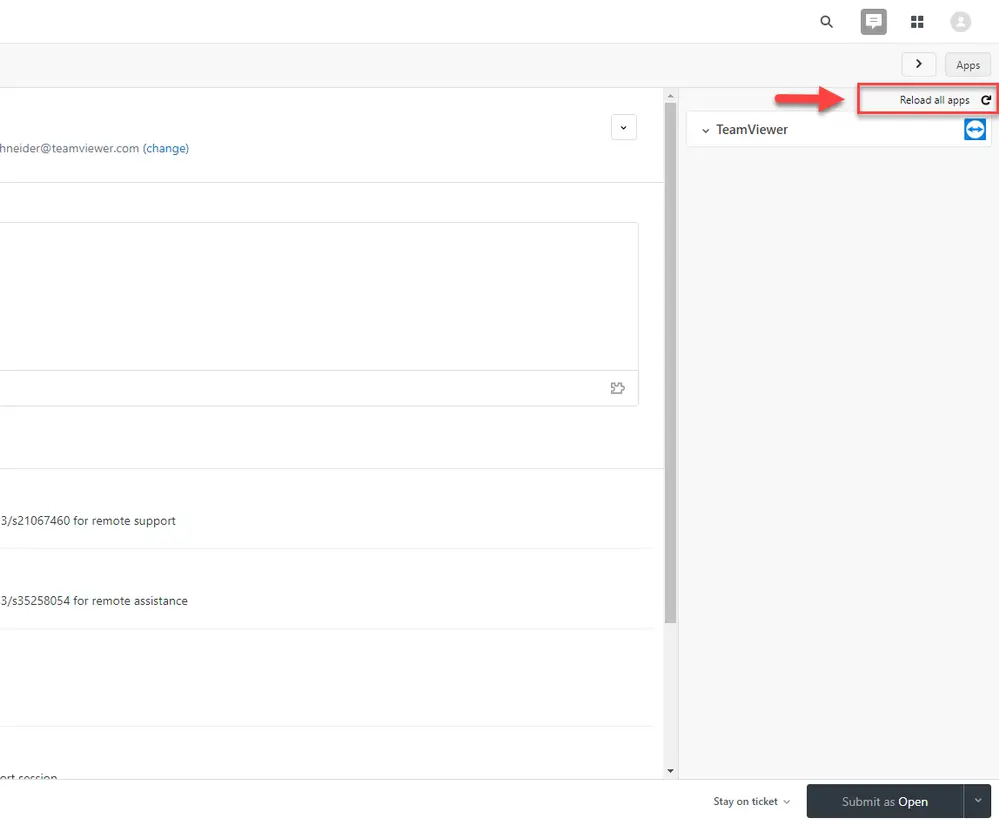
* Note: If you experience issues displaying the TeamViewer App in the widget area, please make sure to choose ‘Reload all Apps’ in top right corner.
Create Service Case
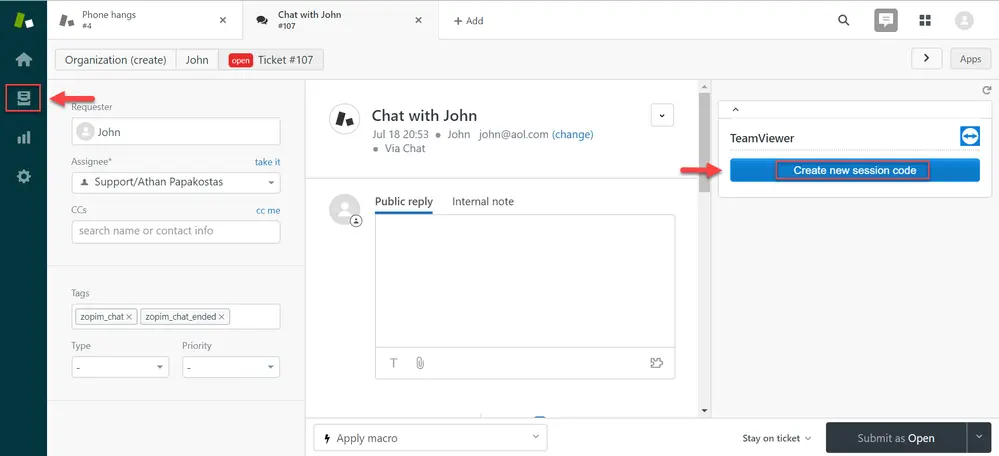
With the TeamViewer App enabled, agents can now enter the ticket view, choose a customer ticket and create a customer session link to be shared for remote assistance.
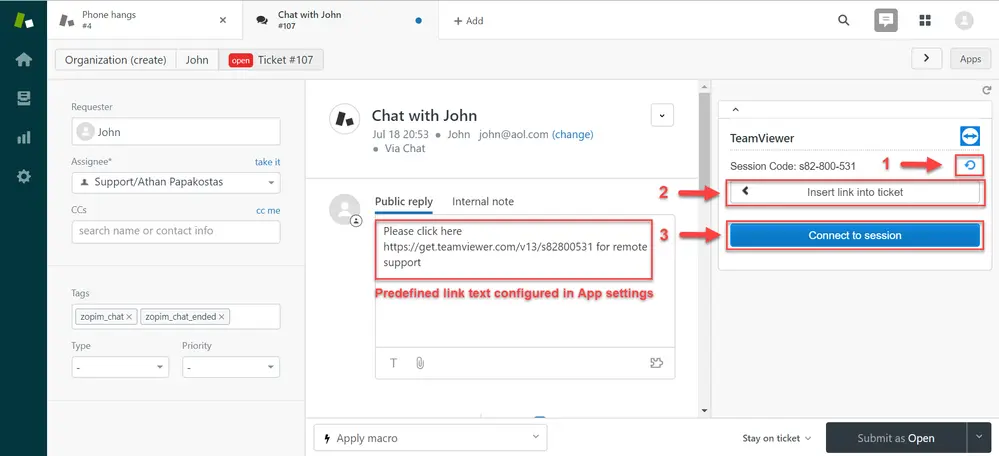
When the session code has been generated, the App interface will change to display the session code and different options such as:
- Regenerate a session
- Insert link into ticket
- Connect to session
Created sessions are valid until 24 hours after creation and then will expire. In the event a customer has not joined a session within 24 hours a new service case will need to be created by the agent for the customer.
Additional Configurations
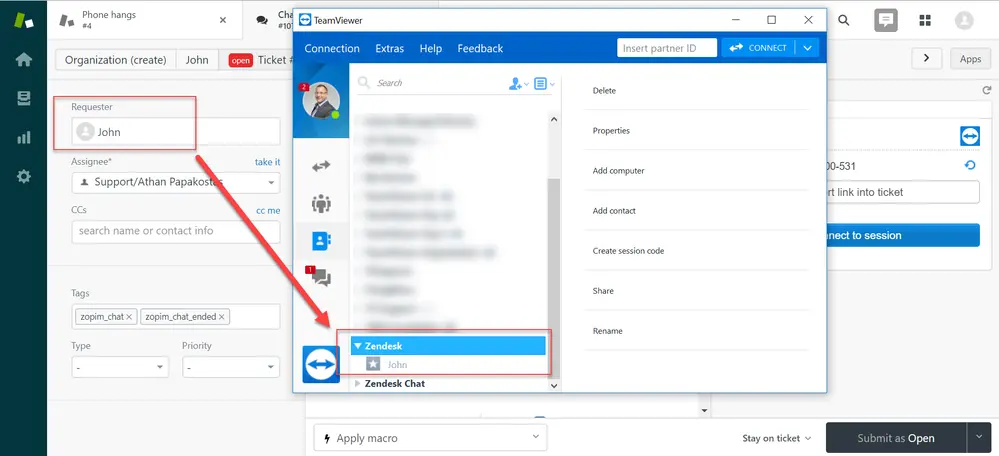
Upon session creation, the TeamViewer App will create a group named ‘Zendesk’ and retrieve the ticket requestor information, allowing agents to easily recognize customers waiting for remote assistance. This group can be shared out with other TeamViewer company members. For more information on sharing groups, please visit the Knowledge Base article here.
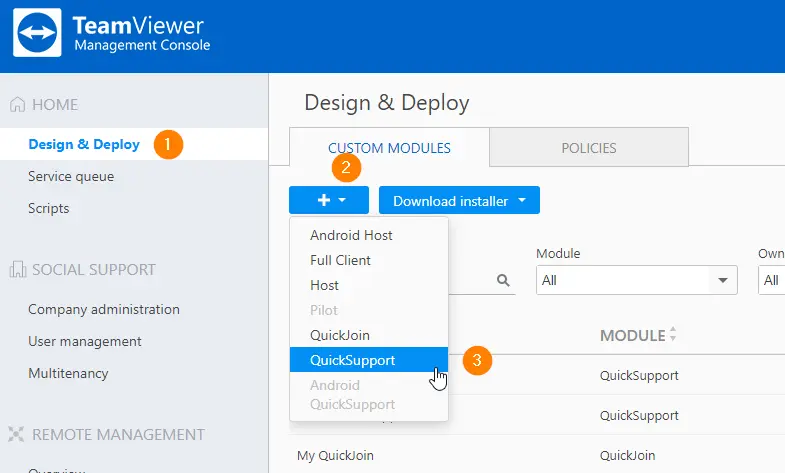
If company administrators wish to apply their own custom branding to the QuickSupport module displayed to their customers, they will need to navigate to the Management Console ➜ Enter Design & Deploy ➜ + button ➜ QuickSupport
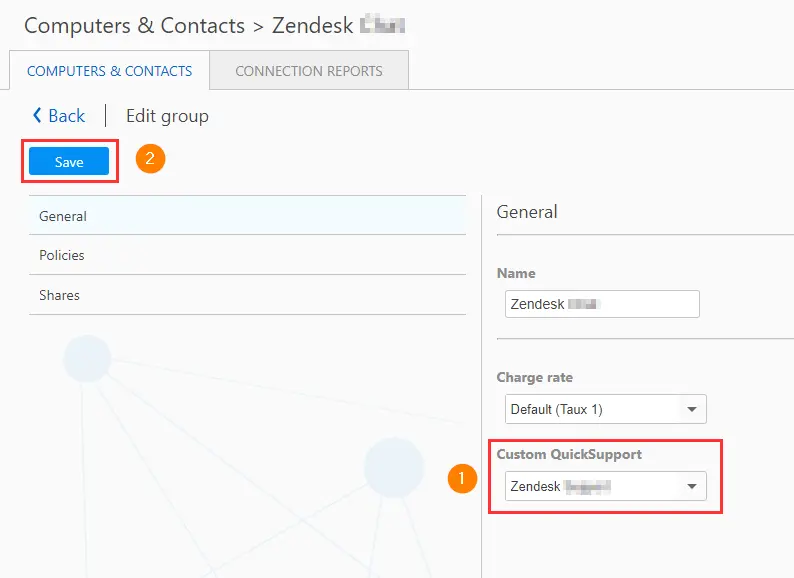
Once the custom QuickSupport has been created, the TeamViewer company administrator can apply the branded module to the Zendesk group used for customers interacting with the customer session links.
Revoking App Permissions
1. Navigate to the Management Console https://login.teamviewer.com
2. In top right corner, click Account ➜ Edit profile
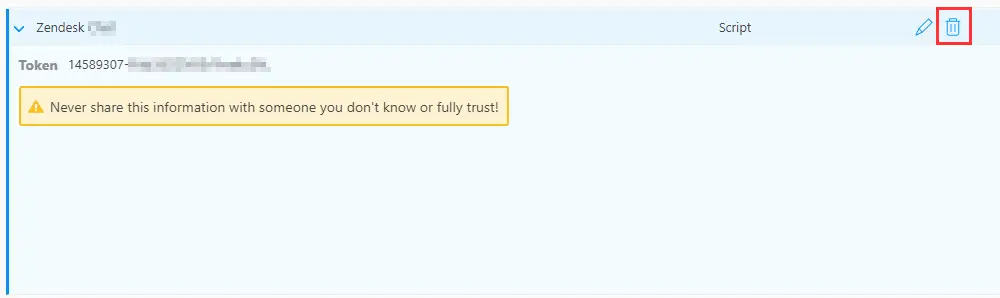
3. Click Apps ➜ [Name of App e.g. Zendesk Support] ➜ click on the Bin to delete the script