Sharing devices and device groups in TeamViewer helps you work faster and keep access transparent and secure. With the updated sharing workflow, you can share devices with clear permission levels and manage access in one place. This makes device sharing easier, more consistent, and similar to access management tools you may already know.
This article applies to all TeamViewer license holders.
How to share a device or device group
-
Open TeamViewer and go to Devices.
-
Select the device or device group you want to share.
-
Click the Share button.
-
Select the users or user groups you want to share with.
-
You can select multiple users or user groups at once.
-
-
Choose a permission level:
-
Read only
-
Read and write
-
Full control
-
Or select Custom to configure individual permissions
-
-
Click Share to finish.
Note: You can also select individual devices and share them following the same steps.
How to manage access to devices or device groups
1. Go to the shared device or device group.
2. Click the arrow next to Share and select Manage access.

Note: You can also access the permission overview via the device or device group details drawer.
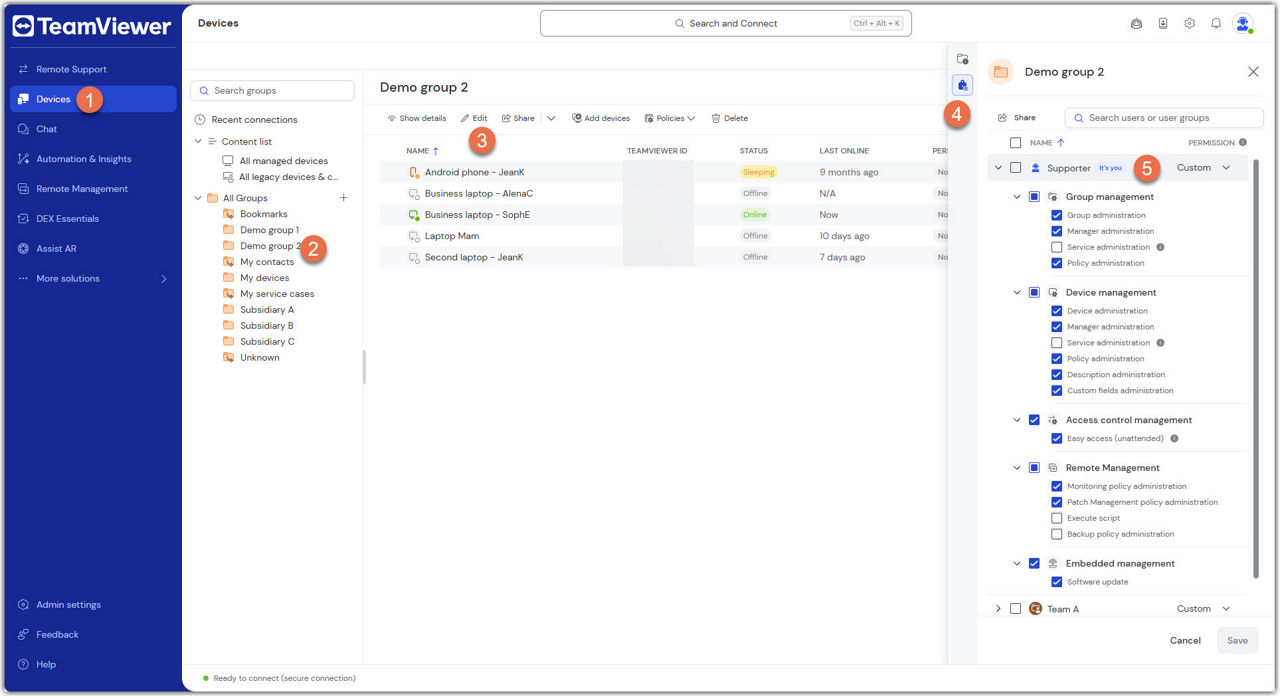
3. Review the list of users who have access.
4. To change access:
-
Select the user(s) or user group(s)
-
Choose the new permission level or adjust custom permissions
5. To remove access:
- Select the user(s) or user group(s)
- Click Remove
6. To confirm, click Save.
