TeamViewer's browser-based screen sharing lets you start a support session instantly, no installation required. Send a link, connect in seconds, and see exactly what's happening on their screen. If you need more control later, you can guide them to download TeamViewer QuickSupport directly from the session.
This article applies to all TeamViewer Business, Premium, and Corporate license holders.
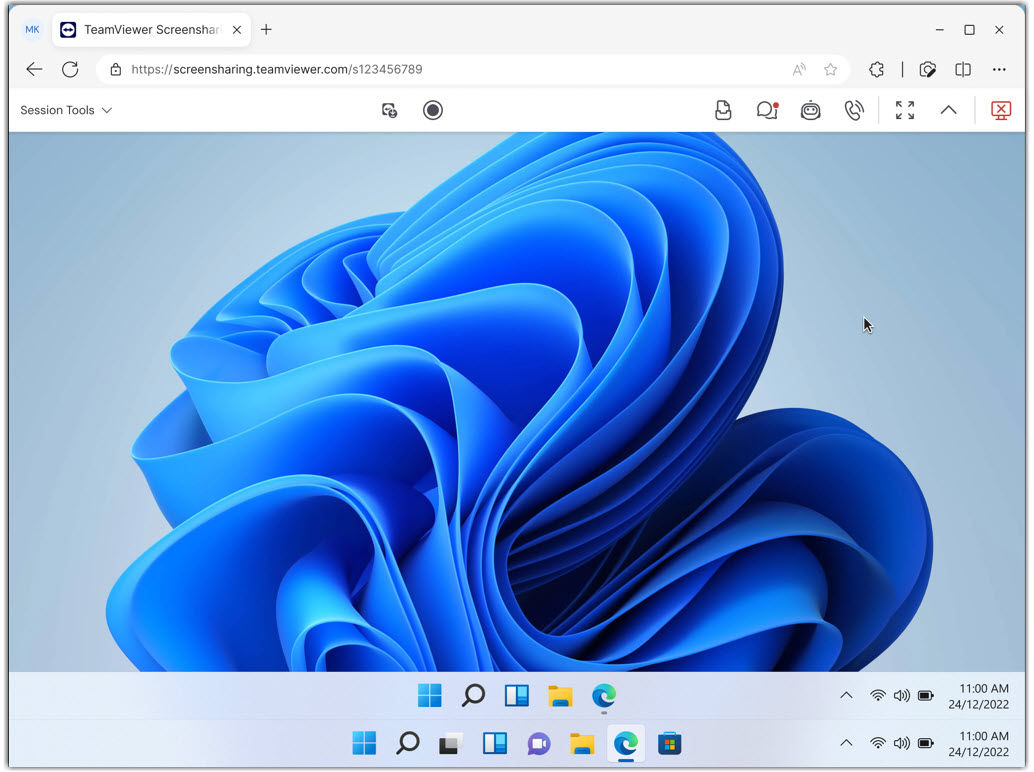
As a TeamViewer Tensor admin, we want you to be aware that our new browser‑based screen sharing feature uses a dedicated TeamViewer subdomain: http://screensharing.teamviewer.com
Even though this feature is not yet available for TeamViewer Tensor, this subdomain is already active for other license types.
If your organization needs tight control over incoming connection methods, you can block http://screensharing.teamviewer.com at the firewall level to prevent any browser‑based screen-sharing requests from reaching your network.
We recommend reviewing your security policies now so you can decide whether to allow or block this connection type before it becomes available to your users.
How to start a screen sharing session
Follow these steps to create and share a browser-based screen sharing session:
1. Sign in to your TeamViewer account via https://web.teamviewer.com/ and go to Remote Support.
2. Click the Sessions tab.
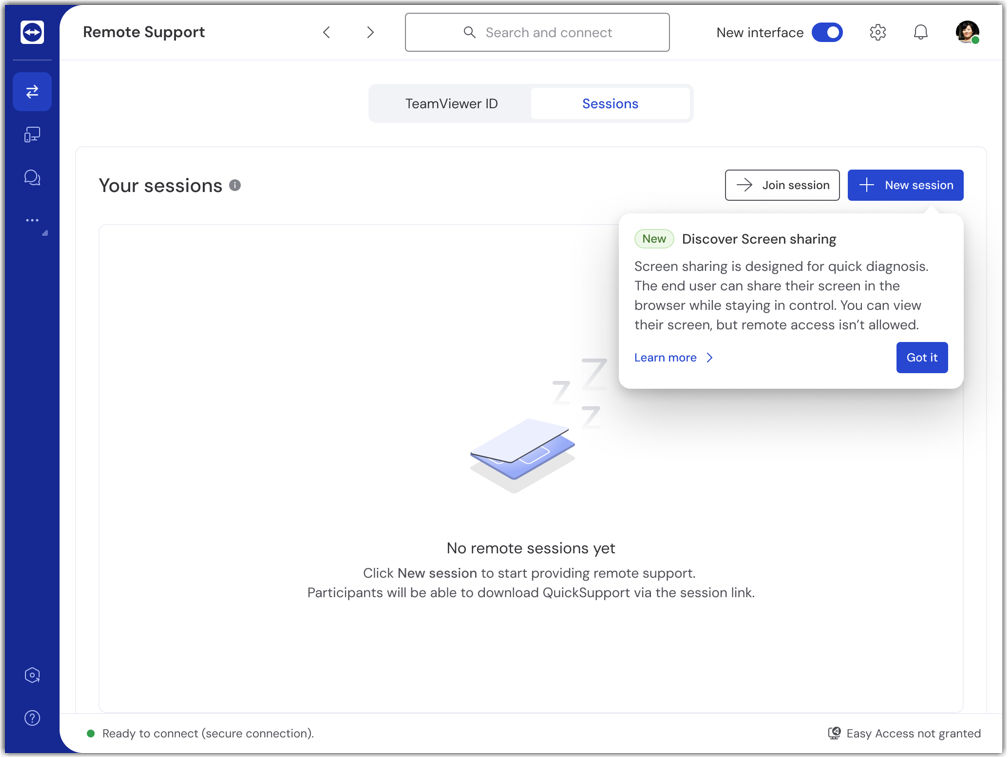
3. Click New session.
4. Click the Screen sharing tab.
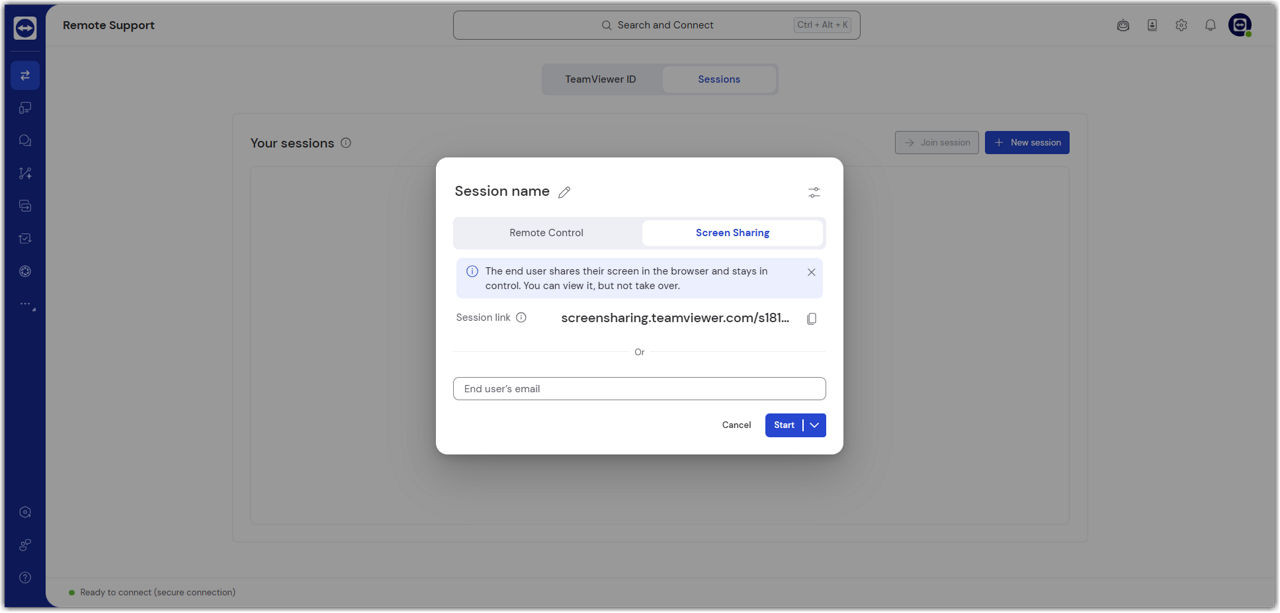
5. Choose how to invite the end user:
- Click Copy link to copy the session link and send it through your preferred communication channel (chat, email, phone), or
- Click Invite via email to send the link directly from TeamViewer.
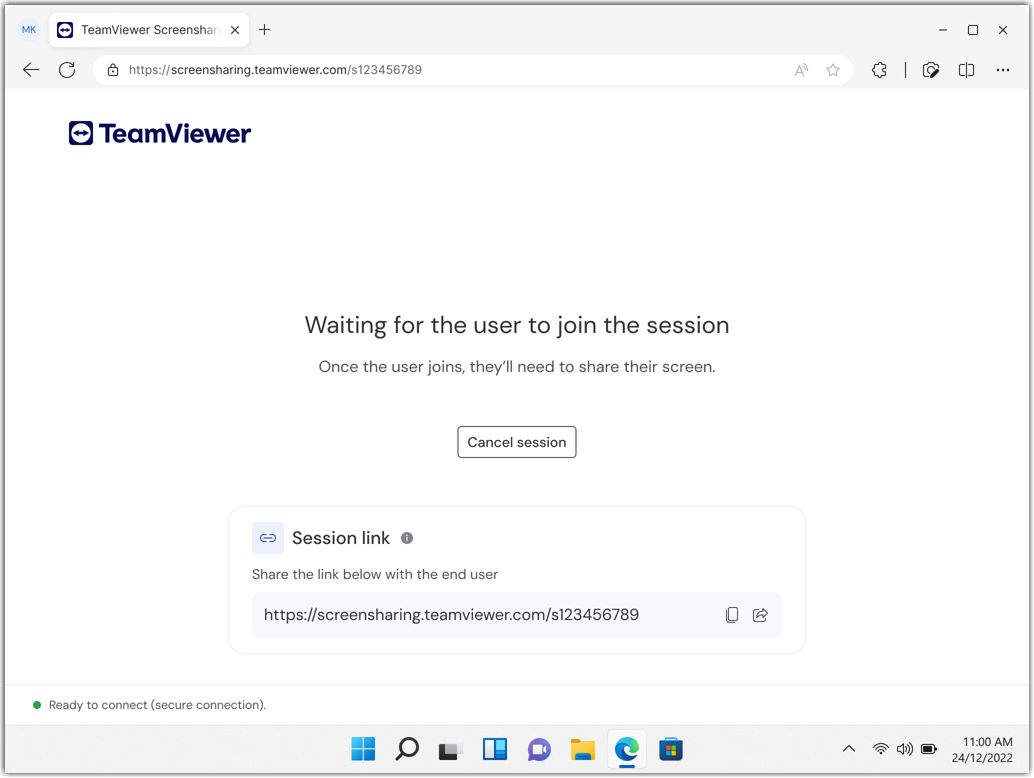
6. Click Start to begin the session and wait for the end user to connect.
How to join a screen sharing session (end user steps)
Share these instructions with the end user who needs support:
1. Open the session link in your web browser.
2. Review the supporter details and click Check supporter to verify who will see your screen.

3. Select the checkbox I have read the supporter details and click Start session.
4. Click Share screen.
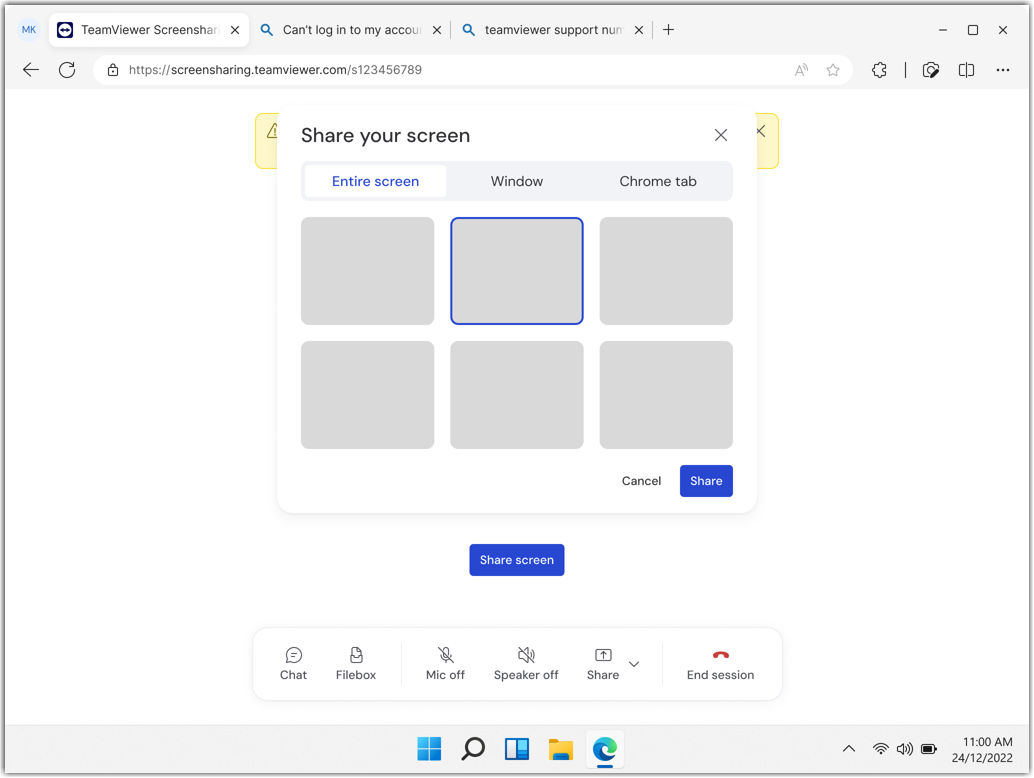
5. Choose what you want to share:
- Entire screen to show everything on your desktop
- Window to share only one specific application
- Tab to share just one browser tab
6. Click Share to begin the screen sharing session.
How to upgrade to full remote control
If you need to take control of the end user's device:
1. In the session toolbar, click Download QuickSupport.

2. The end user will be prompted to download QuickSupport and to run the file.
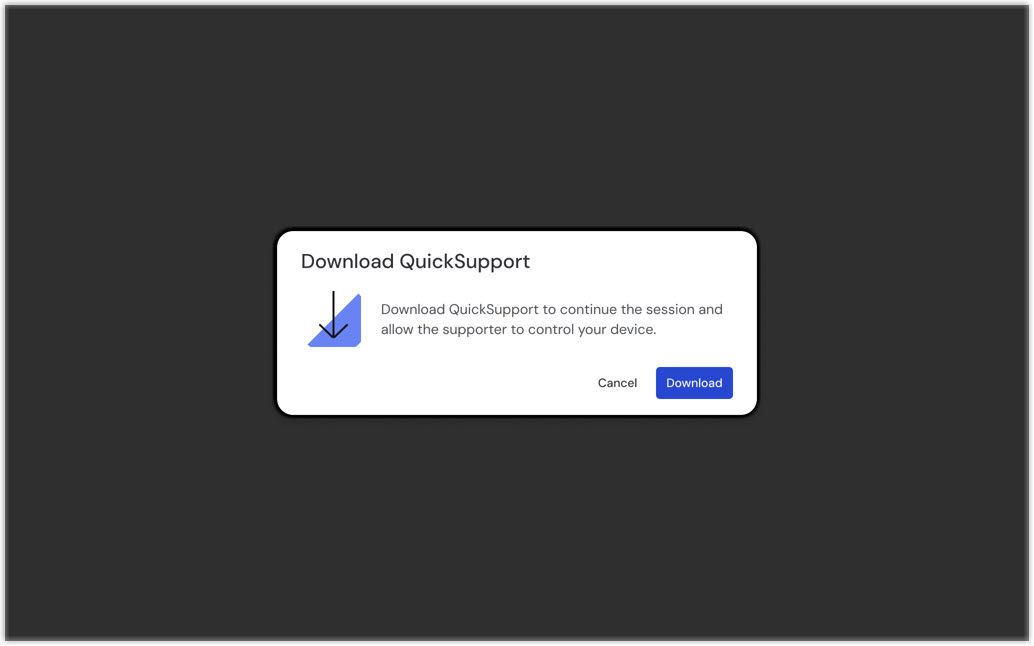
3. Once QuickSupport launches, you can connect via ID and password, as they will be displayed on the end user’s screen, and support them with full remote control of their device.
