
Knowledge Base
Add users to your company
Last Modified 7 jul 2026
Company administrators have the ability to create accounts for both new and existing users within the company.
Note: When you add an existing user to your company, the devices assigned to them will not be automatically assigned to the company. To assign a device to your company, please follow these instructions.
This article applies to company administrators.
How to add new users
To add new users to your company, please follow the instructions below:
- Sign in with your admin account to web.teamviewer.com or within the client.
- Click the Admin settings on the bottom left-hand side of TeamViewer Remote's interface.
- Click on Users.
- Click on Add user and select Add user again from the drop-down.
- Enter
- a user name
- an e-mail address,
- a password
- Select the user group you want to assign to the user.
- Click Save.
How to add existing users
To add existing users to your company, please follow the instructions below:
Step 1: Admins add email IDs of the users
- Sign in with your admin account to web.teamviewer.com or within the client.
- Click Admin settings and within the User management section, click Users.
- Click on Add user and select Add existing account from the drop-down.
- Add up to 10 users at once.
Note: The existing accounts must not already belong to another company.
Step 2: Users accept the invite to join the company
- Users would receive an email inviting them to join the company.
- On clicking Join, the users will have to login with their TeamViewer credentials.
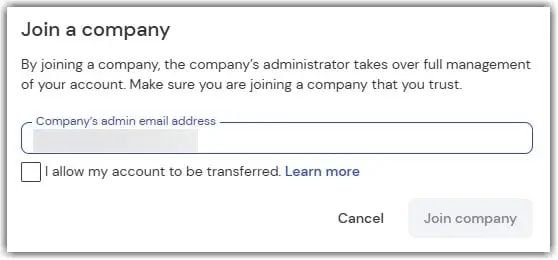
- Next, confirm that the prefilled admin email address is correct, tick the box I allow to transfer my account, and click on Join company.
- A message will confirm that your request has been successfully sent to the admin.
Step 3: Admins approve the requests
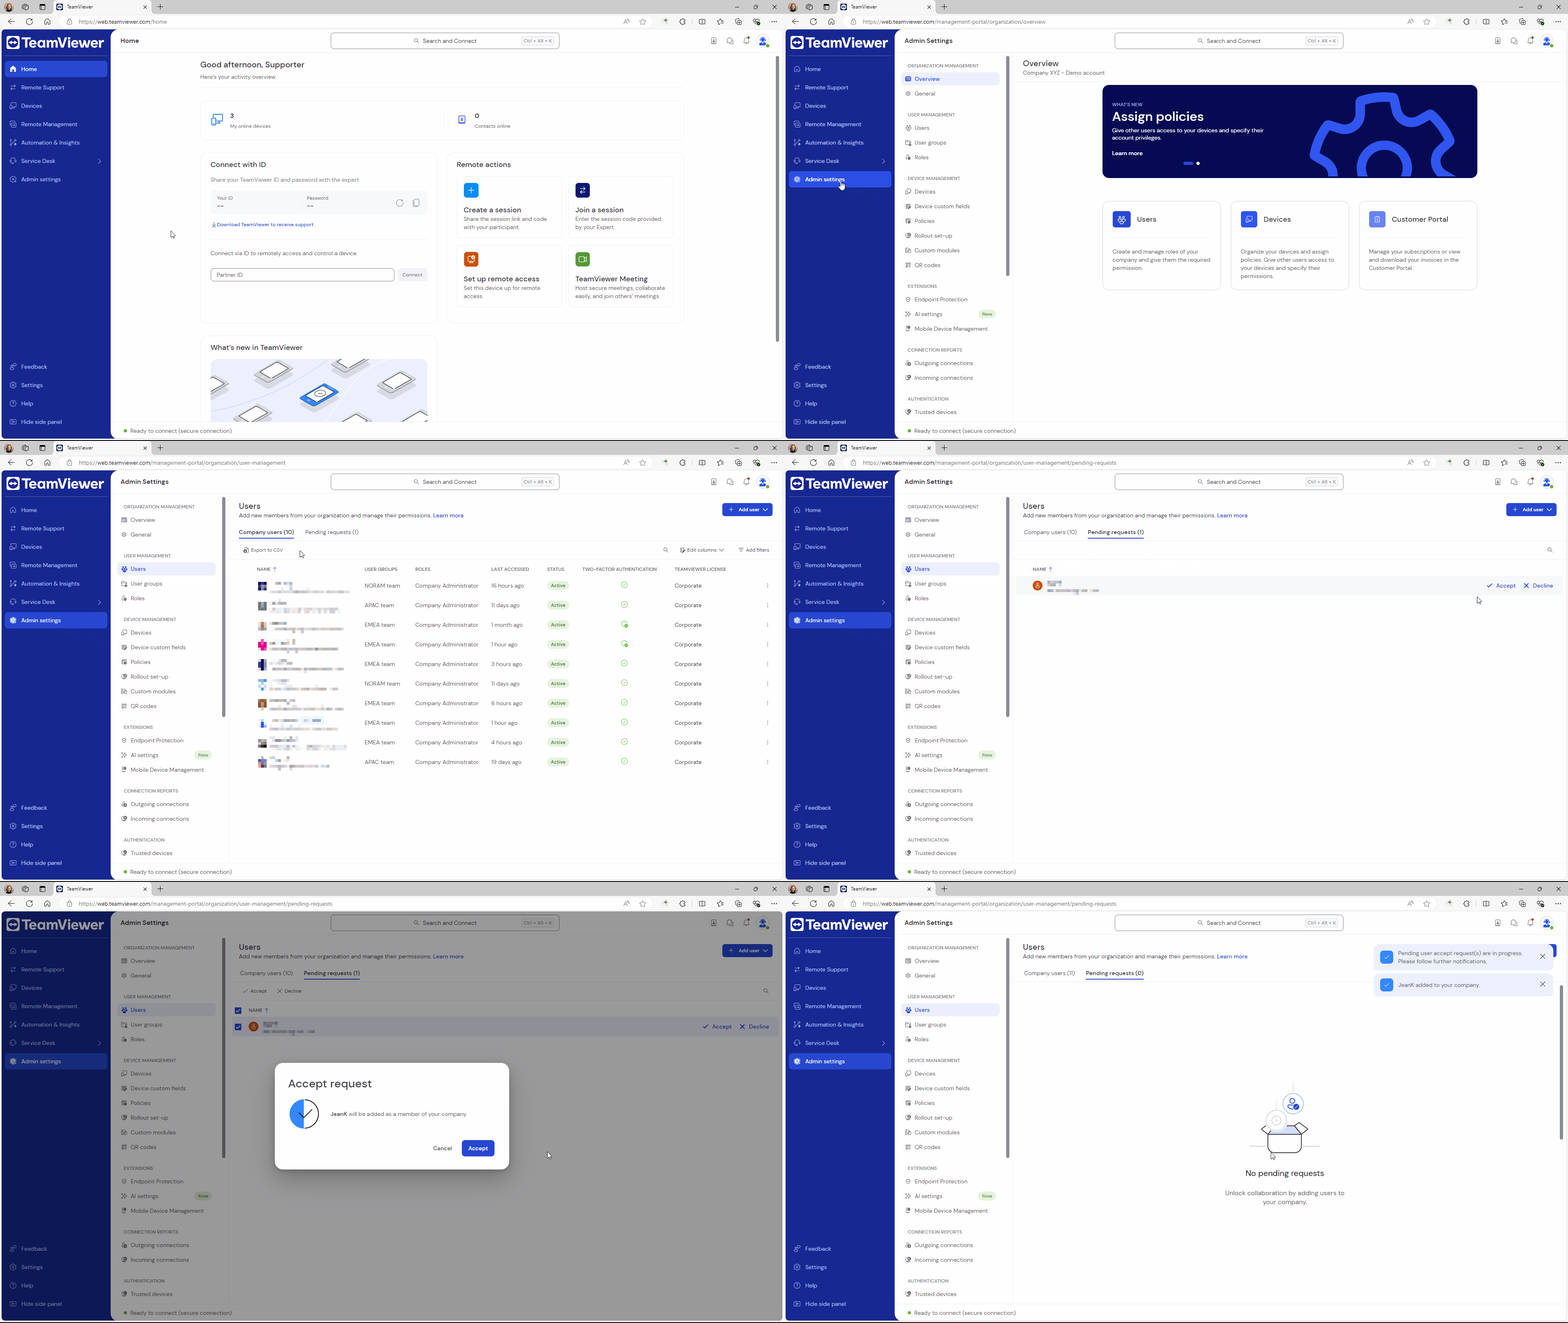
- Sign in with your admin account to web.teamviewer.com or within the client.
- Click Admin settings and within the User management section, click Users.
- Go to the Pending requests tab. You'll see the user request in the list. Click Accept and confirm by clicking Accept again.
The user has been successfully added to your user list.
Note: Accepting user requests is only possible with TeamViewer 15.55 or via the web app.