
Knowledge Base
Activate and set up your TeamViewer Remote Access license
Last Modified 4 нояб. 2025 г.
In this article, we'll explain how to get started with your Remote Access license.
We will talk about local and remote devices. In a typical home office situation:
- The local device is the computer at home
- The remote device is the computer in the office
This article applies to all TeamViewer Remote customers who have purchased a Remote Access license.
Step 1: Activate the Remote Access license on your TeamViewer account
Important note for customers who purchased after the 20th of March 2024: If you are a new customer and don't have a TeamViewer account, you will only have to set up a password after clicking the Confirm account button in the order confirmation e-mail. This will automatically create your TeamViewer account and activate the license. Once this step is done, you can jump to Step 2.
The first step is to activate the Remote Access license on your TeamViewer account. To do so, please follow the instructions below:
- Check your inbox and open the e-mail called Your TeamViewer License Activation.
- Next to TeamViewer Remote Access, click on the ACTIVATE link. You will be redirected to the sign in page.
- If you already have an account:
- Sign in with your TeamViewer credentials. Once you have signed in, you will be redirected to the activation page.
- Click the Activate button.
- If you haven't created an account yet:
- Click Sign Up.
- Enter your email address and name, and create a password.
- Read and accept the EULA and mark the captcha box. Once you have signed in, you will be redirected to the activation page.
- Click the Activate button. For more information on how to create an account, please check this article.
- If you already have an account:
- A confirmation pop-up will appear. Click Continue.
- Enter a company name (if not applicable, you can also simply enter your name, for example) and click Save and continue.
You have successfully activated your Remote access license on your TeamViewer account.
Step 2: Install the TeamViewer full client on your remote device
The second step is to install the TeamViewer full client on your remote device. To do so, please follow the instructions below:
- Download the TeamViewer full client from our download page: https://www.teamviewer.com/en/download/
- Access your Download file and open the downloaded TeamViewer file: TeamViewer_Setup.exe
- Click Next to start the installation.
- Once the installation is done, tick the box I accept the EULA and the DPA and click Continue.
You have successfully installed the TeamViewer full client.
Step 3: Activate the Remote Access license for the remote device
After installing the full TeamViewer client on your remote device, you can activate the Remote Access license. Follow the instructions based on whether you have physical access to your remote devices or not.
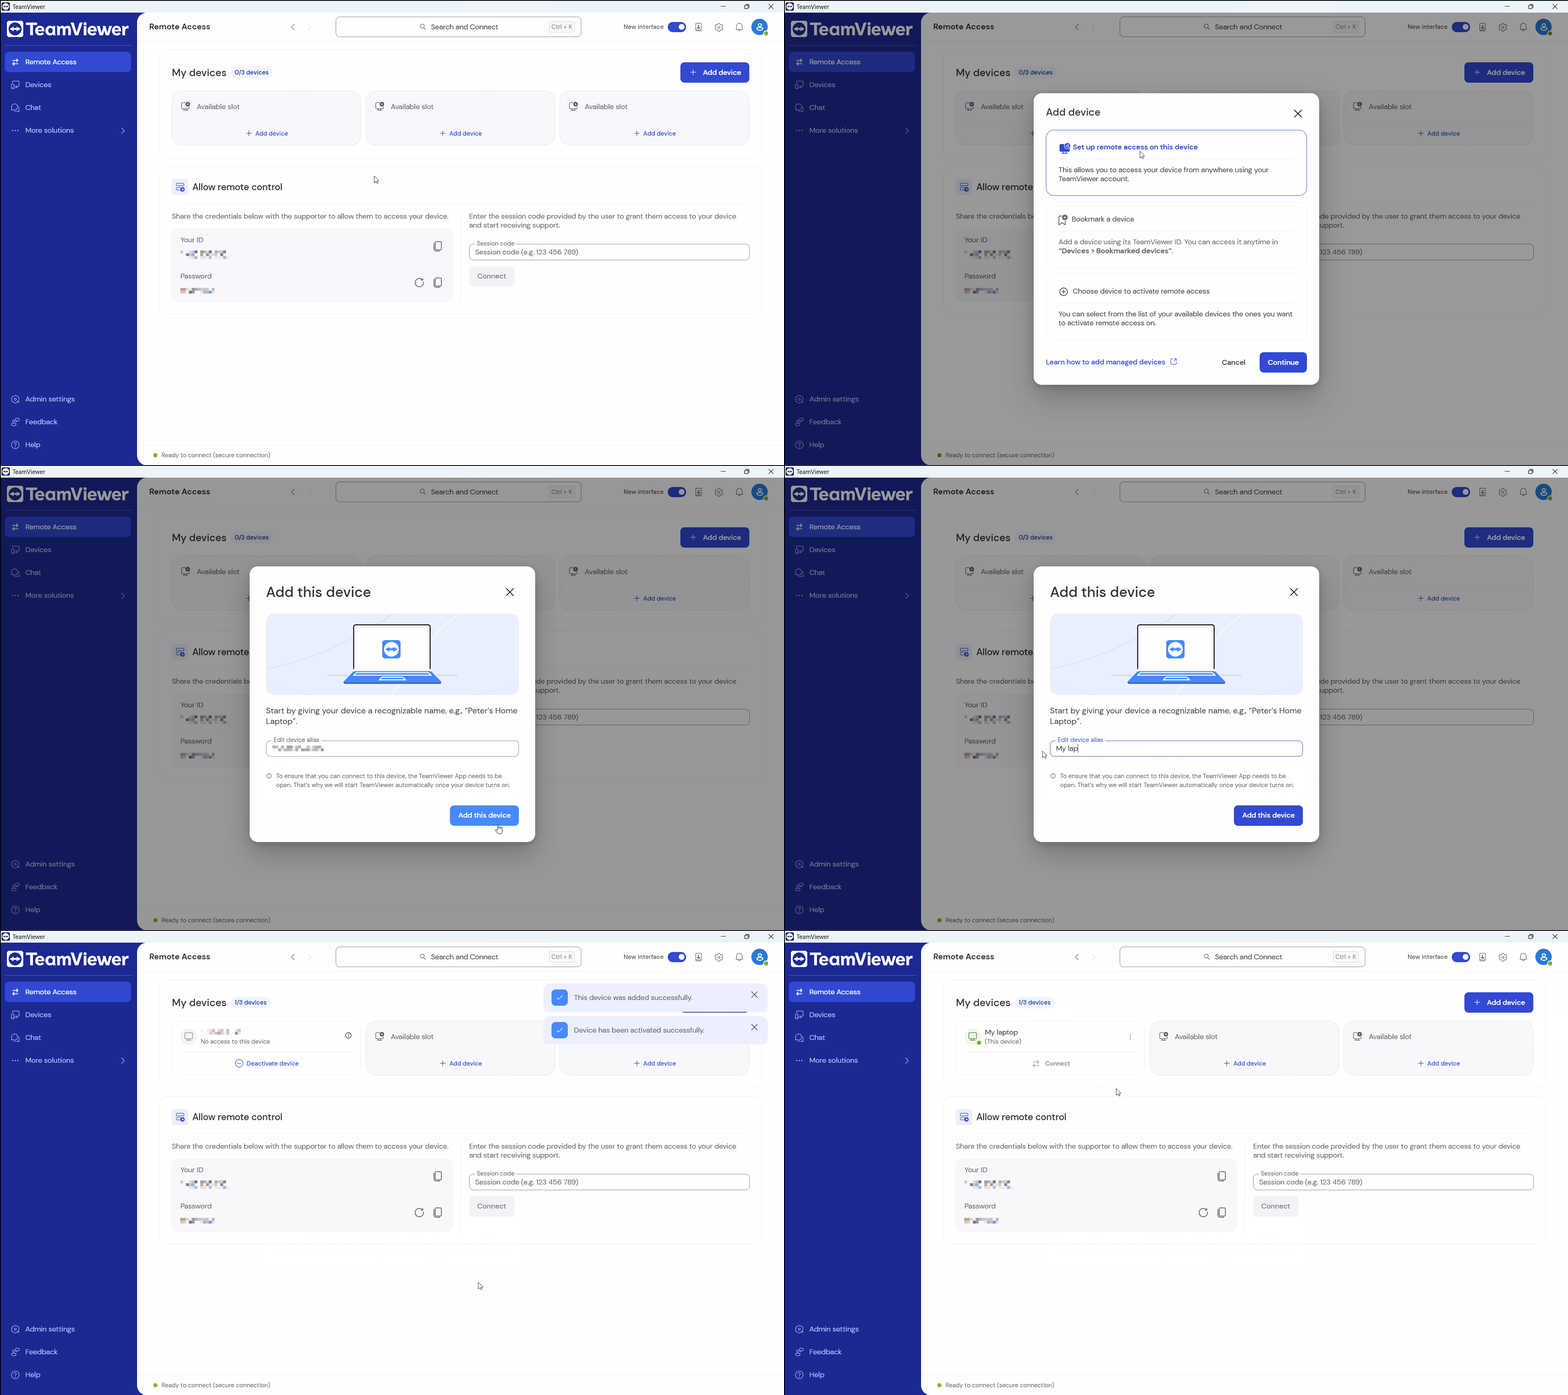
Step 4: Connect to your remote devices
You have successfully activated your Remote Access license on your remote device(s). You can now connect to them. To do so, please follow the video or the instructions below:
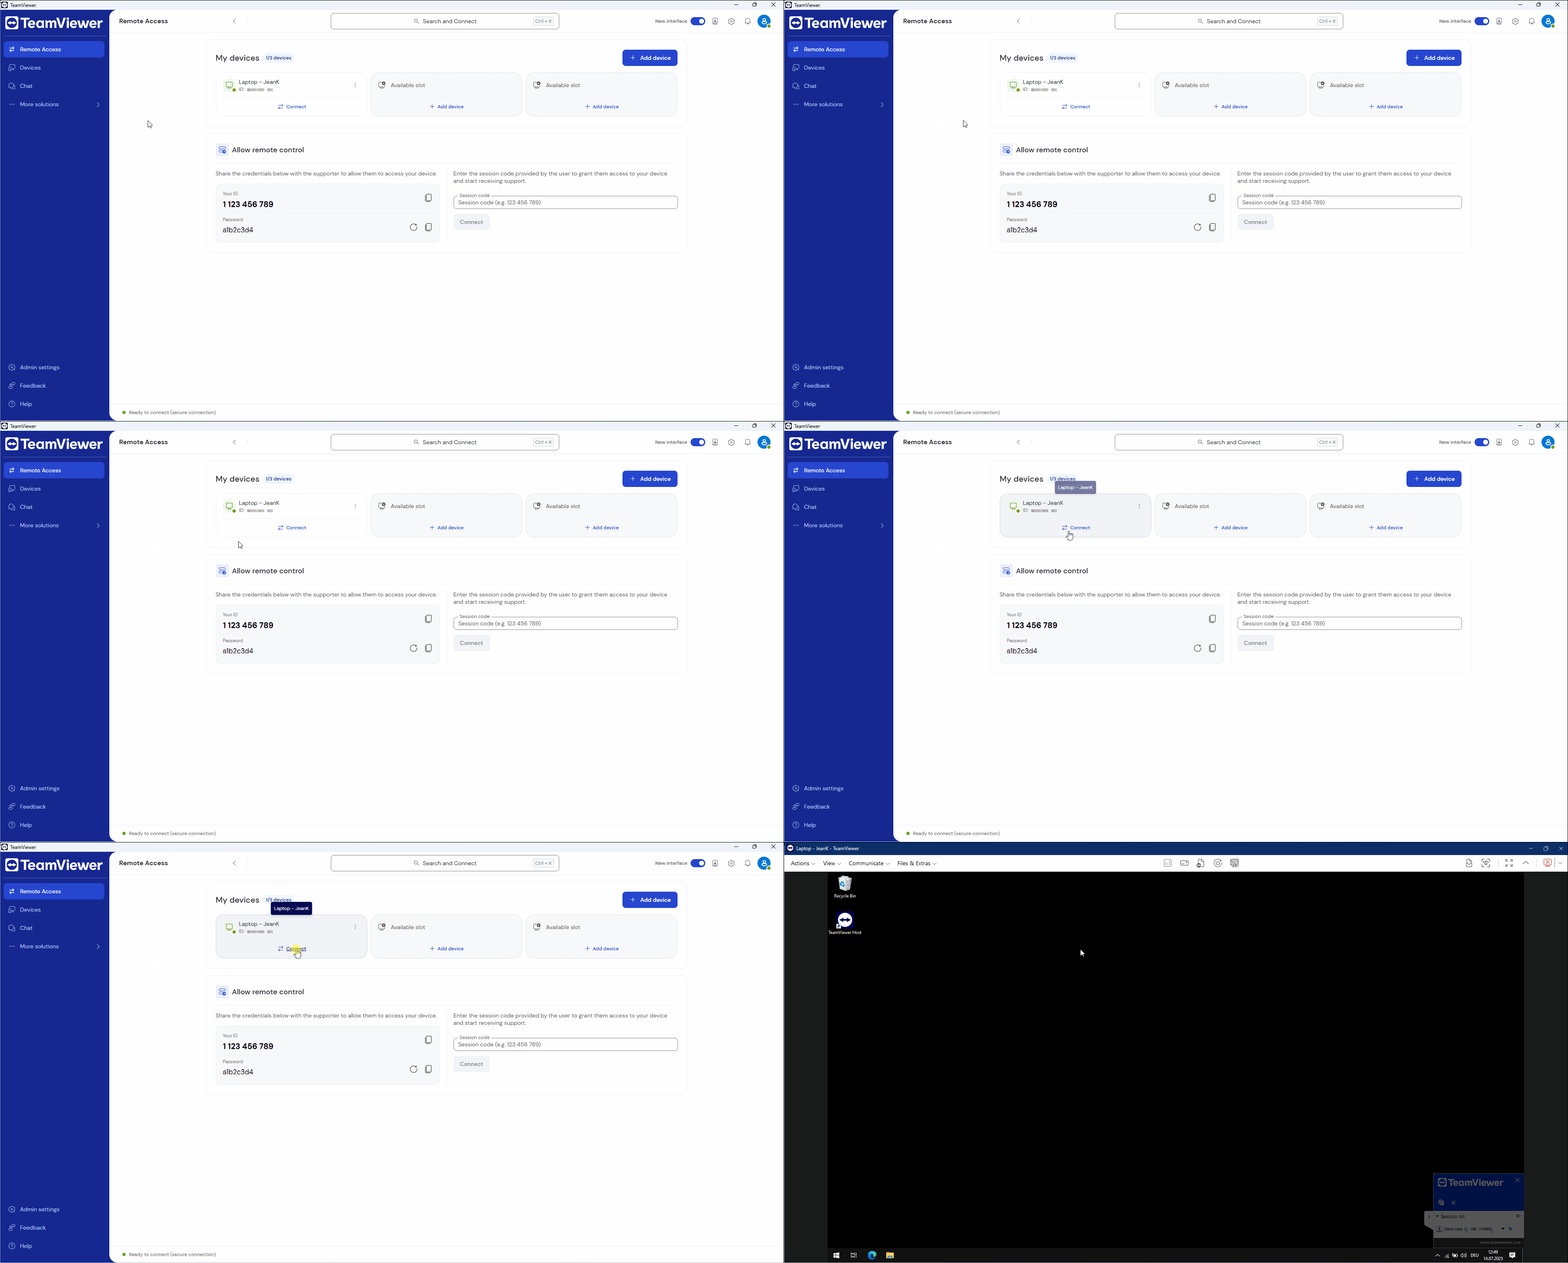
- On your local device, sign in to your TeamViewer account using the TeamViewer full client or via web.teamviewer.com.
- Go to Remote Access.
- Click the Connect button of the respective remote device you want to connect to.
You are now connected to your remote device.
Hint: You can also connect to your remote device from the Devices menu.