
Knowledge Base
Use Teamviewer Printing
Last Modified 27 июл. 2026 г.
Using TeamViewer Printing, you can print documents from remote devices directly on a locally accessible printer. This allows you to print documents from remote devices on your printer without transferring files.
From the remote device, you can access the same printers (including network printers) as you would on your local device.
Remote Printing is available for Windows and macOS. Remote Printing in color is also possible.
This article applies to customers using TeamViewer Remote on Windows and macOS with a Remote Access, Business, Premium, Corporate, Tensor, or TeamViewer ONE license.
Step 1: Install the TeamViewer printer driver on the local device
The first step to setting up remote printing is to install the printer driver on your local device. For Windows and macOS devices, follow the steps below:
- Open and sign in with your account on TeamViewer Remote.
- Click the profile picture and select Edit profile.
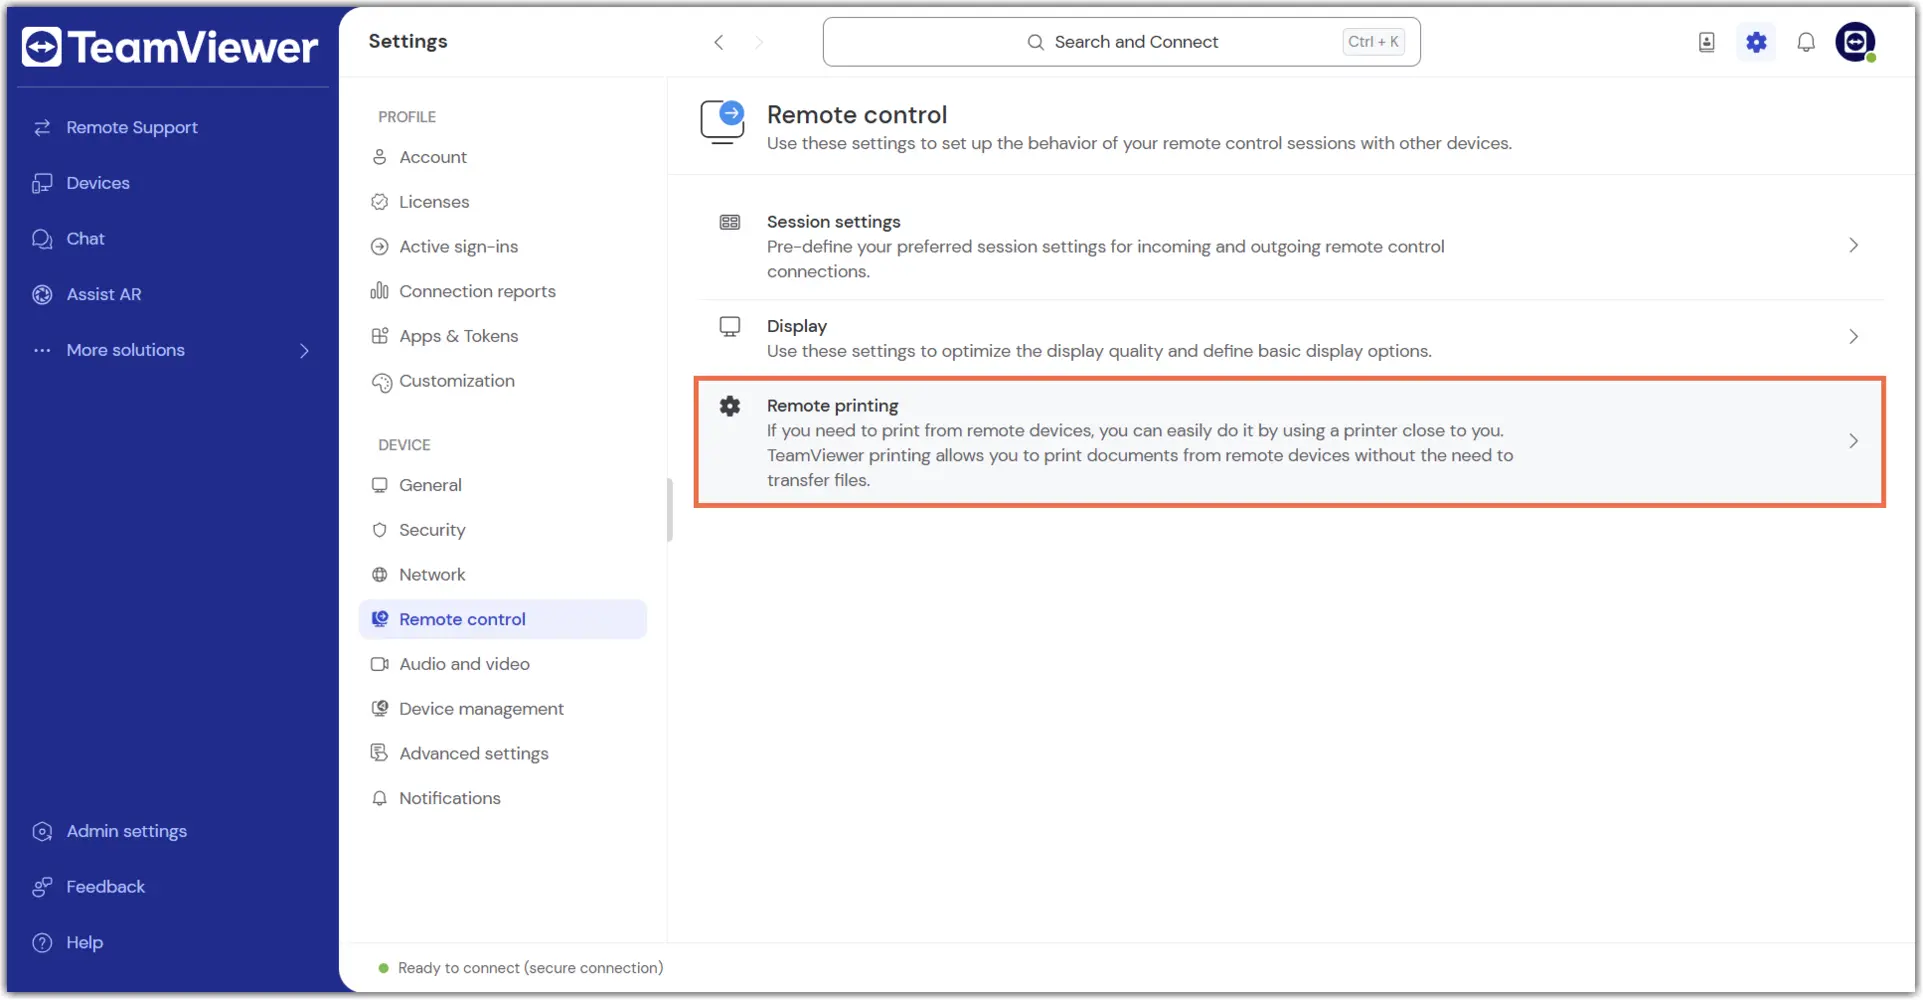
- On the Settings menu, go to Remote control.
Hint: If the Settings menu is collapsed, click on the side panel to expand it. - Click Remote printing.
5. On the TeamViewer printer driver, click Install.
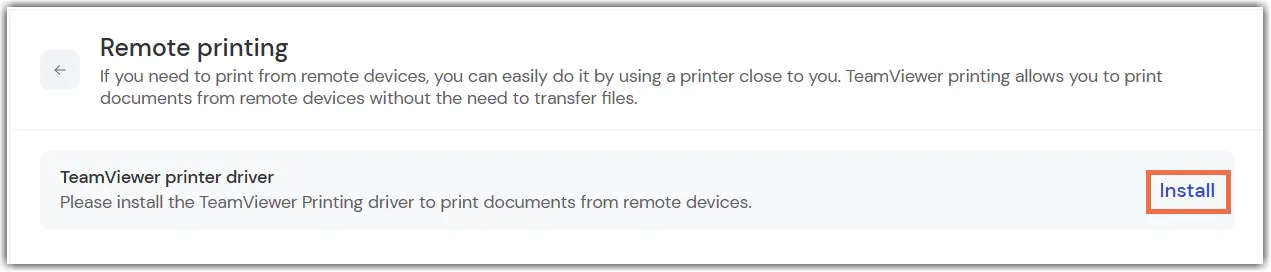
The printer drive is now successfully installed.
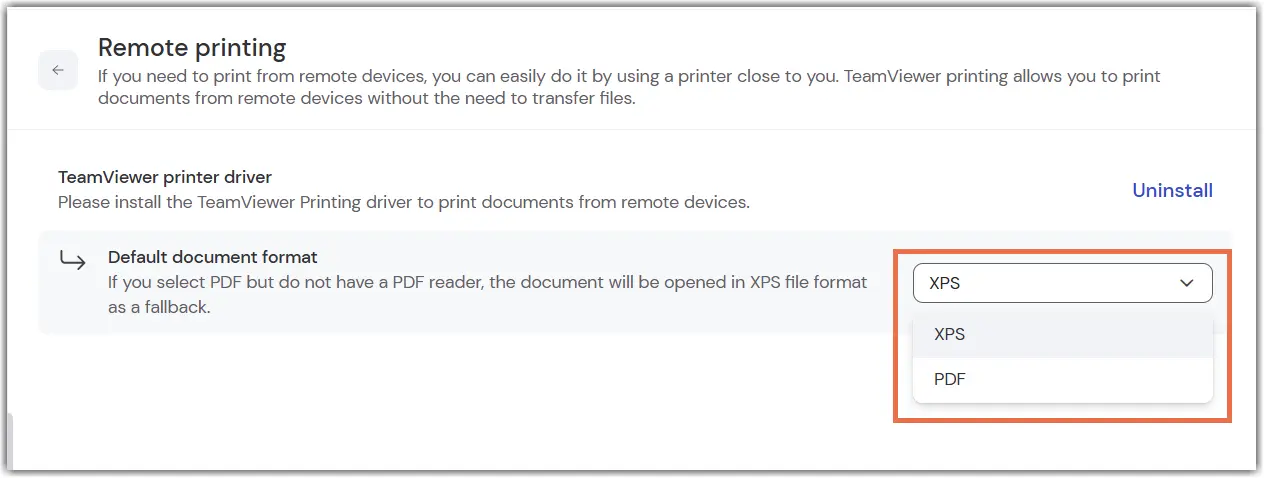
Note: The native format on Windows is XPS. However, with the Windows 10 April 2018 Update, Microsoft has made the XPS-Viewer an optional feature. Therefore, you can select the format (PDF or XPS) for opening documents in the Settings. By default, XPS is selected. If you selected PDF but do not have a PDF reader, the document will be opened as XPS as a fallback.
When installing the printer driver, TeamViewer selects the default printer and calls it TeamViewer – [username (ID number)]. This improves general usability during the remote printing process.
Step 2: Install the TeamViewer printer driver on the remote side
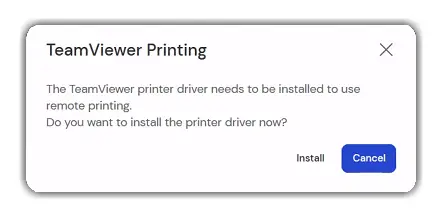
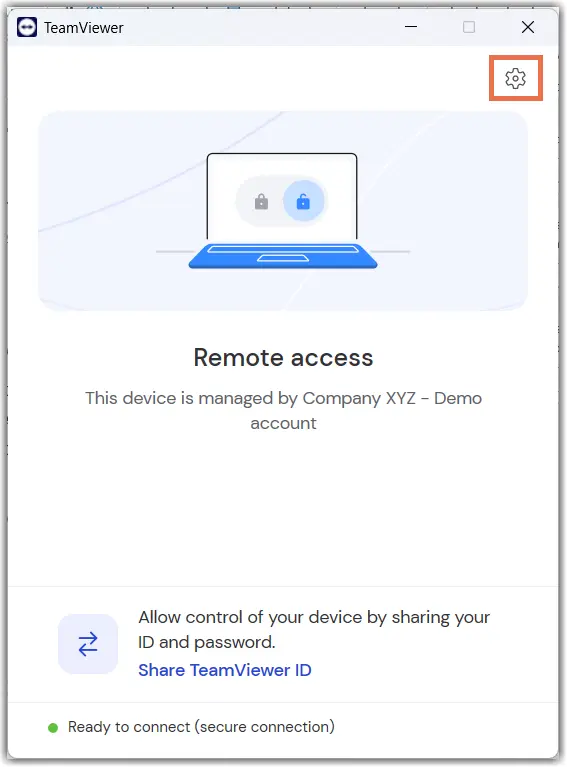
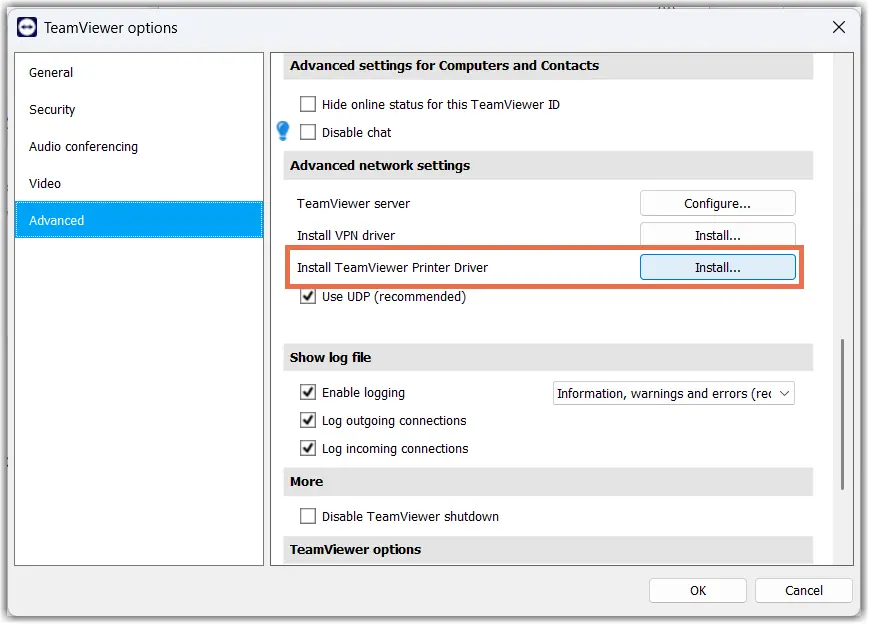
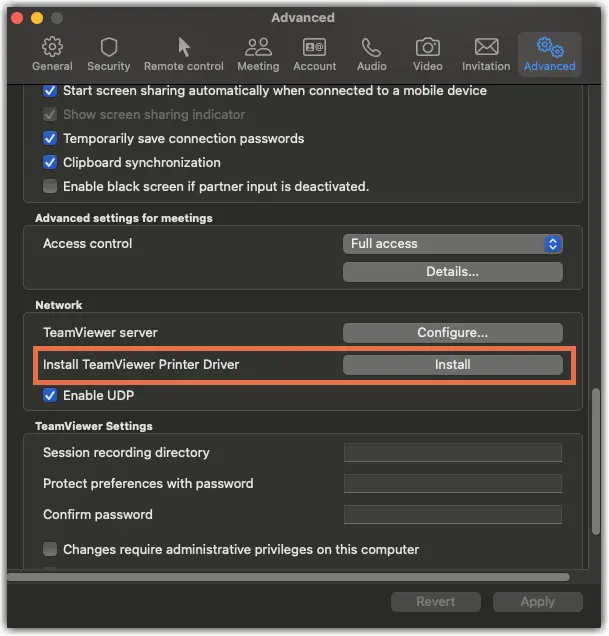
It’s possible to install the printer driver via the remote session toolbar or via the device Settings. If the printer driver is already installed, move forward to Step 3.
Step 3: Activating remote printing within a session
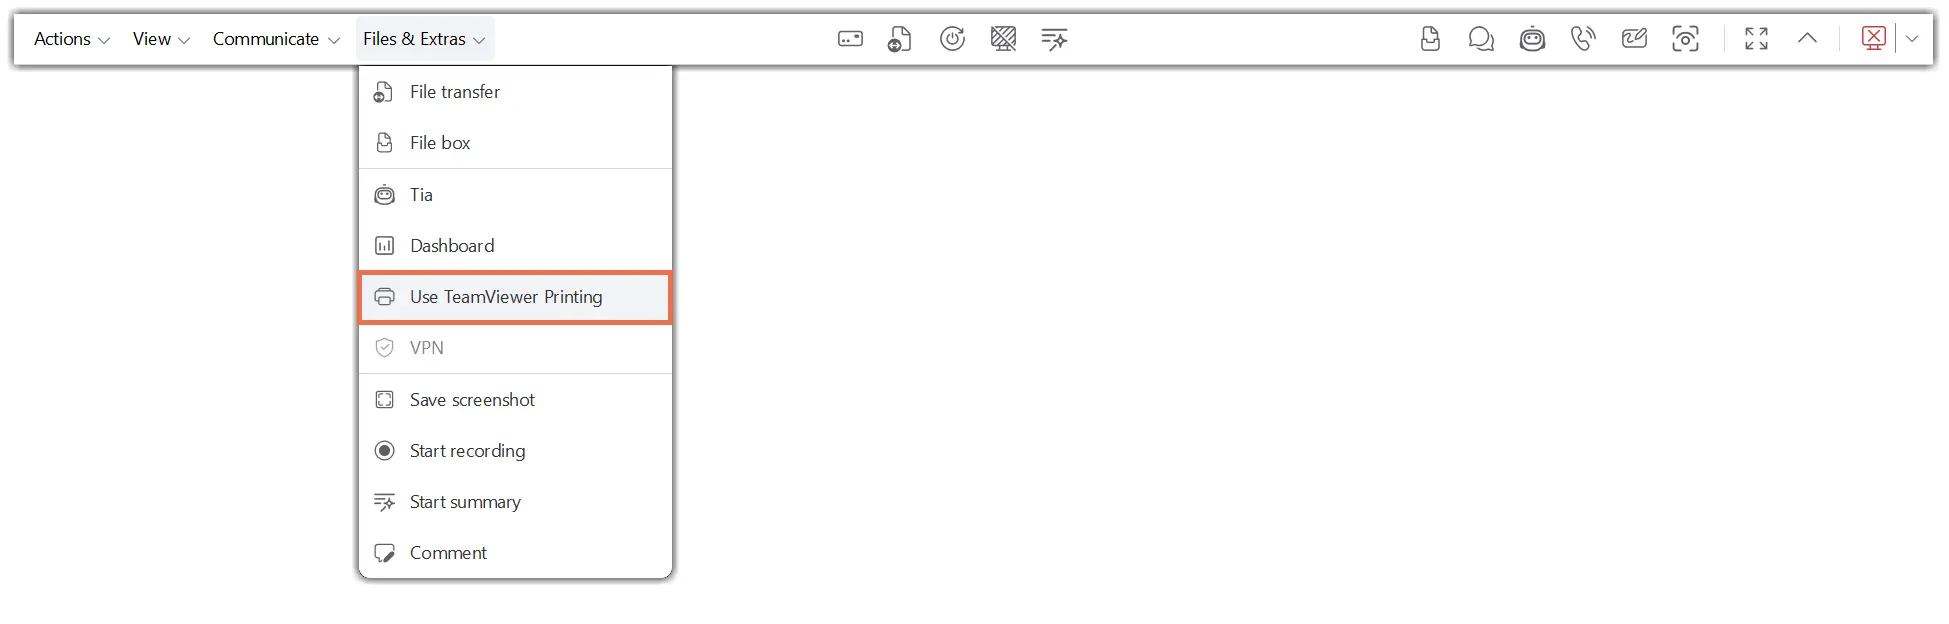
Once the drivers have been installed, you can activate remote printing in the session toolbar:

Additional troubleshooting
If you’re running into issues with remote printing, we’ve put together a dedicated troubleshooting guide that walks you through the most common causes and fixes step by step. Check out the article: Troubleshoot remote printing
Important notes:
- If Windows 10 Version 1903 or 1909 is installed on the remote computer:
- TeamViewer (Classic) Version 14.7 or higher: Printing documents on macOS is possible with an installed XPS viewer on the local computer. Please follow the instructions below on how to use an XPS viewer
- Any TeamViewer (Classic) version below 14.7: TeamViewer Printing does not currently work due to OS changes in Windows. This is fixed for higher Windows versions starting with build 2004.
- If Windows 10 Version 2004 (or higher) is installed on the remote computer:
- TeamViewer (Classic) Version 15.5 or higher: Everything works as before once the printer driver is installed. Due to a fix by Microsoft, direct printing in connections from macOS to Windows was re-enabled.