The Picking Orders tab shows a Frontline Worker's Task List in Pick.
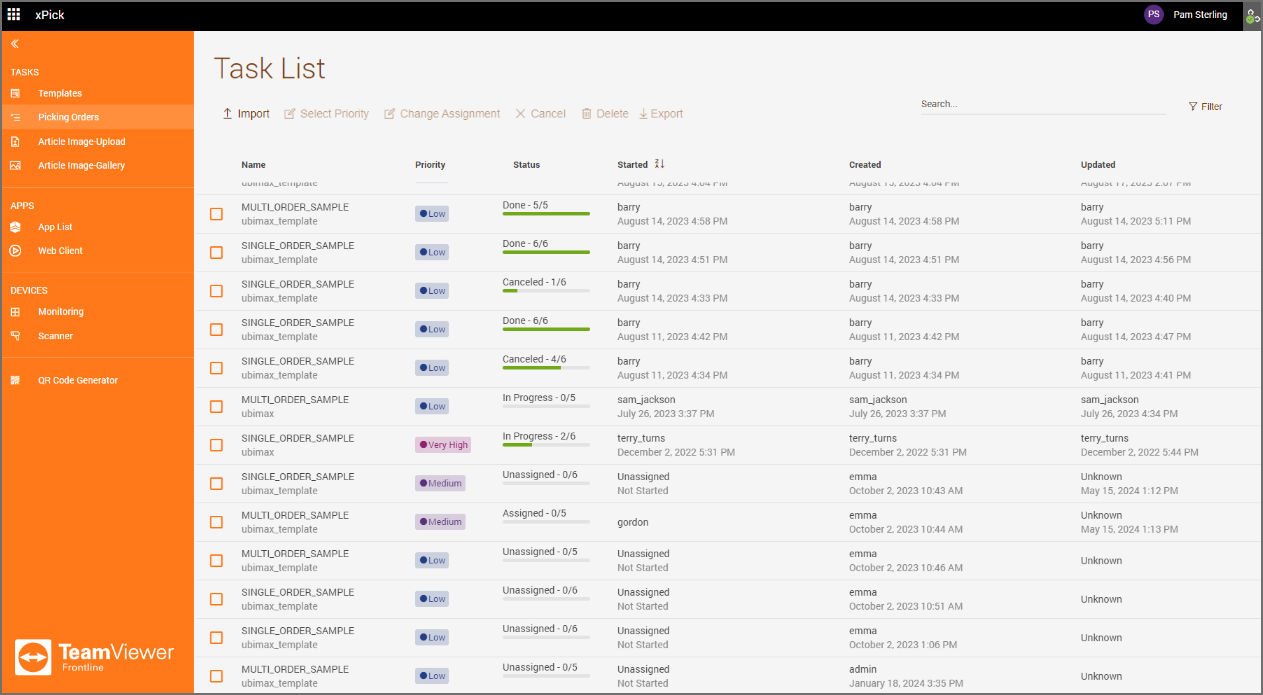
- Name: Shows the task ID.
- Priority: Shows priority of the task (from "Very High" to "Very Low").
- Status: Shows the status of the task ("Unassigned", "Cancelled", or "Done") and the number of completed picks.
- Started: Shows the name of the current picker and when they started the task.
- Created: Shows the name of the user who assigned the task.
- Updated: Shows the name of the user who last updated the task and when.
To view additional details of a particular task, double-click on it.
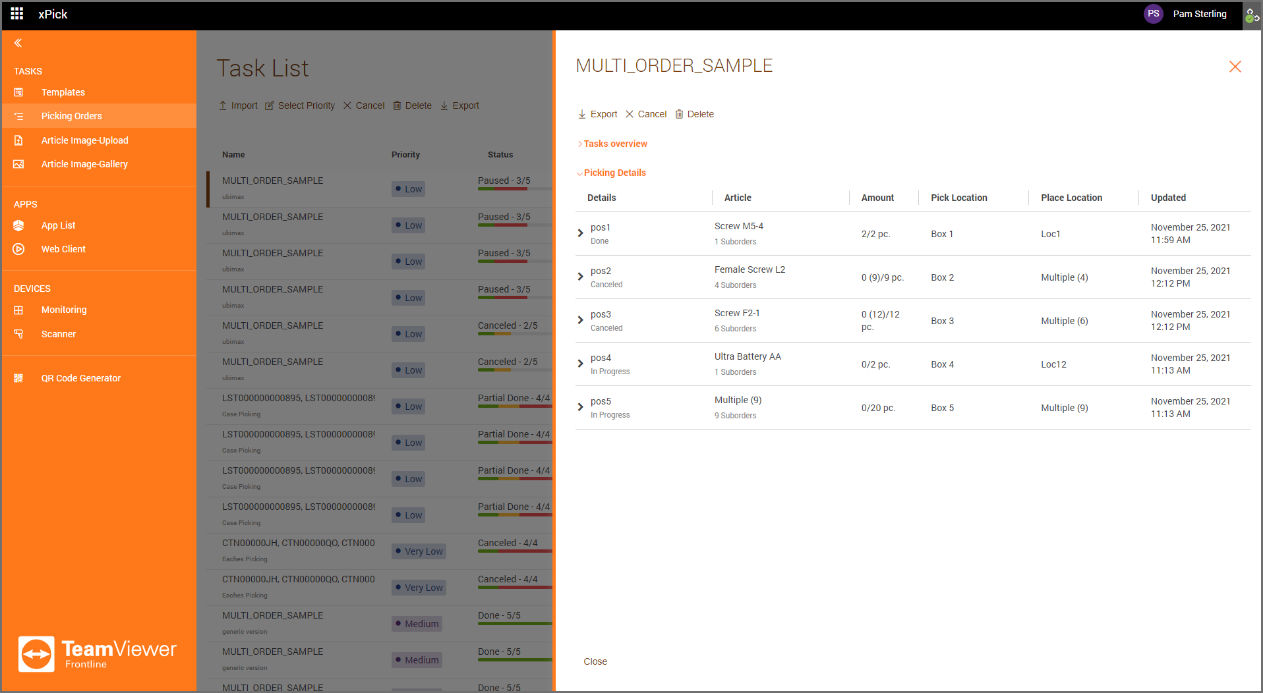
- Details: Shows the pick number.
- Article: Shows the name of the item that needs to be picked.
- Amount: Shows the item's amount to be picked.
- Pick Location: Shows the location from which the item needs to be picked.
- Place Location: Shows the location to which the item needs to be taken.
- Updated: Shows the name of the user who last updated the task and when.
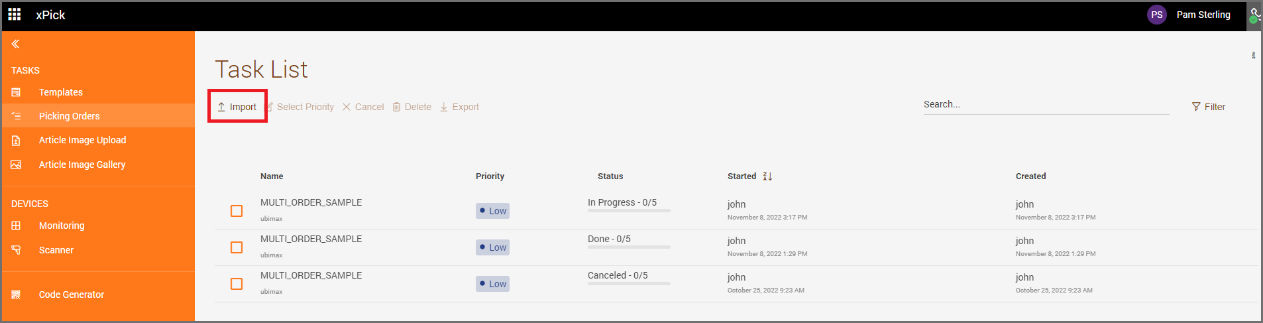
Importing a pick order
1. Select Import on the Task List page.
2. Click on Import Files and select the picking order Excel file on your local disk (or simply use drag-and-drop).
3. Click on Import.
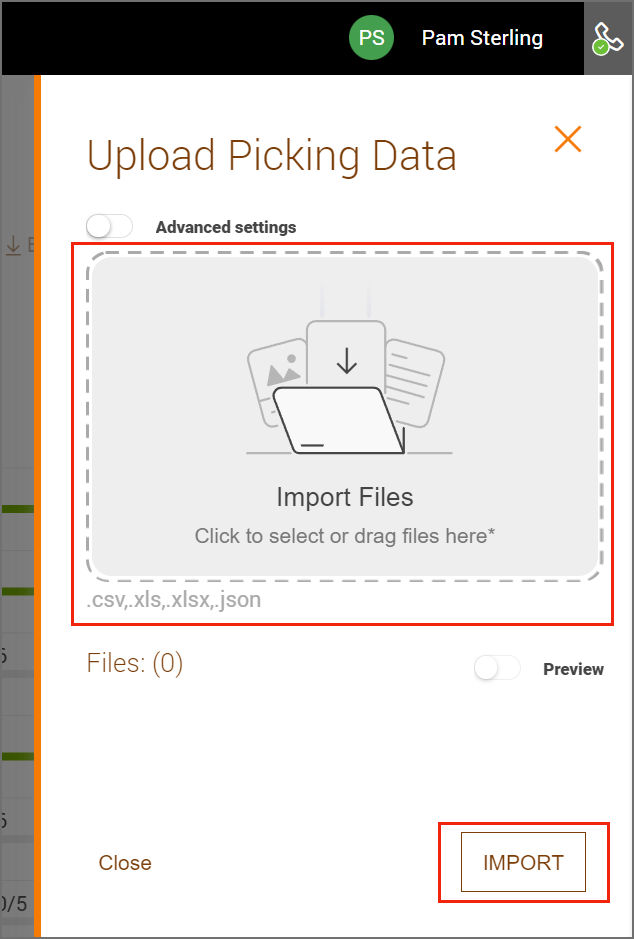
Advanced Settings
Users can define their own table schema for the imported data with the Advanced settings toggle. It is possible to add multiple templates and edit them.
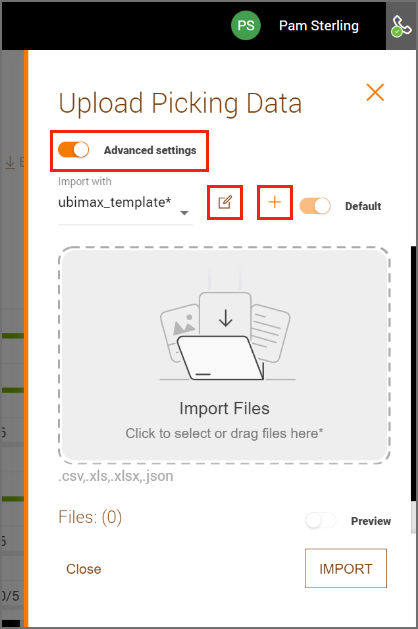
To add a new template:
- Select Import on the Task List page.
- Switch the Advanced settings toggle option.
- Click on the Plus button.
- From the opened panel, you can manually configure, load from config file, or load metadata.

5. Assign a name for the template.
6. Click on Save.
You can see the created templates from the import with dropdown and edit them with the Edit icon right next to it.