Dieser Artikel richtet sich an alle TeamViewer Meeting Nutzer.
TeamViewer Meeting bietet eine Reihe von Einstellungsoptionen, mit deren Hilfe Sie TeamViewer Meeting nach Ihren individuellen Präferenzen oder Anforderungen anpassen können.
📌Hinweis: Einige der hier beschriebenen Einstellungen gelten speziell für Microsoft® Windows. Sie sind nicht auf anderen Plattformen verfügbar.
Zum Dialogfenster TeamViewer Meeting Optionen wechseln
Klicken Sie in der Navigationsleiste auf ⚙️Einstellungen und anschließend auf Optionen
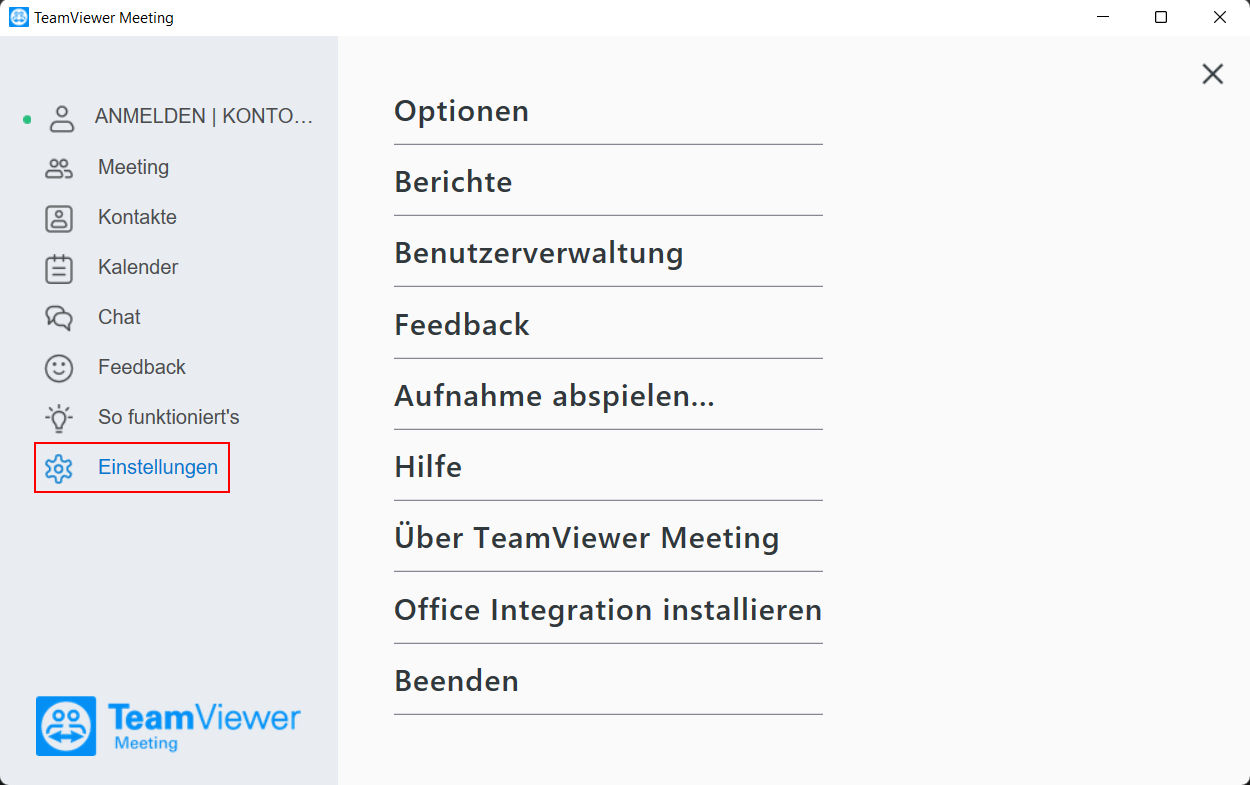
💡 Tipp: Falls Sie angemeldet sind, können Sie auch durch Klicken auf das Stiftsymbol oben rechts im Tab Benutzerprofil zu den Optionen wechseln.
Profil
Im Tab Profil können Sie Ihre Kontoeinstellungen ändern:

Meeting
Im Meeting-Tab können Sie die allgemeinen Einstellungen für Meetings ändern:
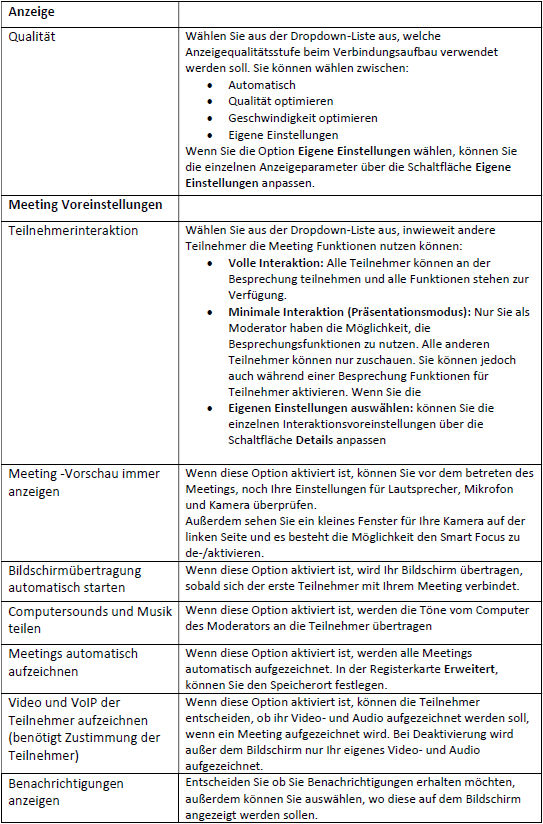
📌Hinweis: Beachten Sie die gesetzlichen Bestimmungen, die für die Aufzeichnung von Kommunikationsverbindungen gelten!
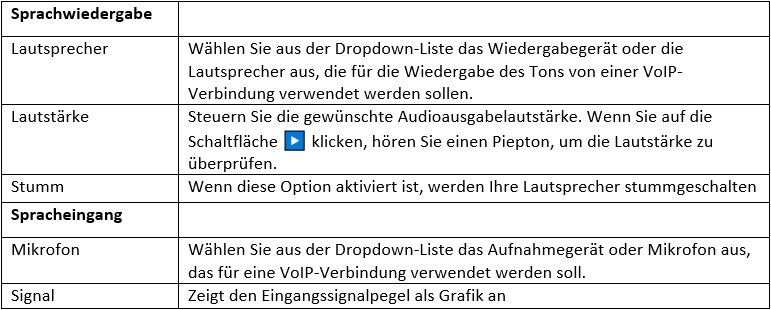
Audiokonferenz
Im Tab Audiokonferenz können Sie die Einstellungen für Audioverbindungen anpassen:
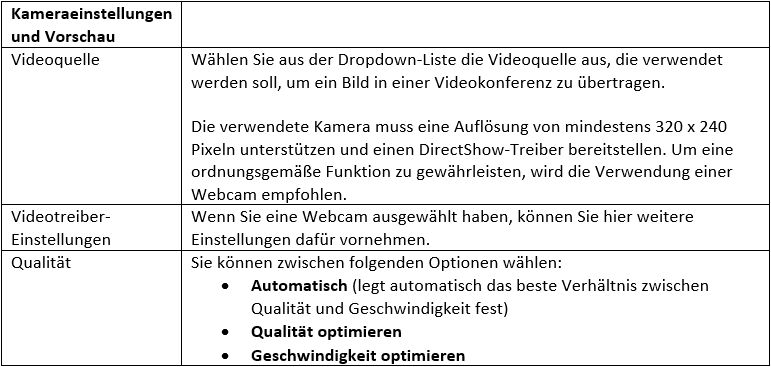
Video
Im Video-Tab können Sie die Einstellungen für Videoverbindungen anpassen:
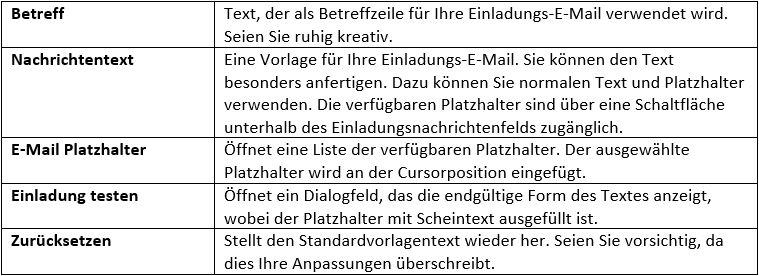
Individuelle Einladungen
Im Tab Individuelle Einladungen können Sie Ihre eigene Vorlage für die „Partner einladen“-E-Mail erstellen:
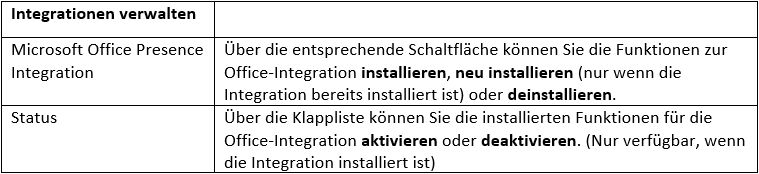
Integrationen
Im Integrationen-Tab können Sie die Verwendung der Microsoft Office-Integration verwalten:
Kontakte verwalten
Im Tab Kontakte verwalten können Sie die Einstellungen für den Zugriff auf die Outlook-Daten anpassen:

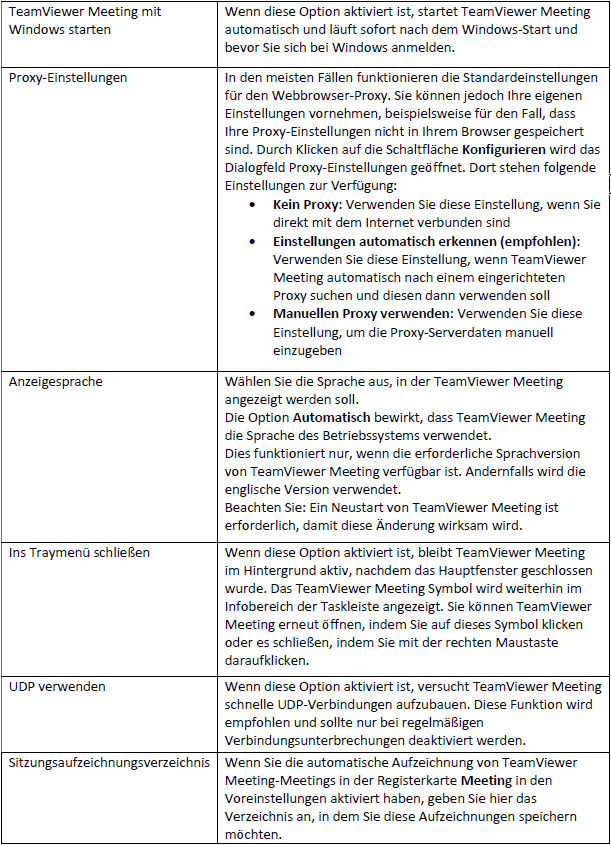
Erweitert
Im Tab Erweitert können Sie weitere Einstellungen ändern, die sich auf das Verhalten von TeamViewer Meeting auswirken.
🚨 Vorsicht: Änderungen der erweiterten Einstellungen können dazu führen, dass TeamViewer Meeting nicht mehr ordnungsgemäß funktioniert. Bitte lesen Sie das TeamViewer Meeting Handbuch, bevor Sie Änderungen vornehmen!
Die folgenden Einstellungen sind verfügbar: