La función de la Pizarra te permite dibujar o escribir en la pantalla durante reuniones de TeamViewer (Classic) o en sesiones de control remoto.
Este artículo va dirigido a tod@s l@s usuari@s de TeamViewer con licencias Business, Premium, Corporate, or Tensor plan.
Activar la pizarra
Durante una sesión de control remoto
Para encender la Pizarra durante una sesión de Control Remoto:
- Haz clic en Comunicar.
- En la sección Pizarra, haz clic en Añadir notas..

Uso de la pizarra
Al activar la pizarra, aparecerá una barra de herramientas adicional que te proporcionará herramientas para dibujar tanto en el lado remoto como en la pantalla del presentador. Ambas partes visualizarán la barra de herramientas adicional y podrán comenzar a dibujar.
Están disponibles las siguientes herramientas:
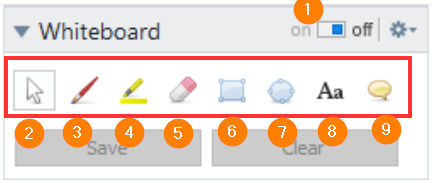
Si cambias el botón a la posición off, los participantes ya no podrán dibujar en la pantalla.
Sugerencia: Para salir de una función específica de la pizarra, simplemente haz un clic en el botón derecho del ratón.
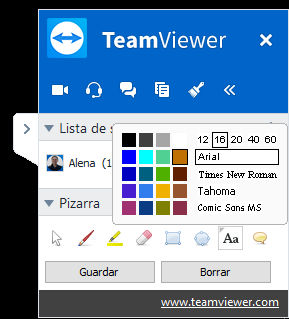
Para cambiar colores, fuentes y demás, haz clic en el botón derecho del ratón sobre la opción que desees modificar.
Guardar los dibujos
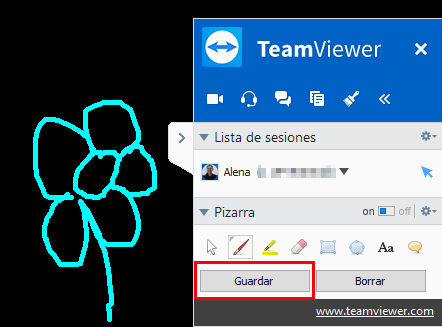
Puedes guardar tus dibujos de manera sencilla haciendo clic en Guardar. Puedes elegir la ubicación y el formato de la captura de pantalla, incluyendo los dibujos, en el cuadro de diálogo emergente.
📌Nota:
- Sólo la persona que recibe la sesión de control remoto puede guardar o borrar los dibujos de una sesión de control remoto.
- El panel de TeamViewer con su información de Control Remoto no se mostrará en la captura de pantalla. El panel aparecerá en gris..
Borrar los dibujos
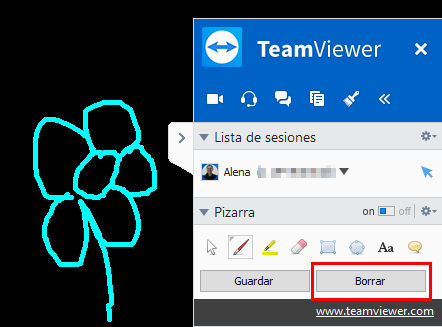
Puedes eliminar fácilmente parte de tus dibujos utilizando el borrador de la barra de herramientas adicional. Si deseas limpiar la pantalla completamente, haz clic en Borrar.
📌Nota: En una sesión de TeamViewer únicamente el que reciba el control remoto podrá guardar o eliminar dibujos